General Introduction
Overview
Teaching: 15 min
Exercises: 0 minQuestions
How is this course going to work?
Objectives
Be comfortable in the course
Structure of the course
This course is organized to be taught on a single day. The schedule is rather flexible to adapt best to your pace.
As much as possible this course is designed to be a hands-on experience with as many practical exercises as possible.
Presentations
Ice breaker
Tell us your name
Tell us the name of your group (Theory in Biodiversity, Biodiversity Conservation, etc.)
Define your research using a single word (e.g., “legumes”)
Learning Goals
- Being able to navigate through your computer in the Terminal
- Setup a project with git and save its history
- Synchronize the local project with GitHub and manage conflicts
- Be able to use git from RStudio
- Synchronize your code with the EVE High Performing Computer cluster
- Explore code on GitHub with your history
- Be able to generate a DOI from Zenedo with a GitHub repository
The way we’ll teach
- Two teachers alternating
- Live-coding as much as possible (show how code works)
- Do take notes if you want to
- Everything (material & exercises) will be provided at the end of the workshop
- Questions anytime
- First time running this course, so be understanding :)
Schedule
Please refer to the home page
Key Points
The course material will be provided through a website and with corresponding PDF.
Beginning with the Terminal
Overview
Teaching: 15 min
Exercises: 0 minQuestions
How do I navigate in command line?
Objectives
Discover the terminal
Use simple commands to navigate your computer in command line
What is the Terminal?
The shell is a program on your computer whose job is to run other programs. Pseudo-synonyms are “terminal”, “command line”, and “console”. There’s a whole StackExchange thread on the differences (What is the difference between Terminal, Console, Shell, and Command Line?), but I don’t find it to be terribly enlightening. Your mileage may vary.
– Jenny Bryan in Happy Git with R
The terminal is a command-line program that let you run other programs.
Why would people use command-line rather than Graphical User Interface? Well one answer is that are more stable that interface, and they tend to crash less (because they don’t have to deal with the graphical part!). Also some computers, like online servers or high performance clusters, are almost only accessible through command-line. So it may useful to familiarize yourself with the shell.
How can I use it?
If you’re on Mac or Linux you should have a program called “Terminal”, if you’re on Windows launch the “Git Bash” application.
Navigating into folders
Once you’ve launched it you’re going to see a black window with a blinking cursor. Welcome to the terminal!
We’re going to go through some basic commands to navigate on your computer.
Because you’re navigating into the files and folders of your computer,
it can be useful to know exactly where your are. For this use the pwd command
which is short for present working directory. It indicates precisely
where your are.
$ pwd
/c/Users/ke76dimu
Slashes / indicate nested folders. Here (on a Windows computer) it shows that
I am on the C:/ drive (shorthened in /c/ here) within the ke76dimu Which
is in the Users folder.
Whenever you get lost in the command-line, you can always use pwd to remind
yourself of where you are.
The list command ls lists the files and folders available in the
specified folder.
$ ls
 Contacts/
 Desktop/
 Documents/
 Downloads/
 Favorites/
 Pictures/
 R/
 Searches/
 Videos/
 Zotero/
All the names that finish with a slash / indicate a folder. Depending on
type of terminal you are using, the folders can also be represented in another
color like in blue.
You can look at what’s inside a folder by adding its names after the command:
$ ls Documents
144101.pdf                                  'My Music'@
'AMF_Unikurse_April 2022.pdf'               'My Videos'@
desktop.ini                                 projects/
R/                                          feature_extraction/
'WiSe 2021_22_AMF_Unikurse_filled.pdf'      Livres/
Zoom/                                       'Matthias Material'/
We can see a file 144101.pdf and many folders (like R/) note that folders
with spaces in their names are indicated with single quote ‘’
like 'Matthias Material'/.
You can re-check that your working directory hasn’t changed by reusing the pwd
command.
$ pwd
/c/Users/ke76dimu
Some files and folders may be special and are not shown by default.
To display them we use the -a option of the ls command:
$ ls -a
./
../
.atom/
.bash_history
.bash_profile
.bashrc
.gitconfig
.ssh/
.vim/
.viminfo
Contacts/
Desktop/
Documents/
Downloads/
Favorites/
Pictures/
R/
Searches/
Videos/
Zotero/
You can now see several files and folders that names begin with a dot .
like .bashrc and .vim/. We’re not going to detail their usefulness,
the important thing to remember is that ls -a gives you a bigger list of
files, including hidden files.
To change directory we use the change directory command cd.
Let’s say we want to into the Documents/ folder. We type the cd command
followed by the folder name.
$ cd Documents/
Recheck where we are with pwd
$ pwd
/c/Users/ke76dimu/Documents
File and Folder names autocompletion
It can become cumbersome to type entire folder names. That’s why most terminal software offer autocompletion of folder names based on typing the beginning of the name then typing the Tabulation (Tab) key on the keyboard (The one on the left of the top row of letters on your keyboard).
What about if you want to back in a folder that is the parent of your folder?
Let’s say we want to go back where we were instead of the Documents/ folder.
Well, you can use the special folder name .. which defines the
parent folder of the folder you’re in.
$ cd ..
/c/Users/ke76dimu/Documents
With the terminal we can also create folders with the
make dirirectory command mkdir.
$ mkdir gitintro
$ cd gitintro
$ pwd
/c/Users/ke76dimu/Documents/gitintro
We’re also going to use a command to create files easily.
touch is a command that let you create empty files to edit them afterwards.
$ touch terminal-101.txt
$ ls
terminal-101.txt
Recent commands
Use up and down arrows to navigate the latest commands you launched. You can see the last 1,000 commands passed to the terminal using
history. You can also start a reverse search pressingCtrl + R; start typing to see the latest relevant commands.
Key Points
Use
pwdto show in which folder you are.Use
lsto list the files of a folderUse
ls -ato show all files and foldersUse
cdto change the folderUse
cd ..to go back one folderUse
mkdirto create a folderUse
touchto create an empty file
Basics
Overview
Teaching: 10 min
Exercises: 0 minQuestions
What is version control?
Objectives
Understand the principles of version control software
We’ll start by exploring how version control can be used to keep track of what one person did and when. Even if you aren’t collaborating with other people, automated version control is much better than this situation:
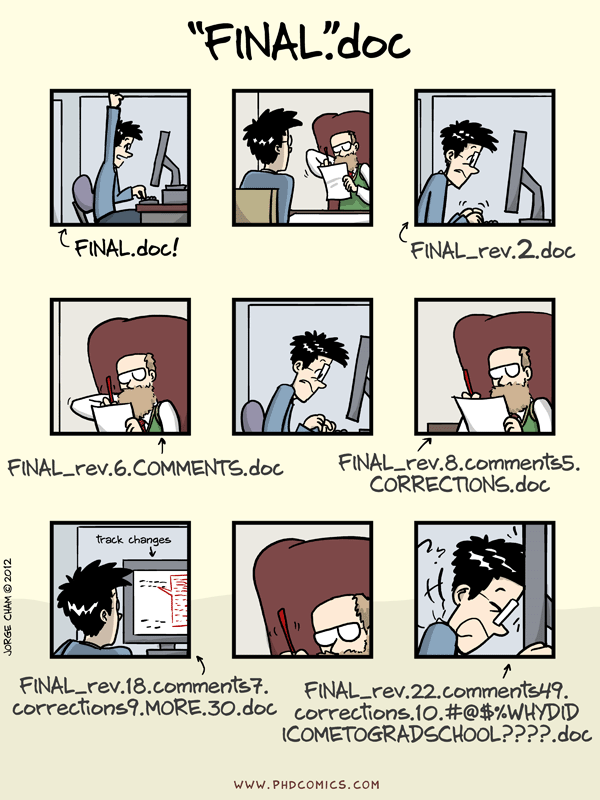
“Piled Higher and Deeper” by Jorge Cham, http://www.phdcomics.com
We’ve all been in this situation before: it seems unnecessary to have multiple nearly-identical versions of the same document. Some word processors let us deal with this a little better, such as Microsoft Word’s Track Changes, Google Docs’ version history, or LibreOffice’s Recording and Displaying Changes.
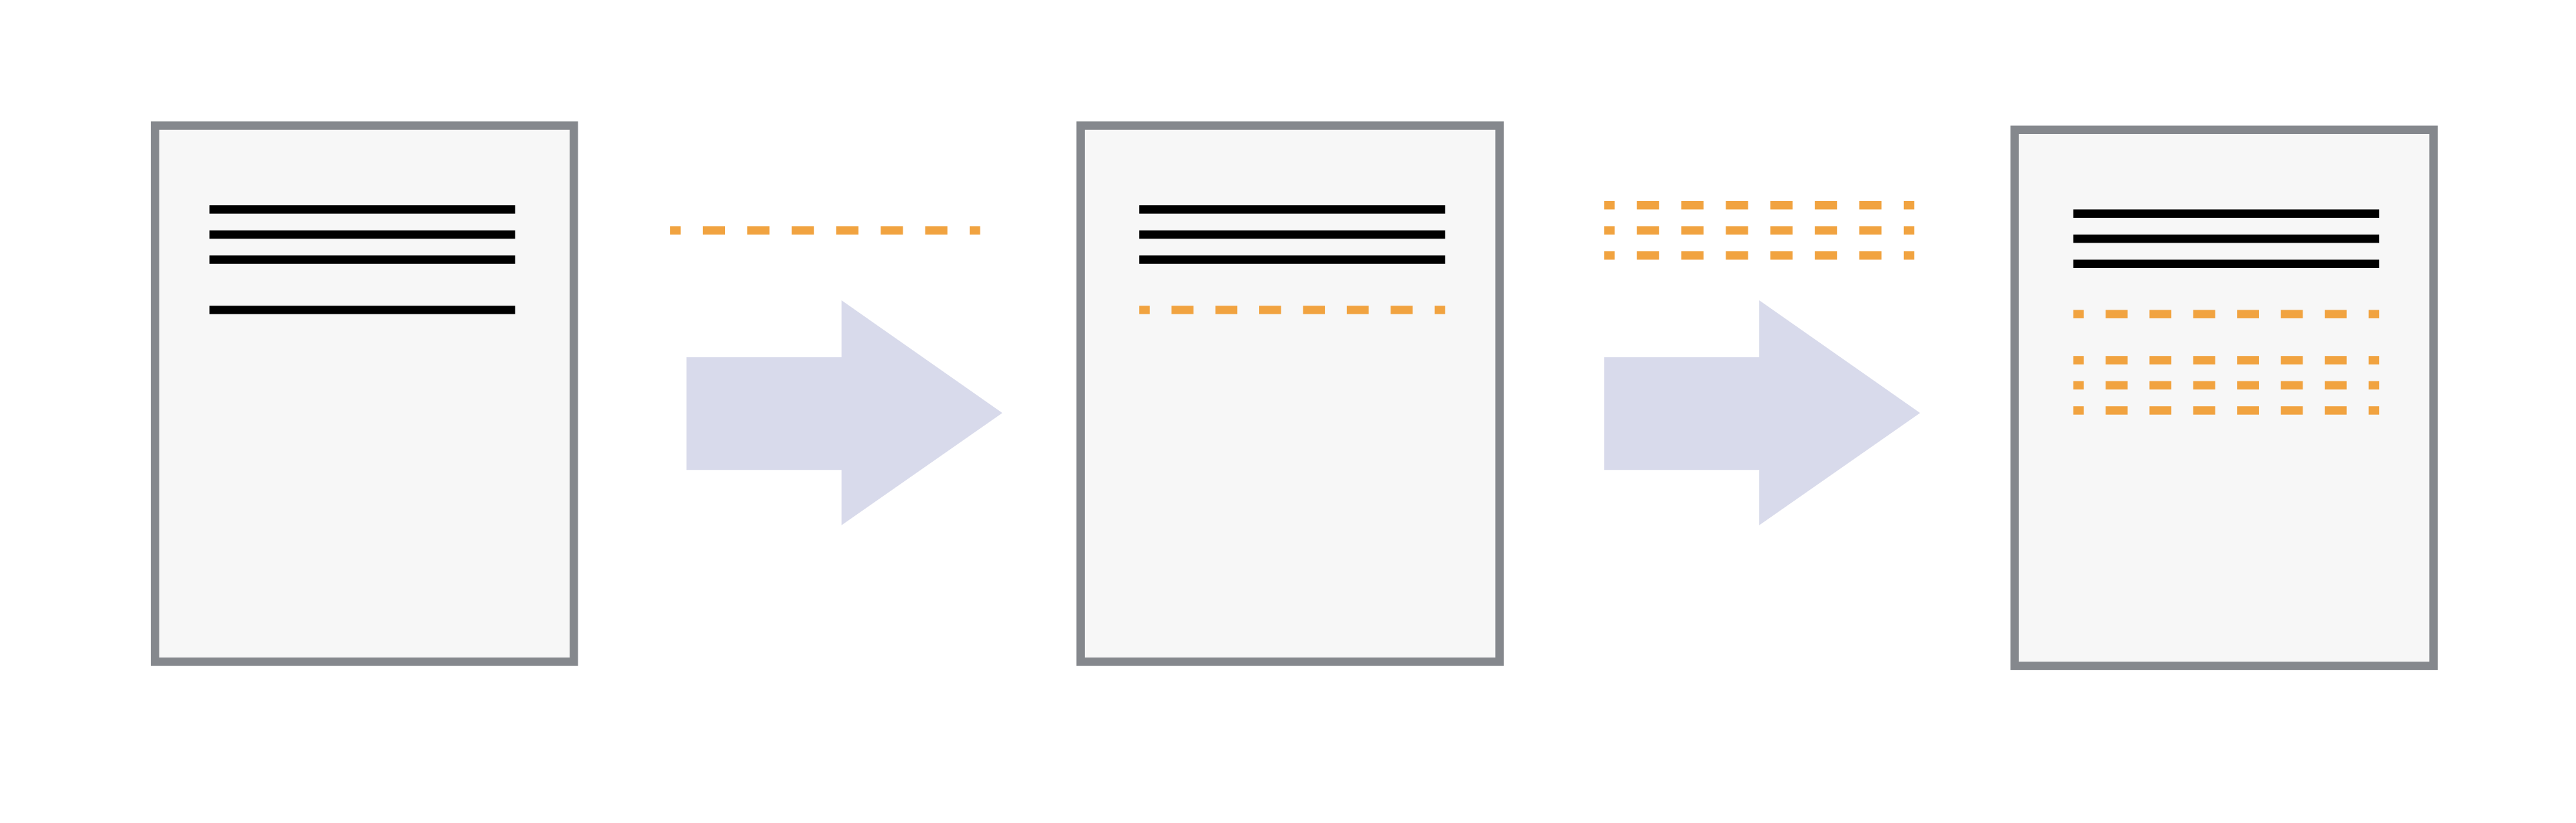
Version control systems start with a base version of the document and then record changes you make each step of the way. You can think of it as a recording of your progress: you can rewind to start at the base document and play back each change you made, eventually arriving at your more recent version.
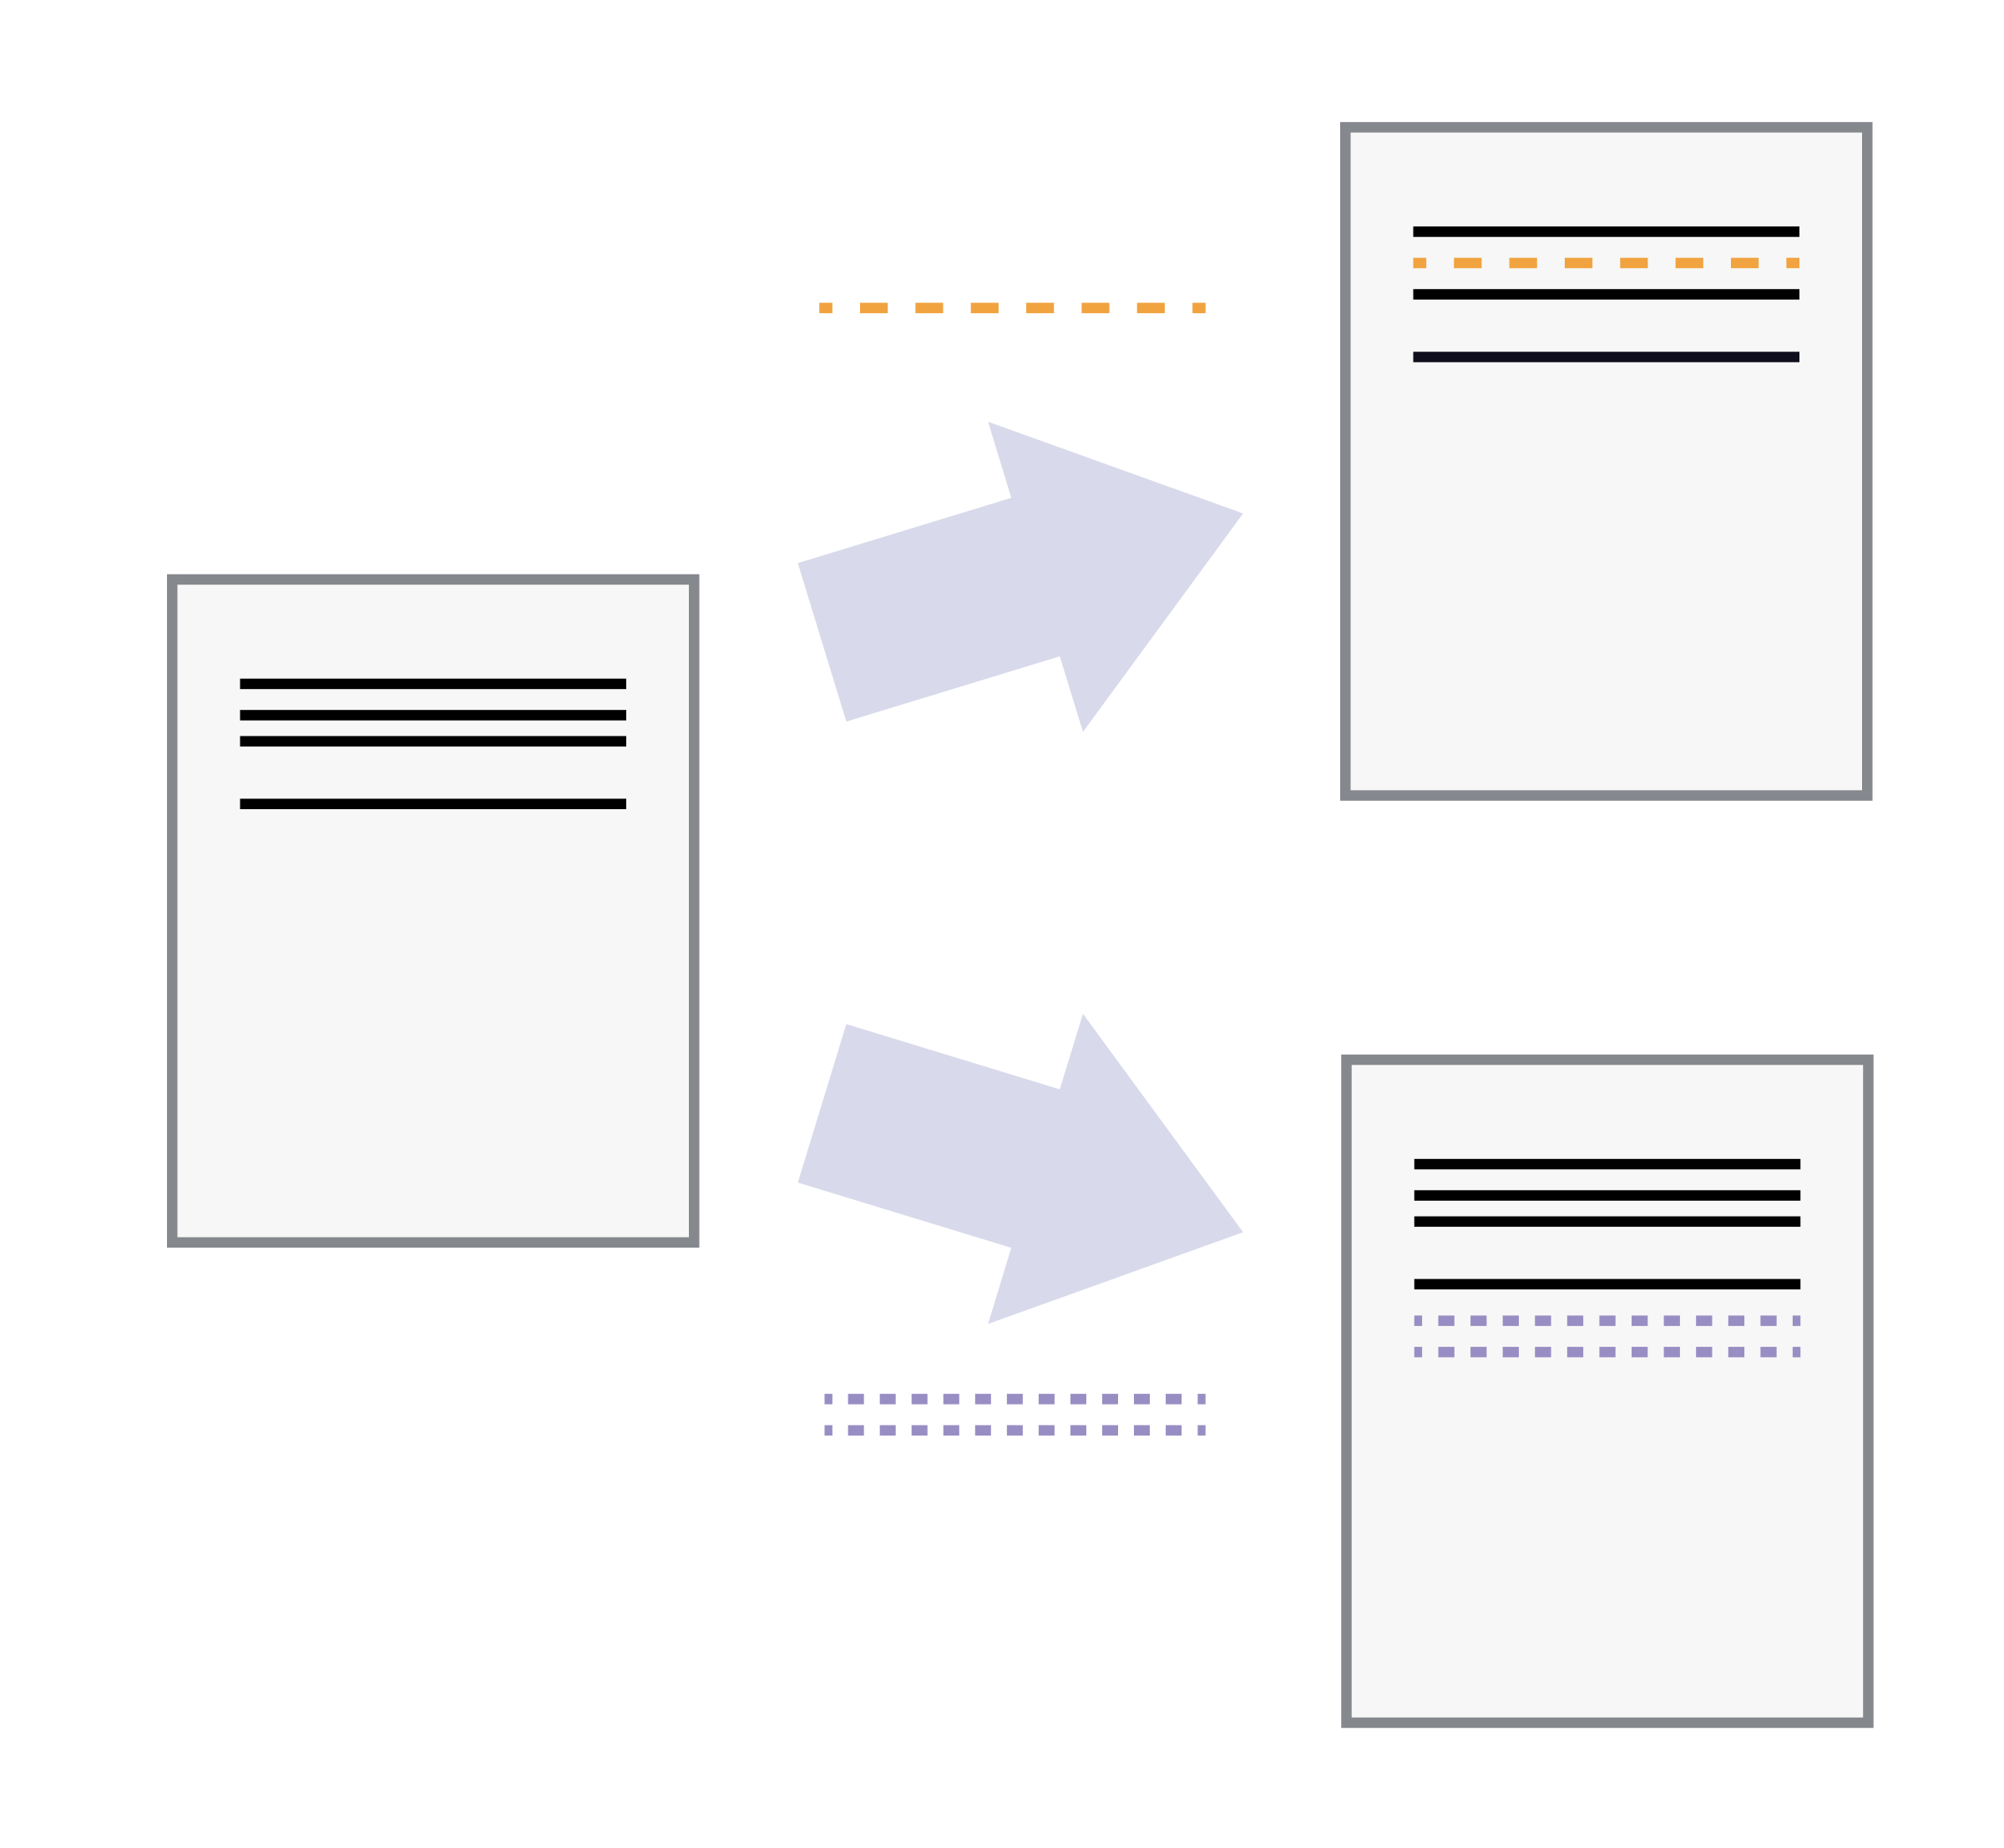
Once you think of changes as separate from the document itself, you can then think about “playing back” different sets of changes on the base document, ultimately resulting in different versions of that document. For example, two users can make independent sets of changes on the same document.
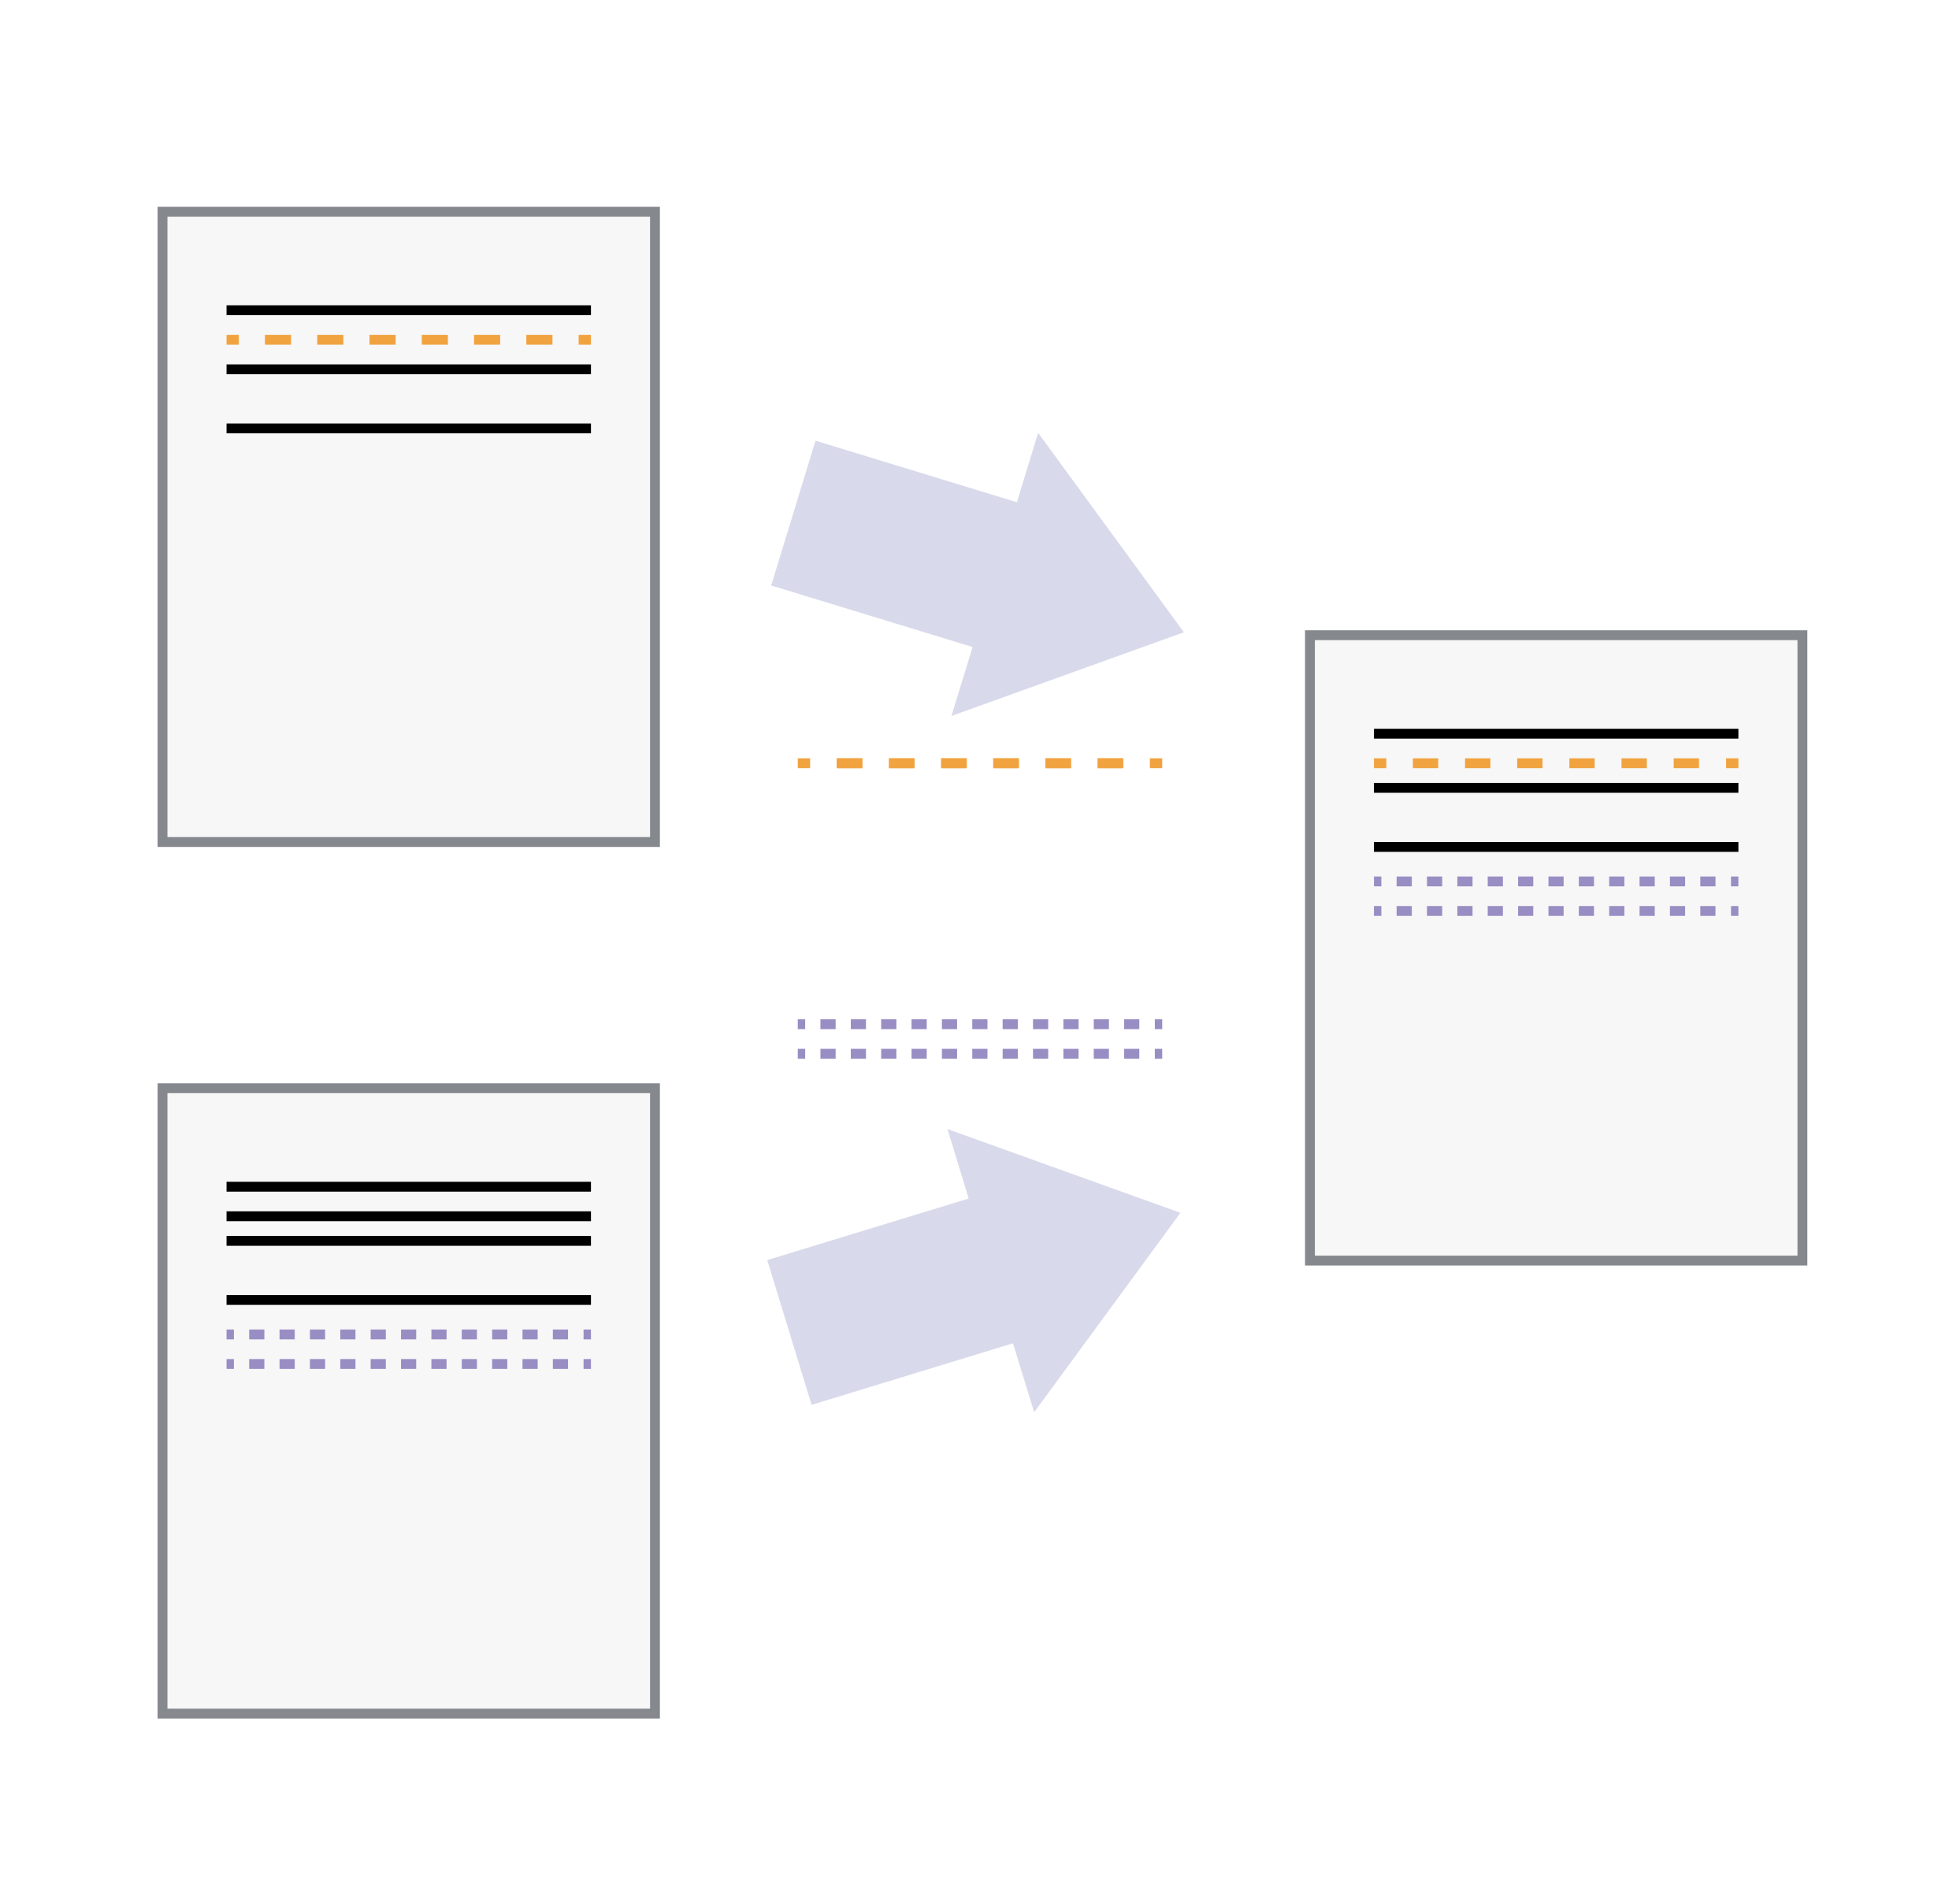
Unless multiple users make changes to the same section of the document - a conflict - you can incorporate two sets of changes into the same base document.
A version control system is a tool that keeps track of these changes for us, effectively creating different versions of our files. It allows us to decide which changes will be made to the next version (each record of these changes is called a commit), and keeps useful metadata about them. The complete history of commits for a particular project and their metadata make up a repository. Repositories can be kept in sync across different computers, facilitating collaboration among different people.
The Long History of Version Control Systems
Automated version control systems are nothing new. Tools like RCS, CVS, or Subversion have been around since the early 1980s and are used by many large companies. However, many of these are now considered legacy systems (i.e., outdated) due to various limitations in their capabilities. More modern systems, such as Git and Mercurial, are distributed, meaning that they do not need a centralized server to host the repository. These modern systems also include powerful merging tools that make it possible for multiple authors to work on the same files concurrently.
Key Points
Version control software let’s you track modifications in documents in a structured way
Setting Up Git
Overview
Teaching: 5 min
Exercises: 0 minQuestions
How do I get set up to use Git?
Objectives
Configure
gitthe first time it is used on a computer.Understand the meaning of the
--globalconfiguration flag.
When we use Git on a new computer for the first time, we need to configure a few things. Below are a few examples of configurations we will set as we get started with Git:
- our name and email address,
- what our preferred text editor is,
- and that we want to use these settings globally (i.e. for every project).
On a command line, Git commands are written as git verb options,
where verb is what we actually want to do and options is additional optional information which may be needed for the verb. So here is how
Dracula sets up his new laptop:
$ git config --global user.name "Vlad Dracula"
$ git config --global user.email "vlad@tran.sylvan.ia"
Please use your own name and email address instead of Dracula’s. This user name and email will be associated with your subsequent Git activity, which means that any changes pushed to GitHub, BitBucket, GitLab or another Git host server after this lesson will include this information.
For this lesson, we will be interacting with GitHub and so the email address used should be the same as the one used when setting up your GitHub account. If you are concerned about privacy, please review GitHub’s instructions for keeping your email address private.
Keeping your email private
If you elect to use a private email address with GitHub, then use that same email address for the
user.emailvalue, e.g.username@users.noreply.github.comreplacingusernamewith your GitHub one.
Line Endings
As with other keys, when you hit Enter or <- or on Macs, Return on your keyboard, your computer encodes this input as a character. Different operating systems use different character(s) to represent the end of a line. (You may also hear these referred to as newlines or line breaks.) Because Git uses these characters to compare files, it may cause unexpected issues when editing a file on different machines. Though it is beyond the scope of this lesson, you can read more about this issue in the Pro Git book.
You can change the way Git recognizes and encodes line endings using the
core.autocrlfcommand togit config. The following settings are recommended:On macOS and Linux:
$ git config --global core.autocrlf inputAnd on Windows:
$ git config --global core.autocrlf true
Dracula also has to set his favorite text editor, following this table:
| Editor | Configuration command |
|---|---|
| nano | $ git config --global core.editor "nano -w" |
| Notepad (Win) | $ git config --global core.editor "c:/Windows/System32/notepad.exe" |
| Vim | $ git config --global core.editor "vim" |
It is possible to reconfigure the text editor for Git whenever you want to change it.
Exiting Vim
Note that Vim is the default editor for many programs. If you haven’t used Vim before and wish to exit a session without saving your changes, press Esc then type
:q!and hit Enter or <- or on Macs, Return. If you want to save your changes and quit, press Esc then type:wqand hit Enter or <- or on Macs, Return.
Git (2.28+) allows configuration of the name of the branch created when you
initialize any new repository. Dracula decides to use that feature to set it to main so
it matches the cloud service he will eventually use.
$ git config --global init.defaultBranch main
Default Git branch naming
Source file changes are associated with a “branch.” For new learners in this lesson, it’s enough to know that branches exist, and this lesson uses one branch.
By default, Git will create a branch calledmasterwhen you create a new repository withgit init(as explained in the next Episode). This term evokes the racist practice of human slavery and the software development community has moved to adopt more inclusive language.In 2020, most Git code hosting services transitioned to using
mainas the default branch. As an example, any new repository that is opened in GitHub and GitLab default tomain. However, Git has not yet made the same change. As a result, local repositories must be manually configured have the same main branch name as most cloud services.For versions of Git prior to 2.28, the change can be made on an individual repository level. The command for this is in the next episode. Note that if this value is unset in your local Git configuration, the
init.defaultBranchvalue defaults tomaster.
The five commands we just ran above only need to be run once: the flag --global tells Git
to use the settings for every project, in your user account, on this computer.
You can check your settings at any time:
$ git config --list
You can change your configuration as many times as you want: use the same commands to choose another editor or update your email address.
Proxy
In some networks you need to use a proxy. If this is the case, you may also need to tell Git about the proxy:
$ git config --global http.proxy proxy-url
$ git config --global https.proxy proxy-url
To disable the proxy, use
$ git config --global --unset http.proxy
$ git config --global --unset https.proxy
Git Help and Manual
Always remember that if you forget the subcommands or options of a
gitcommand, you can access the relevant list of options typinggit <command> -hor access the corresponding Git manual by typinggit <command> --help, e.g.:$ git config -h $ git config --helpWhile viewing the manual, remember the
:is a prompt waiting for commands and you can press Q to exit the manual.More generally, you can get the list of available
gitcommands and further resources of the Git manual typing:$ git help
Key Points
Use
git configwith the--globaloption to configure a user name, email address, editor, and other preferences once per machine.
Creating a Repository
Overview
Teaching: 10 min
Exercises: 0 minQuestions
Where does Git store information?
Objectives
Create a local Git repository.
Describe the purpose of the
.gitdirectory.
Once Git is configured, we can start using it.
We will continue with the story of Wolfman and Dracula who are investigating if it is possible to send a planetary lander to Mars.
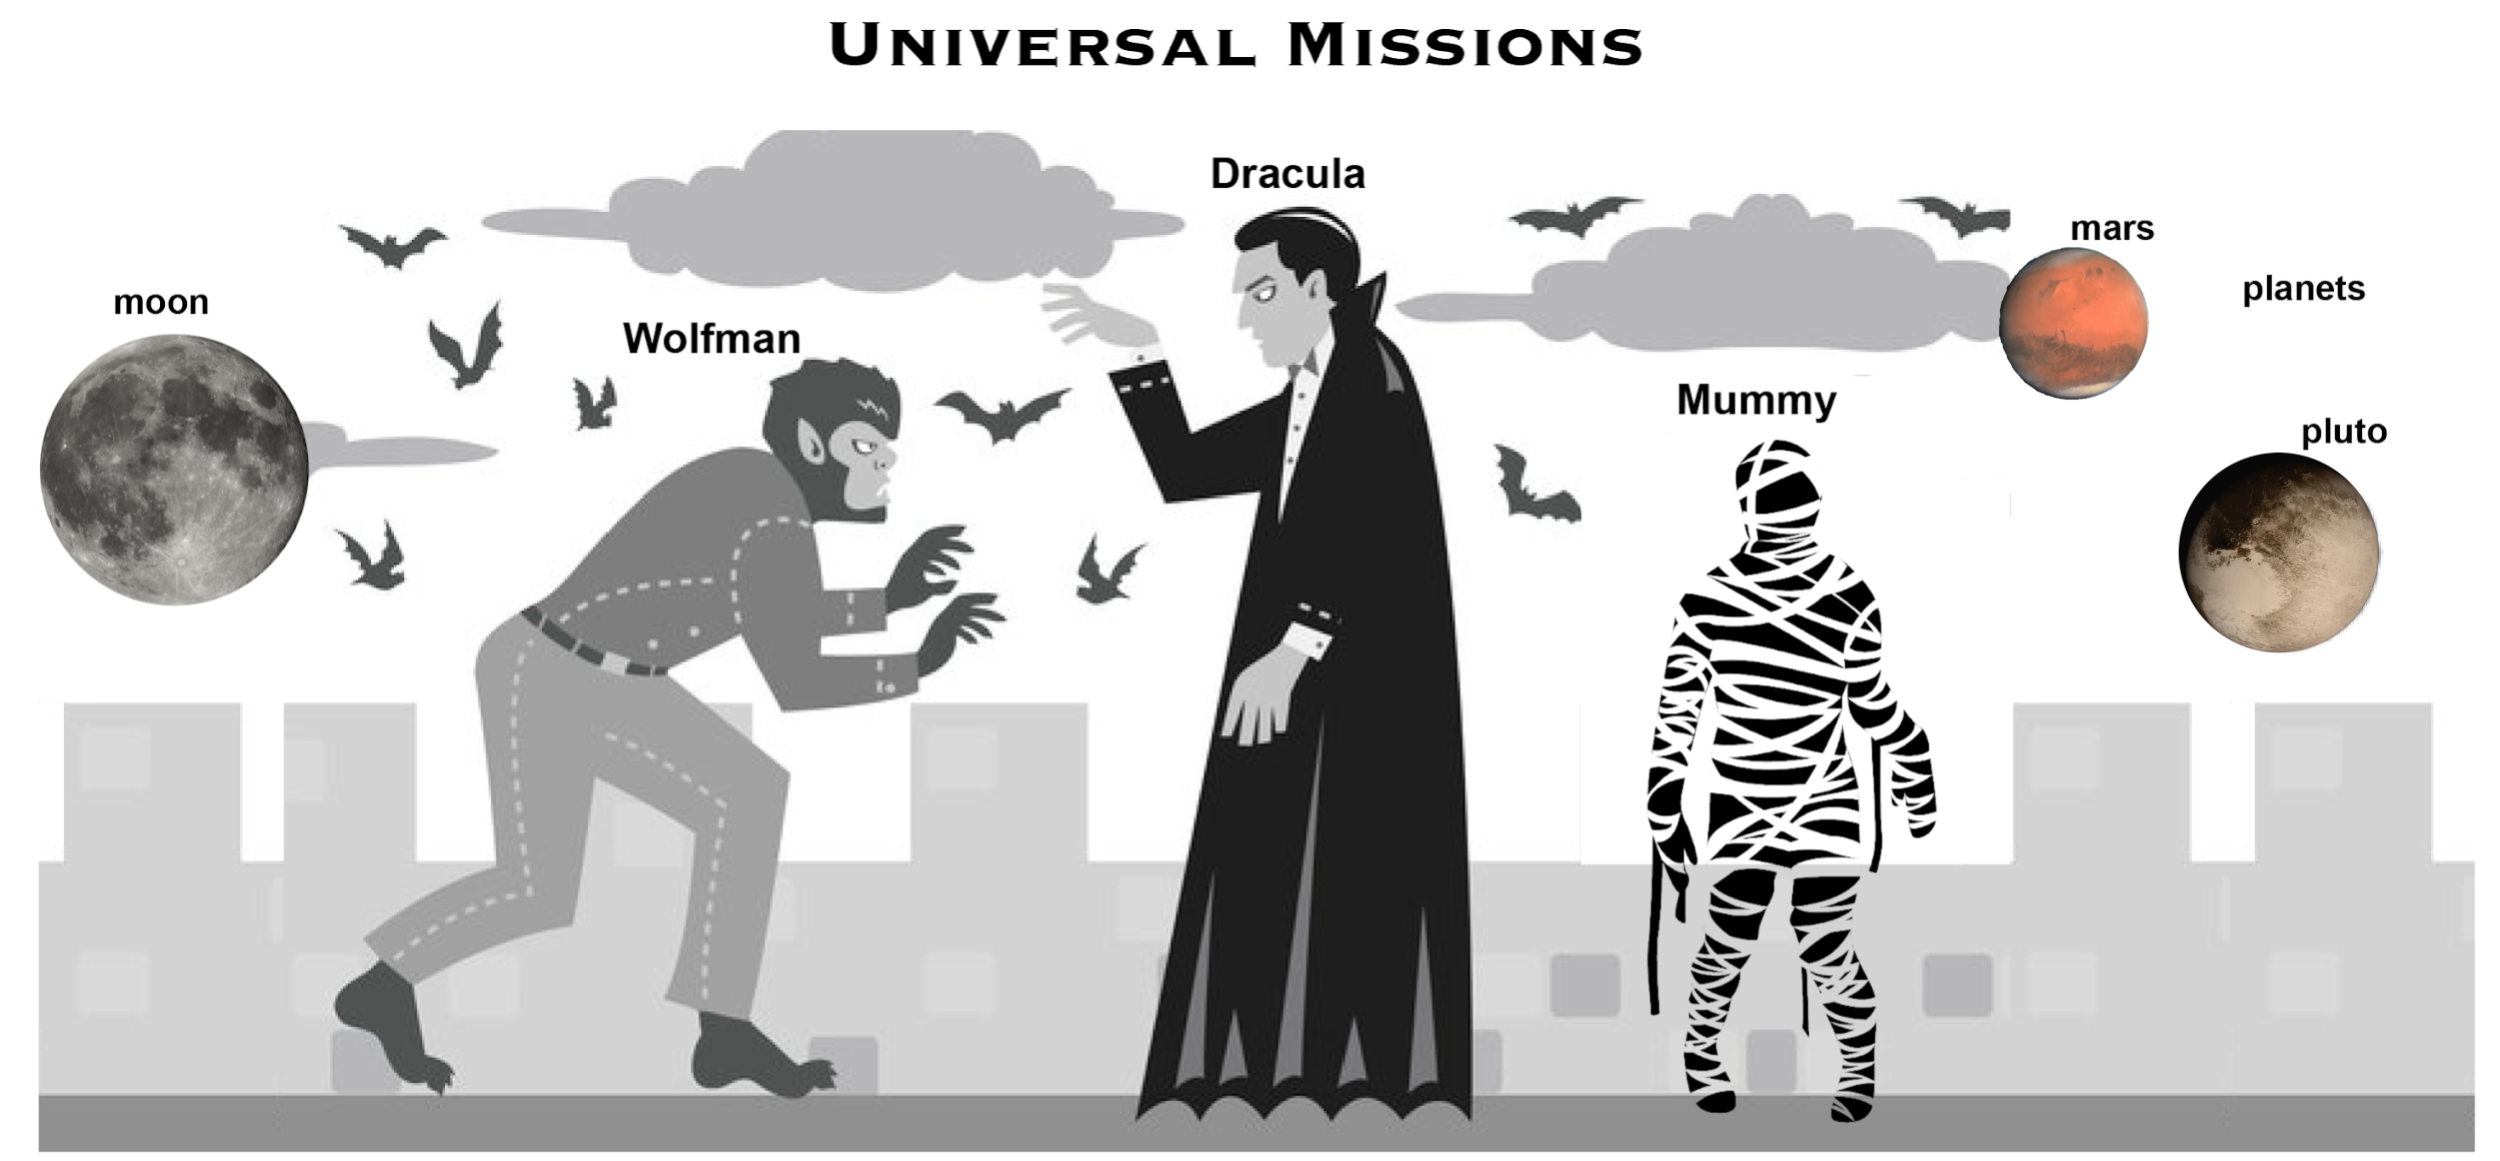 Werewolf vs dracula
by b-maze / Deviant Art.
Mars by European Space Agency /
CC-BY-SA 3.0 IGO.
Pluto /
Courtesy NASA/JPL-Caltech.
Mummy
© Gilad Fried / The Noun Project /
CC BY 3.0.
Moon
© Luc Viatour / https://lucnix.be /
CC BY-SA 3.0.
Werewolf vs dracula
by b-maze / Deviant Art.
Mars by European Space Agency /
CC-BY-SA 3.0 IGO.
Pluto /
Courtesy NASA/JPL-Caltech.
Mummy
© Gilad Fried / The Noun Project /
CC BY 3.0.
Moon
© Luc Viatour / https://lucnix.be /
CC BY-SA 3.0.
First, let’s create a directory in Desktop folder for our work and then move into that directory:
$ cd ~/Desktop
$ mkdir planets
$ cd planets
Then we tell Git to make planets a repository
– a place where Git can store versions of our files:
$ git init
It is important to note that git init will create a repository that
includes subdirectories and their files—there is no need to create
separate repositories nested within the planets repository, whether
subdirectories are present from the beginning or added later. Also, note
that the creation of the planets directory and its initialization as a
repository are completely separate processes.
If we use ls to show the directory’s contents,
it appears that nothing has changed:
$ ls
But if we add the -a flag to show everything,
we can see that Git has created a hidden directory within planets called .git:
$ ls -a
. .. .git
Git uses this special subdirectory to store all the information about the project,
including all files and sub-directories located within the project’s directory.
If we ever delete the .git subdirectory,
we will lose the project’s history.
Next, we will change the default branch to be called main.
This might be the default branch depending on your settings and version
of git.
See the setup episode for more information on this change.
git checkout -b main
Switched to a new branch 'main'
We can check that everything is set up correctly by asking Git to tell us the status of our project:
$ git status
On branch main

No commits yet

nothing to commit (create/copy files and use "git add" to track)
If you are using a different version of git, the exact
wording of the output might be slightly different.
Places to Create Git Repositories
Along with tracking information about planets (the project we have already created), Dracula would also like to track information about moons. Despite Wolfman’s concerns, Dracula creates a
moonsproject inside hisplanetsproject with the following sequence of commands:$ cd ~/Desktop # return to Desktop directory $ cd planets # go into planets directory, which is already a Git repository $ ls -a # ensure the .git subdirectory is still present in the planets directory $ mkdir moons # make a subdirectory planets/moons $ cd moons # go into moons subdirectory $ git init # make the moons subdirectory a Git repository $ ls -a # ensure the .git subdirectory is present indicating we have created a new Git repositoryIs the
git initcommand, run inside themoonssubdirectory, required for tracking files stored in themoonssubdirectory?Solution
No. Dracula does not need to make the
moonssubdirectory a Git repository because theplanetsrepository will track all files, sub-directories, and subdirectory files under theplanetsdirectory. Thus, in order to track all information about moons, Dracula only needed to add themoonssubdirectory to theplanetsdirectory.Additionally, Git repositories can interfere with each other if they are “nested”: the outer repository will try to version-control the inner repository. Therefore, it’s best to create each new Git repository in a separate directory. To be sure that there is no conflicting repository in the directory, check the output of
git status. If it looks like the following, you are good to go to create a new repository as shown above:$ git statusfatal: Not a git repository (or any of the parent directories): .git
Correcting
git initMistakesWolfman explains to Dracula how a nested repository is redundant and may cause confusion down the road. Dracula would like to remove the nested repository. How can Dracula undo his last
git initin themoonssubdirectory?Solution – USE WITH CAUTION!
Background
Removing files from a Git repository needs to be done with caution. But we have not learned yet how to tell Git to track a particular file; we will learn this in the next episode. Files that are not tracked by Git can easily be removed like any other “ordinary” files with
$ rm filenameSimilarly a directory can be removed using
rm -r dirnameorrm -rf dirname. If the files or folder being removed in this fashion are tracked by Git, then their removal becomes another change that we will need to track, as we will see in the next episode.Solution
Git keeps all of its files in the
.gitdirectory. To recover from this little mistake, Dracula can just remove the.gitfolder in the moons subdirectory by running the following command from inside theplanetsdirectory:$ rm -rf moons/.gitBut be careful! Running this command in the wrong directory will remove the entire Git history of a project you might want to keep. Therefore, always check your current directory using the command
pwd.
Key Points
git initinitializes a repository.Git stores all of its repository data in the
.gitdirectory.
Tracking Changes
Overview
Teaching: 20 min
Exercises: 0 minQuestions
How do I record changes in Git?
How do I check the status of my version control repository?
How do I record notes about what changes I made and why?
Objectives
Go through the modify-add-commit cycle for one or more files.
Explain where information is stored at each stage of that cycle.
Distinguish between descriptive and non-descriptive commit messages.
First let’s make sure we’re still in the right directory.
You should be in the planets directory.
$ cd ~/Desktop/planets
Let’s create a file called mars.txt that contains some notes
about the Red Planet’s suitability as a base.
We’ll use nano to edit the file;
you can use whatever editor you like.
In particular, this does not have to be the core.editor you set globally earlier. But remember, the bash command to create or edit a new file will depend on the editor you choose (it might not be nano). For a refresher on text editors, check out “Which Editor?” in The Unix Shell lesson.
$ nano mars.txt
Type the text below into the mars.txt file:
Cold and dry, but everything is my favorite color
Let’s first verify that the file was properly created by running the list command (ls):
$ ls
mars.txt
mars.txt contains a single line, which we can see by running:
$ cat mars.txt
Cold and dry, but everything is my favorite color
If we check the status of our project again, Git tells us that it’s noticed the new file:
$ git status
On branch main

No commits yet

Untracked files:
   (use "git add <file>..." to include in what will be committed)

	mars.txt

nothing added to commit but untracked files present (use "git add" to track)
The “untracked files” message means that there’s a file in the directory
that Git isn’t keeping track of.
We can tell Git to track a file using git add:
$ git add mars.txt
and then check that the right thing happened:
$ git status
On branch main

No commits yet

Changes to be committed:
  (use "git rm --cached <file>..." to unstage)

	new file:   mars.txt
Git now knows that it’s supposed to keep track of mars.txt,
but it hasn’t recorded these changes as a commit yet.
To get it to do that,
we need to run one more command:
$ git commit -m "Start notes on Mars as a base"
[main (root-commit) f22b25e] Start notes on Mars as a base
 1 file changed, 1 insertion(+)
 create mode 100644 mars.txt
When we run git commit,
Git takes everything we have told it to save by using git add
and stores a copy permanently inside the special .git directory.
This permanent copy is called a commit
(or revision) and its short identifier is f22b25e. Your commit may have another identifier.
We use the -m flag (for “message”)
to record a short, descriptive, and specific comment that will help us remember later on what we did and why.
If we just run git commit without the -m option,
Git will launch nano (or whatever other editor we configured as core.editor)
so that we can write a longer message.
Good commit messages start with a brief (<50 characters) statement about the
changes made in the commit. Generally, the message should complete the sentence “If applied, this commit will”
If we run git status now:
$ git status
On branch main
nothing to commit, working directory clean
it tells us everything is up to date.
If we want to know what we’ve done recently,
we can ask Git to show us the project’s history using git log:
$ git log
commit f22b25e3233b4645dabd0d81e651fe074bd8e73b
Author: Vlad Dracula <vlad@tran.sylvan.ia>
Date:   Thu Aug 22 09:51:46 2013 -0400

    Start notes on Mars as a base
git log lists all commits made to a repository in reverse chronological order.
The listing for each commit includes
the commit’s full identifier
(which starts with the same characters as
the short identifier printed by the git commit command earlier),
the commit’s author,
when it was created,
and the log message Git was given when the commit was created.
Where Are My Changes?
If we run
lsat this point, we will still see just one file calledmars.txt. That’s because Git saves information about files’ history in the special.gitdirectory mentioned earlier so that our filesystem doesn’t become cluttered (and so that we can’t accidentally edit or delete an old version).
Now suppose Dracula adds more information to the file.
(Again, we’ll edit with nano and then cat the file to show its contents;
you may use a different editor, and don’t need to cat.)
$ nano mars.txt
$ cat mars.txt
Cold and dry, but everything is my favorite color
The two moons may be a problem for Wolfman
When we run git status now,
it tells us that a file it already knows about has been modified:
$ git status
On branch main
Changes not staged for commit:
  (use "git add <file>..." to update what will be committed)
  (use "git checkout -- <file>..." to discard changes in working directory)

	modified:   mars.txt

no changes added to commit (use "git add" and/or "git commit -a")
The last line is the key phrase:
“no changes added to commit”.
We have changed this file,
but we haven’t told Git we will want to save those changes
(which we do with git add)
nor have we saved them (which we do with git commit).
So let’s do that now. It is good practice to always review
our changes before saving them. We do this using git diff.
This shows us the differences between the current state
of the file and the most recently saved version:
$ git diff
diff --git a/mars.txt b/mars.txt
index df0654a..315bf3a 100644
--- a/mars.txt
+++ b/mars.txt
@@ -1 +1,2 @@
 Cold and dry, but everything is my favorite color
+The two moons may be a problem for Wolfman
The output is cryptic because
it is actually a series of commands for tools like editors and patch
telling them how to reconstruct one file given the other.
If we break it down into pieces:
- The first line tells us that Git is producing output similar to the Unix
diffcommand comparing the old and new versions of the file. - The second line tells exactly which versions of the file
Git is comparing;
df0654aand315bf3aare unique computer-generated labels for those versions. - The third and fourth lines once again show the name of the file being changed.
- The remaining lines are the most interesting, they show us the actual differences
and the lines on which they occur.
In particular,
the
+marker in the first column shows where we added a line.
After reviewing our change, it’s time to commit it:
$ git commit -m "Add concerns about effects of Mars' moons on Wolfman"
On branch main
Changes not staged for commit:
  (use "git add <file>..." to update what will be committed)
  (use "git checkout -- <file>..." to discard changes in working directory)

	modified:   mars.txt

no changes added to commit (use "git add" and/or "git commit -a")
Whoops:
Git won’t commit because we didn’t use git add first.
Let’s fix that:
$ git add mars.txt
$ git commit -m "Add concerns about effects of Mars' moons on Wolfman"
[main 34961b1] Add concerns about effects of Mars' moons on Wolfman
 1 file changed, 1 insertion(+)
Git insists that we add files to the set we want to commit before actually committing anything. This allows us to commit our changes in stages and capture changes in logical portions rather than only large batches. For example, suppose we’re adding a few citations to relevant research to our thesis. We might want to commit those additions, and the corresponding bibliography entries, but not commit some of our work drafting the conclusion (which we haven’t finished yet).
To allow for this, Git has a special staging area where it keeps track of things that have been added to the current changeset but not yet committed.
Staging Area
If you think of Git as taking snapshots of changes over the life of a project,
git addspecifies what will go in a snapshot (putting things in the staging area), andgit committhen actually takes the snapshot, and makes a permanent record of it (as a commit). If you don’t have anything staged when you typegit commit, Git will prompt you to usegit commit -aorgit commit --all, which is kind of like gathering everyone to take a group photo! However, it’s almost always better to explicitly add things to the staging area, because you might commit changes you forgot you made. (Going back to the group photo simile, you might get an extra with incomplete makeup walking on the stage for the picture because you used-a!) Try to stage things manually, or you might find yourself searching for “git undo commit” more than you would like!

Let’s watch as our changes to a file move from our editor to the staging area and into long-term storage. First, we’ll add another line to the file:
$ nano mars.txt
$ cat mars.txt
Cold and dry, but everything is my favorite color
The two moons may be a problem for Wolfman
But the Mummy will appreciate the lack of humidity
$ git diff
diff --git a/mars.txt b/mars.txt
index 315bf3a..b36abfd 100644
--- a/mars.txt
+++ b/mars.txt
@@ -1,2 +1,3 @@
 Cold and dry, but everything is my favorite color
 The two moons may be a problem for Wolfman
+But the Mummy will appreciate the lack of humidity
So far, so good:
we’ve added one line to the end of the file
(shown with a + in the first column).
Now let’s put that change in the staging area
and see what git diff reports:
$ git add mars.txt
$ git diff
There is no output: as far as Git can tell, there’s no difference between what it’s been asked to save permanently and what’s currently in the directory. However, if we do this:
$ git diff --staged
diff --git a/mars.txt b/mars.txt
index 315bf3a..b36abfd 100644
--- a/mars.txt
+++ b/mars.txt
@@ -1,2 +1,3 @@
 Cold and dry, but everything is my favorite color
 The two moons may be a problem for Wolfman
+But the Mummy will appreciate the lack of humidity
it shows us the difference between the last committed change and what’s in the staging area. Let’s save our changes:
$ git commit -m "Discuss concerns about Mars' climate for Mummy"
[main 005937f] Discuss concerns about Mars' climate for Mummy
 1 file changed, 1 insertion(+)
check our status:
$ git status
On branch main
nothing to commit, working directory clean
and look at the history of what we’ve done so far:
$ git log
commit 005937fbe2a98fb83f0ade869025dc2636b4dad5 (HEAD -> main)
Author: Vlad Dracula <vlad@tran.sylvan.ia>
Date:   Thu Aug 22 10:14:07 2013 -0400

    Discuss concerns about Mars' climate for Mummy

commit 34961b159c27df3b475cfe4415d94a6d1fcd064d
Author: Vlad Dracula <vlad@tran.sylvan.ia>
Date:   Thu Aug 22 10:07:21 2013 -0400

    Add concerns about effects of Mars' moons on Wolfman

commit f22b25e3233b4645dabd0d81e651fe074bd8e73b
Author: Vlad Dracula <vlad@tran.sylvan.ia>
Date:   Thu Aug 22 09:51:46 2013 -0400

    Start notes on Mars as a base
Word-based diffing
Sometimes, e.g. in the case of the text documents a line-wise diff is too coarse. That is where the
--color-wordsoption ofgit diffcomes in very useful as it highlights the changed words using colors.
Paging the Log
When the output of
git logis too long to fit in your screen,gituses a program to split it into pages of the size of your screen. When this “pager” is called, you will notice that the last line in your screen is a:, instead of your usual prompt.
- To get out of the pager, press Q.
- To move to the next page, press Spacebar.
- To search for
some_wordin all pages, press / and typesome_word. Navigate through matches pressing N.
Limit Log Size
To avoid having
git logcover your entire terminal screen, you can limit the number of commits that Git lists by using-N, whereNis the number of commits that you want to view. For example, if you only want information from the last commit you can use:$ git log -1commit 005937fbe2a98fb83f0ade869025dc2636b4dad5 (HEAD -> main) Author: Vlad Dracula <vlad@tran.sylvan.ia> Date: Thu Aug 22 10:14:07 2013 -0400 Discuss concerns about Mars' climate for MummyYou can also reduce the quantity of information using the
--onelineoption:$ git log --oneline005937f (HEAD -> main) Discuss concerns about Mars' climate for Mummy 34961b1 Add concerns about effects of Mars' moons on Wolfman f22b25e Start notes on Mars as a baseYou can also combine the
--onelineoption with others. One useful combination adds--graphto display the commit history as a text-based graph and to indicate which commits are associated with the currentHEAD, the current branchmain, or other Git references:$ git log --oneline --graph* 005937f (HEAD -> main) Discuss concerns about Mars' climate for Mummy * 34961b1 Add concerns about effects of Mars' moons on Wolfman * f22b25e Start notes on Mars as a base
Directories
Two important facts you should know about directories in Git.
Git does not track directories on their own, only files within them. Try it for yourself:
$ mkdir spaceships
$ git status
$ git add spaceships
$ git status
Note, our newly created empty directory
spaceshipsdoes not appear in the list of untracked files even if we explicitly add it (viagit add) to our repository. This is the reason why you will sometimes see.gitkeepfiles in otherwise empty directories. Unlike.gitignore, these files are not special and their sole purpose is to populate a directory so that Git adds it to the repository. In fact, you can name such files anything you like.If you create a directory in your Git repository and populate it with files, you can add all files in the directory at once by:
git add <directory-with-files>Try it for yourself:
$ touch spaceships/apollo-11 spaceships/sputnik-1
$ git status
$ git add spaceships
$ git status
Before moving on, we will commit these changes.
$ git commit -m "Add some initial thoughts on spaceships"
To recap, when we want to add changes to our repository,
we first need to add the changed files to the staging area
(git add) and then commit the staged changes to the
repository (git commit):

Choosing a Commit Message
Which of the following commit messages would be most appropriate for the last commit made to
mars.txt?
- “Changes”
- “Added line ‘But the Mummy will appreciate the lack of humidity’ to mars.txt”
- “Discuss effects of Mars’ climate on the Mummy”
Solution
Answer 1 is not descriptive enough, and the purpose of the commit is unclear; and answer 2 is redundant to using “git diff” to see what changed in this commit; but answer 3 is good: short, descriptive, and imperative.
Committing Changes to Git
Which command(s) below would save the changes of
myfile.txtto my local Git repository?
$ git commit -m "my recent changes"$ git init myfile.txt $ git commit -m "my recent changes"$ git add myfile.txt $ git commit -m "my recent changes"$ git commit -m myfile.txt "my recent changes"Solution
- Would only create a commit if files have already been staged.
- Would try to create a new repository.
- Is correct: first add the file to the staging area, then commit.
- Would try to commit a file “my recent changes” with the message myfile.txt.
Committing Multiple Files
The staging area can hold changes from any number of files that you want to commit as a single snapshot.
- Add some text to
mars.txtnoting your decision to consider Venus as a base- Create a new file
venus.txtwith your initial thoughts about Venus as a base for you and your friends- Add changes from both files to the staging area, and commit those changes.
Solution
The output below from
cat mars.txtreflects only content added during this exercise. Your output may vary.First we make our changes to the
mars.txtandvenus.txtfiles:$ nano mars.txt $ cat mars.txtMaybe I should start with a base on Venus.$ nano venus.txt $ cat venus.txtVenus is a nice planet and I definitely should consider it as a base.Now you can add both files to the staging area. We can do that in one line:
$ git add mars.txt venus.txtOr with multiple commands:
$ git add mars.txt $ git add venus.txtNow the files are ready to commit. You can check that using
git status. If you are ready to commit use:$ git commit -m "Write plans to start a base on Venus"[main cc127c2] Write plans to start a base on Venus 2 files changed, 2 insertions(+) create mode 100644 venus.txt
Key Points
git statusshows the status of a repository.Files can be stored in a project’s working directory (which users see), the staging area (where the next commit is being built up) and the local repository (where commits are permanently recorded).
git addputs files in the staging area.
git commitsaves the staged content as a new commit in the local repository.Write a commit message that accurately describes your changes.
Coffee Break
Overview
Teaching: min
Exercises: minQuestions
Objectives
Key Points
Exploring History
Overview
Teaching: 25 min
Exercises: 0 minQuestions
How can I identify old versions of files?
How do I review my changes?
How can I recover old versions of files?
Objectives
Explain what the HEAD of a repository is and how to use it.
Identify and use Git commit numbers.
Compare various versions of tracked files.
Restore old versions of files.
As we saw in the previous episode, we can refer to commits by their
identifiers. You can refer to the most recent commit of the working
directory by using the identifier HEAD.
We’ve been adding one line at a time to mars.txt, so it’s easy to track our
progress by looking, so let’s do that using our HEADs. Before we start,
let’s make a change to mars.txt, adding yet another line.
$ nano mars.txt
$ cat mars.txt
Cold and dry, but everything is my favorite color
The two moons may be a problem for Wolfman
But the Mummy will appreciate the lack of humidity
An ill-considered change
Now, let’s see what we get.
$ git diff HEAD mars.txt
diff --git a/mars.txt b/mars.txt
index b36abfd..0848c8d 100644
--- a/mars.txt
+++ b/mars.txt
@@ -1,3 +1,4 @@
Cold and dry, but everything is my favorite color
The two moons may be a problem for Wolfman
But the Mummy will appreciate the lack of humidity
+An ill-considered change.
which is the same as what you would get if you leave out HEAD (try it). The
real goodness in all this is when you can refer to previous commits. We do
that by adding ~1
(where “~” is “tilde”, pronounced [til-duh])
to refer to the commit one before HEAD.
$ git diff HEAD~1 mars.txt
If we want to see the differences between older commits we can use git diff
again, but with the notation HEAD~1, HEAD~2, and so on, to refer to them:
$ git diff HEAD~3 mars.txt
diff --git a/mars.txt b/mars.txt
index df0654a..b36abfd 100644
--- a/mars.txt
+++ b/mars.txt
@@ -1 +1,4 @@
Cold and dry, but everything is my favorite color
+The two moons may be a problem for Wolfman
+But the Mummy will appreciate the lack of humidity
+An ill-considered change
We could also use git show which shows us what changes we made at an older commit as
well as the commit message, rather than the differences between a commit and our
working directory that we see by using git diff.
$ git show HEAD~3 mars.txt
commit f22b25e3233b4645dabd0d81e651fe074bd8e73b
Author: Vlad Dracula <vlad@tran.sylvan.ia>
Date: Thu Aug 22 09:51:46 2013 -0400
Start notes on Mars as a base
diff --git a/mars.txt b/mars.txt
new file mode 100644
index 0000000..df0654a
--- /dev/null
+++ b/mars.txt
@@ -0,0 +1 @@
+Cold and dry, but everything is my favorite color
In this way,
we can build up a chain of commits.
The most recent end of the chain is referred to as HEAD;
we can refer to previous commits using the ~ notation,
so HEAD~1
means “the previous commit”,
while HEAD~123 goes back 123 commits from where we are now.
We can also refer to commits using
those long strings of digits and letters
that git log displays.
These are unique IDs for the changes,
and “unique” really does mean unique:
every change to any set of files on any computer
has a unique 40-character identifier.
Our first commit was given the ID
f22b25e3233b4645dabd0d81e651fe074bd8e73b,
so let’s try this:
$ git diff f22b25e3233b4645dabd0d81e651fe074bd8e73b mars.txt
diff --git a/mars.txt b/mars.txt
index df0654a..93a3e13 100644
--- a/mars.txt
+++ b/mars.txt
@@ -1 +1,4 @@
Cold and dry, but everything is my favorite color
+The two moons may be a problem for Wolfman
+But the Mummy will appreciate the lack of humidity
+An ill-considered change
That’s the right answer, but typing out random 40-character strings is annoying, so Git lets us use just the first few characters (typically seven for normal size projects):
$ git diff f22b25e mars.txt
diff --git a/mars.txt b/mars.txt
index df0654a..93a3e13 100644
--- a/mars.txt
+++ b/mars.txt
@@ -1 +1,4 @@
Cold and dry, but everything is my favorite color
+The two moons may be a problem for Wolfman
+But the Mummy will appreciate the lack of humidity
+An ill-considered change
All right! So
we can save changes to files and see what we’ve changed. Now, how
can we restore older versions of things?
Let’s suppose we change our mind about the last update to
mars.txt (the “ill-considered change”).
git status now tells us that the file has been changed,
but those changes haven’t been staged:
$ git status
On branch main
Changes not staged for commit:
(use "git add <file>..." to update what will be committed)
(use "git checkout -- <file>..." to discard changes in working directory)
modified: mars.txt
no changes added to commit (use "git add" and/or "git commit -a")
We can put things back the way they were
by using git checkout:
$ git checkout HEAD mars.txt
$ cat mars.txt
Cold and dry, but everything is my favorite color
The two moons may be a problem for Wolfman
But the Mummy will appreciate the lack of humidity
As you might guess from its name,
git checkout checks out (i.e., restores) an old version of a file.
In this case,
we’re telling Git that we want to recover the version of the file recorded in HEAD,
which is the last saved commit.
If we want to go back even further,
we can use a commit identifier instead:
$ git checkout f22b25e mars.txt
$ cat mars.txt
Cold and dry, but everything is my favorite color
$ git status
On branch main
Changes to be committed:
(use "git reset HEAD <file>..." to unstage)
modified: mars.txt
Notice that the changes are currently in the staging area.
Again, we can put things back the way they were
by using git checkout:
$ git checkout HEAD mars.txt
Don’t Lose Your HEAD
Above we used
$ git checkout f22b25e mars.txtto revert
mars.txtto its state after the commitf22b25e. But be careful! The commandcheckouthas other important functionalities and Git will misunderstand your intentions if you are not accurate with the typing. For example, if you forgetmars.txtin the previous command.$ git checkout f22b25eNote: checking out 'f22b25e'. You are in 'detached HEAD' state. You can look around, make experimental changes and commit them, and you can discard any commits you make in this state without impacting any branches by performing another checkout. If you want to create a new branch to retain commits you create, you may do so (now or later) by using -b with the checkout command again. Example: git checkout -b <new-branch-name> HEAD is now at f22b25e Start notes on Mars as a baseThe “detached HEAD” is like “look, but don’t touch” here, so you shouldn’t make any changes in this state. After investigating your repo’s past state, reattach your
HEADwithgit checkout main.
It’s important to remember that
we must use the commit number that identifies the state of the repository
before the change we’re trying to undo.
A common mistake is to use the number of
the commit in which we made the change we’re trying to discard.
In the example below, we want to retrieve the state from before the most
recent commit (HEAD~1), which is commit f22b25e:
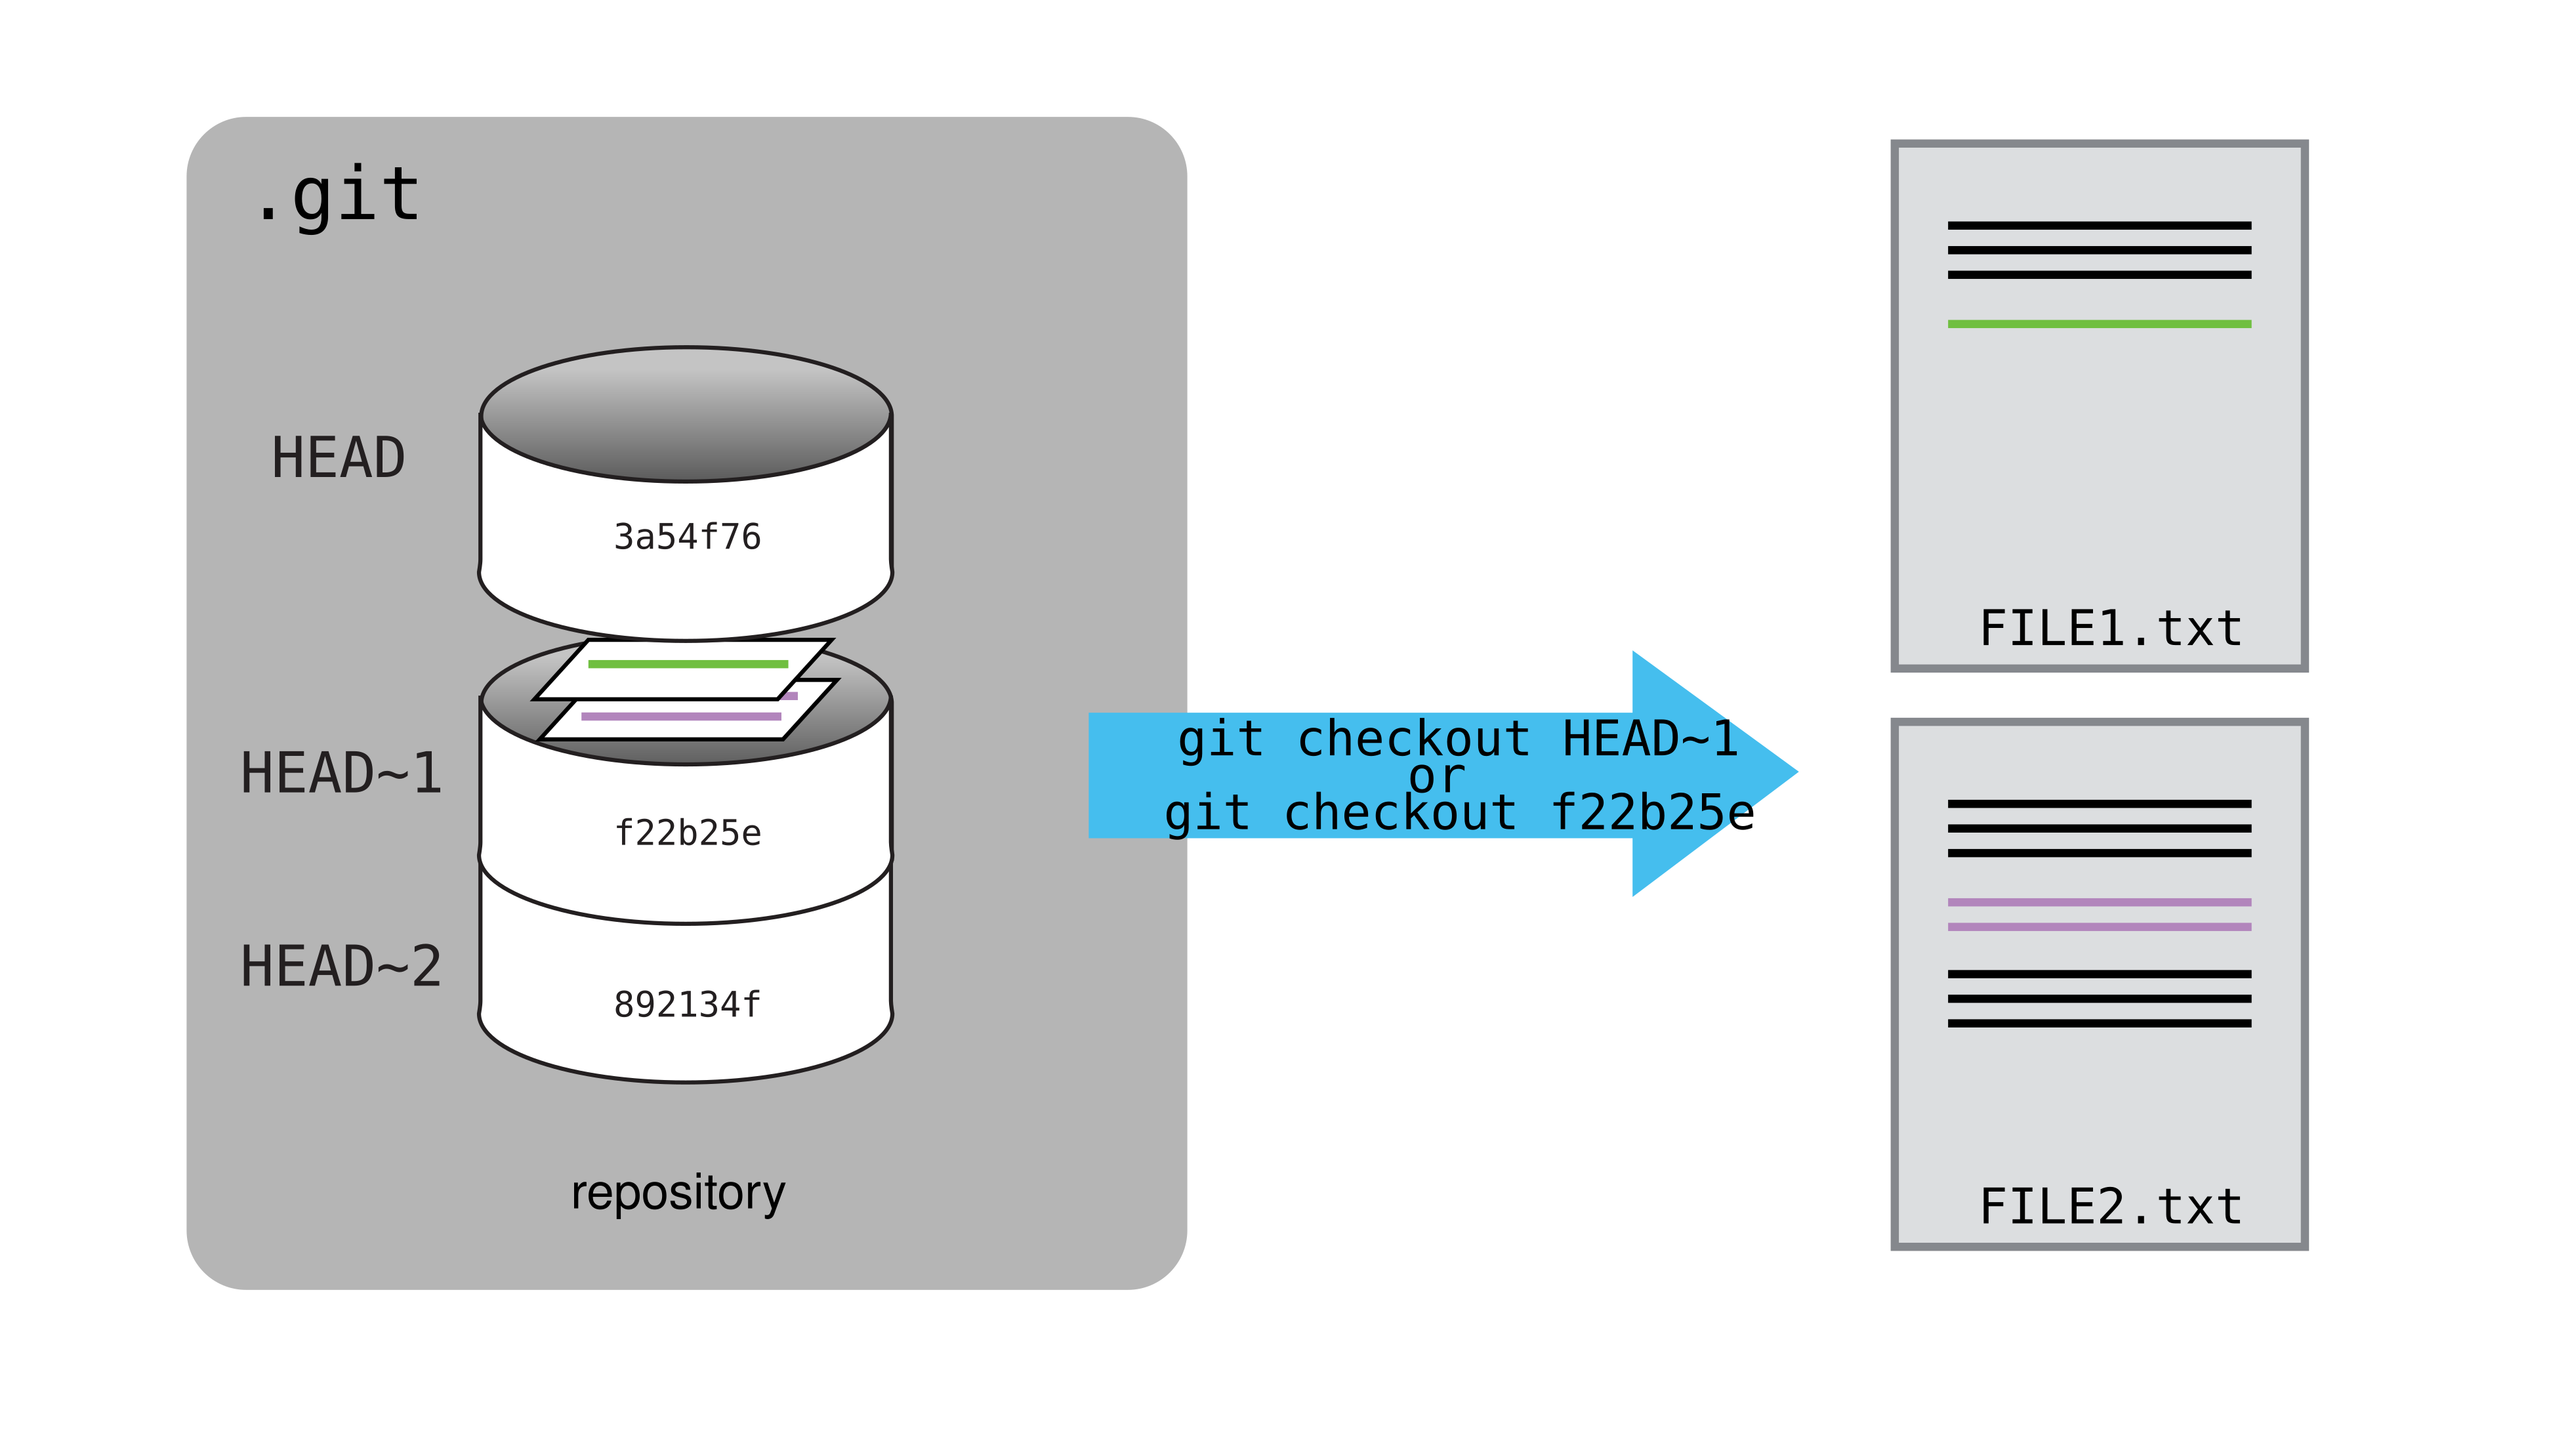
So, to put it all together, here’s how Git works in cartoon form:

Simplifying the Common Case
If you read the output of
git statuscarefully, you’ll see that it includes this hint:(use "git checkout -- <file>..." to discard changes in working directory)As it says,
git checkoutwithout a version identifier restores files to the state saved inHEAD. The double dash--is needed to separate the names of the files being recovered from the command itself: without it, Git would try to use the name of the file as the commit identifier.
The fact that files can be reverted one by one tends to change the way people organize their work. If everything is in one large document, it’s hard (but not impossible) to undo changes to the introduction without also undoing changes made later to the conclusion. If the introduction and conclusion are stored in separate files, on the other hand, moving backward and forward in time becomes much easier.
Reverting a Commit
Jennifer is collaborating with colleagues on her Python script. She realizes her last commit to the project’s repository contained an error, and wants to undo it. Jennifer wants to undo correctly so everyone in the project’s repository gets the correct change. The command
git revert [erroneous commit ID]will create a new commit that reverses the erroneous commit.The command
git revertis different fromgit checkout [commit ID]becausegit checkoutreturns the files not yet committed within the local repository to a previous state, whereasgit revertreverses changes committed to the local and project repositories.Below are the right steps and explanations for Jennifer to use
git revert, what is the missing command?
________ # Look at the git history of the project to find the commit IDCopy the ID (the first few characters of the ID, e.g. 0b1d055).
git revert [commit ID]Type in the new commit message.
Save and close
Solution
The command
git loglists project history with commit IDs.The command
git show HEADshows changes made at the latest commit, and lists the commit ID; however, Jennifer should double-check it is the correct commit, and no one else has committed changes to the repository.
Understanding Workflow and History
What is the output of the last command in
$ cd planets $ echo "Venus is beautiful and full of love" > venus.txt $ git add venus.txt $ echo "Venus is too hot to be suitable as a base" >> venus.txt $ git commit -m "Comment on Venus as an unsuitable base" $ git checkout HEAD venus.txt $ cat venus.txt #this will print the contents of venus.txt to the screen
Venus is too hot to be suitable as a baseVenus is beautiful and full of loveVenus is beautiful and full of love Venus is too hot to be suitable as a baseError because you have changed venus.txt without committing the changesSolution
The answer is 2.
The command
git add venus.txtplaces the current version ofvenus.txtinto the staging area. The changes to the file from the secondechocommand are only applied to the working copy, not the version in the staging area.So, when
git commit -m "Comment on Venus as an unsuitable base"is executed, the version ofvenus.txtcommitted to the repository is the one from the staging area and has only one line.At this time, the working copy still has the second line (and
git statuswill show that the file is modified). However,git checkout HEAD venus.txtreplaces the working copy with the most recently committed version ofvenus.txt.So,
cat venus.txtwill outputVenus is beautiful and full of love.
Checking Understanding of
git diffConsider this command:
git diff HEAD~9 mars.txt. What do you predict this command will do if you execute it? What happens when you do execute it? Why?Try another command,
git diff [ID] mars.txt, where [ID] is replaced with the unique identifier for your most recent commit. What do you think will happen, and what does happen?
Getting Rid of Staged Changes
git checkoutcan be used to restore a previous commit when unstaged changes have been made, but will it also work for changes that have been staged but not committed? Make a change tomars.txt, add that change, and usegit checkoutto see if you can remove your change.
Explore and Summarize Histories
Exploring history is an important part of Git, and often it is a challenge to find the right commit ID, especially if the commit is from several months ago.
Imagine the
planetsproject has more than 50 files. You would like to find a commit that modifies some specific text inmars.txt. When you typegit log, a very long list appeared. How can you narrow down the search?Recall that the
git diffcommand allows us to explore one specific file, e.g.,git diff mars.txt. We can apply a similar idea here.$ git log mars.txtUnfortunately some of these commit messages are very ambiguous, e.g.,
update files. How can you search through these files?Both
git diffandgit logare very useful and they summarize a different part of the history for you. Is it possible to combine both? Let’s try the following:$ git log --patch mars.txtYou should get a long list of output, and you should be able to see both commit messages and the difference between each commit.
Question: What does the following command do?
$ git log --patch HEAD~9 *.txt
Key Points
git diffdisplays differences between commits.
git checkoutrecovers old versions of files.
Ignoring Things
Overview
Teaching: 5 min
Exercises: 0 minQuestions
How can I tell Git to ignore files I don’t want to track?
Objectives
Configure Git to ignore specific files.
Explain why ignoring files can be useful.
What if we have files that we do not want Git to track for us, like backup files created by our editor or intermediate files created during data analysis? Let’s create a few dummy files:
$ mkdir results
$ touch a.dat b.dat c.dat results/a.out results/b.out
and see what Git says:
$ git status
On branch main
Untracked files:
(use "git add <file>..." to include in what will be committed)
a.dat
b.dat
c.dat
results/
nothing added to commit but untracked files present (use "git add" to track)
Putting these files under version control would be a waste of disk space. What’s worse, having them all listed could distract us from changes that actually matter, so let’s tell Git to ignore them.
We do this by creating a file in the root directory of our project called .gitignore:
$ nano .gitignore
$ cat .gitignore
*.dat
results/
These patterns tell Git to ignore any file whose name ends in .dat
and everything in the results directory.
(If any of these files were already being tracked,
Git would continue to track them.)
Once we have created this file,
the output of git status is much cleaner:
$ git status
On branch main
Untracked files:
(use "git add <file>..." to include in what will be committed)
.gitignore
nothing added to commit but untracked files present (use "git add" to track)
The only thing Git notices now is the newly-created .gitignore file.
You might think we wouldn’t want to track it,
but everyone we’re sharing our repository with will probably want to ignore
the same things that we’re ignoring.
Let’s add and commit .gitignore:
$ git add .gitignore
$ git commit -m "Ignore data files and the results folder."
$ git status
On branch main
nothing to commit, working directory clean
As a bonus, using .gitignore helps us avoid accidentally adding files to the repository that we don’t want to track:
$ git add a.dat
The following paths are ignored by one of your .gitignore files:
a.dat
Use -f if you really want to add them.
If we really want to override our ignore settings,
we can use git add -f to force Git to add something. For example,
git add -f a.dat.
We can also always see the status of ignored files if we want:
$ git status --ignored
On branch main
Ignored files:
(use "git add -f <file>..." to include in what will be committed)
a.dat
b.dat
c.dat
results/
nothing to commit, working directory clean
Ignoring Nested Files
Given a directory structure that looks like:
results/data results/plotsHow would you ignore only
results/plotsand notresults/data?Solution
If you only want to ignore the contents of
results/plots, you can change your.gitignoreto ignore only the/plots/subfolder by adding the following line to your .gitignore:results/plots/This line will ensure only the contents of
results/plotsis ignored, and not the contents ofresults/data.As with most programming issues, there are a few alternative ways that one may ensure this ignore rule is followed. The “Ignoring Nested Files: Variation” exercise has a slightly different directory structure that presents an alternative solution. Further, the discussion page has more detail on ignore rules.
Including Specific Files
How would you ignore all
.datfiles in your root directory except forfinal.dat? Hint: Find out what!(the exclamation point operator) doesSolution
You would add the following two lines to your .gitignore:
*.dat # ignore all data files !final.dat # except final.dataThe exclamation point operator will include a previously excluded entry.
Note also that because you’ve previously committed
.datfiles in this lesson they will not be ignored with this new rule. Only future additions of.datfiles added to the root directory will be ignored.
Ignoring Nested Files: Variation
Given a directory structure that looks similar to the earlier Nested Files exercise, but with a slightly different directory structure:
results/data results/images results/plots results/analysisHow would you ignore all of the contents in the results folder, but not
results/data?Hint: think a bit about how you created an exception with the
!operator before.Solution
If you want to ignore the contents of
results/but not those ofresults/data/, you can change your.gitignoreto ignore the contents of results folder, but create an exception for the contents of theresults/datasubfolder. Your .gitignore would look like this:results/* # ignore everything in results folder !results/data/ # do not ignore results/data/ contents
Ignoring all data Files in a Directory
Assuming you have an empty .gitignore file, and given a directory structure that looks like:
results/data/position/gps/a.dat results/data/position/gps/b.dat results/data/position/gps/c.dat results/data/position/gps/info.txt results/plotsWhat’s the shortest
.gitignorerule you could write to ignore all.datfiles inresult/data/position/gps? Do not ignore theinfo.txt.Solution
Appending
results/data/position/gps/*.datwill match every file inresults/data/position/gpsthat ends with.dat. The fileresults/data/position/gps/info.txtwill not be ignored.
Ignoring all data Files in the repository
Let us assume you have many
.datfiles in different subdirectories of your repository. For example, you might have:results/a.dat data/experiment_1/b.dat data/experiment_2/c.dat data/experiment_2/variation_1/d.datHow do you ignore all the
.datfiles, without explicitly listing the names of the corresponding folders?Solution
In the
.gitignorefile, write:**/*.datThis will ignore all the
.datfiles, regardless of their position in the directory tree. You can still include some specific exception with the exclamation point operator.
The Order of Rules
Given a
.gitignorefile with the following contents:*.dat !*.datWhat will be the result?
Solution
The
!modifier will negate an entry from a previously defined ignore pattern. Because the!*.datentry negates all of the previous.datfiles in the.gitignore, none of them will be ignored, and all.datfiles will be tracked.
Log Files
You wrote a script that creates many intermediate log-files of the form
log_01,log_02,log_03, etc. You want to keep them but you do not want to track them throughgit.
Write one
.gitignoreentry that excludes files of the formlog_01,log_02, etc.Test your “ignore pattern” by creating some dummy files of the form
log_01, etc.You find that the file
log_01is very important after all, add it to the tracked files without changing the.gitignoreagain.Discuss with your neighbor what other types of files could reside in your directory that you do not want to track and thus would exclude via
.gitignore.Solution
- append either
log_*orlog*as a new entry in your .gitignore- track
log_01usinggit add -f log_01
Key Points
The
.gitignorefile tells Git what files to ignore.
Remotes in GitHub
Overview
Teaching: 45 min
Exercises: 0 minQuestions
How do I share my changes with others on the web?
Objectives
Explain what remote repositories are and why they are useful.
Push to or pull from a remote repository.
Version control really comes into its own when we begin to collaborate with other people. We already have most of the machinery we need to do this; the only thing missing is to copy changes from one repository to another.
Systems like Git allow us to move work between any two repositories. In practice, though, it’s easiest to use one copy as a central hub, and to keep it on the web rather than on someone’s laptop. Most programmers use hosting services like GitHub, Bitbucket or GitLab to hold those main copies; we’ll explore the pros and cons of this in a later episode.
Let’s start by sharing the changes we’ve made to our current project with the world. To this end we are going to create a remote repository that will be linked to our local repository.
1. Create a remote repository
Log in to GitHub, then click on the icon in the top right corner to
create a new repository called planets:
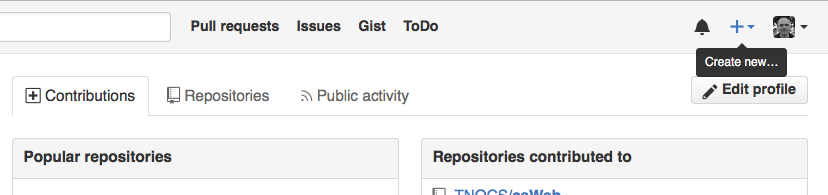
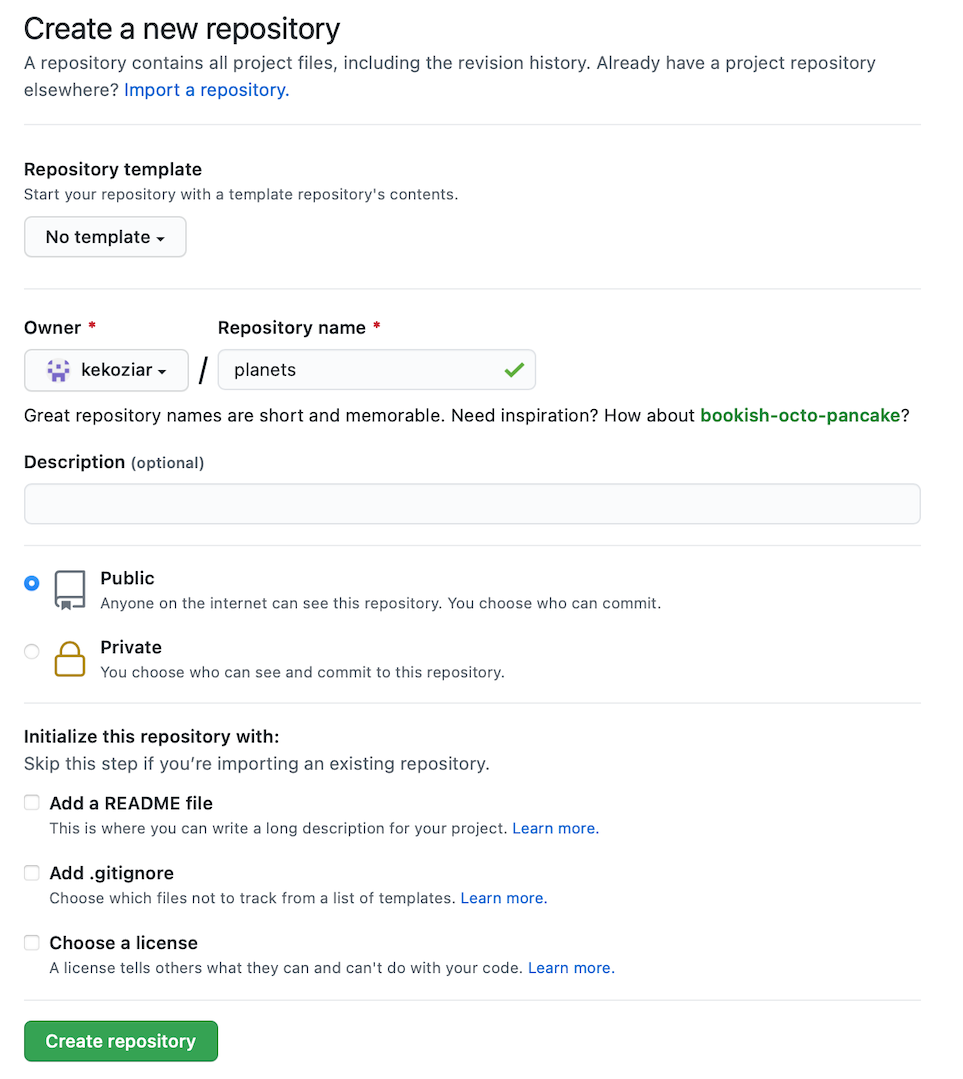
Name your repository “planets” and then click “Create Repository”.
Note: Since this repository will be connected to a local repository, it needs to be empty. Leave “Initialize this repository with a README” unchecked, and keep “None” as options for both “Add .gitignore” and “Add a license.” See the “GitHub License and README files” exercise below for a full explanation of why the repository needs to be empty.
As soon as the repository is created, GitHub displays a page with a URL and some information on how to configure your local repository:
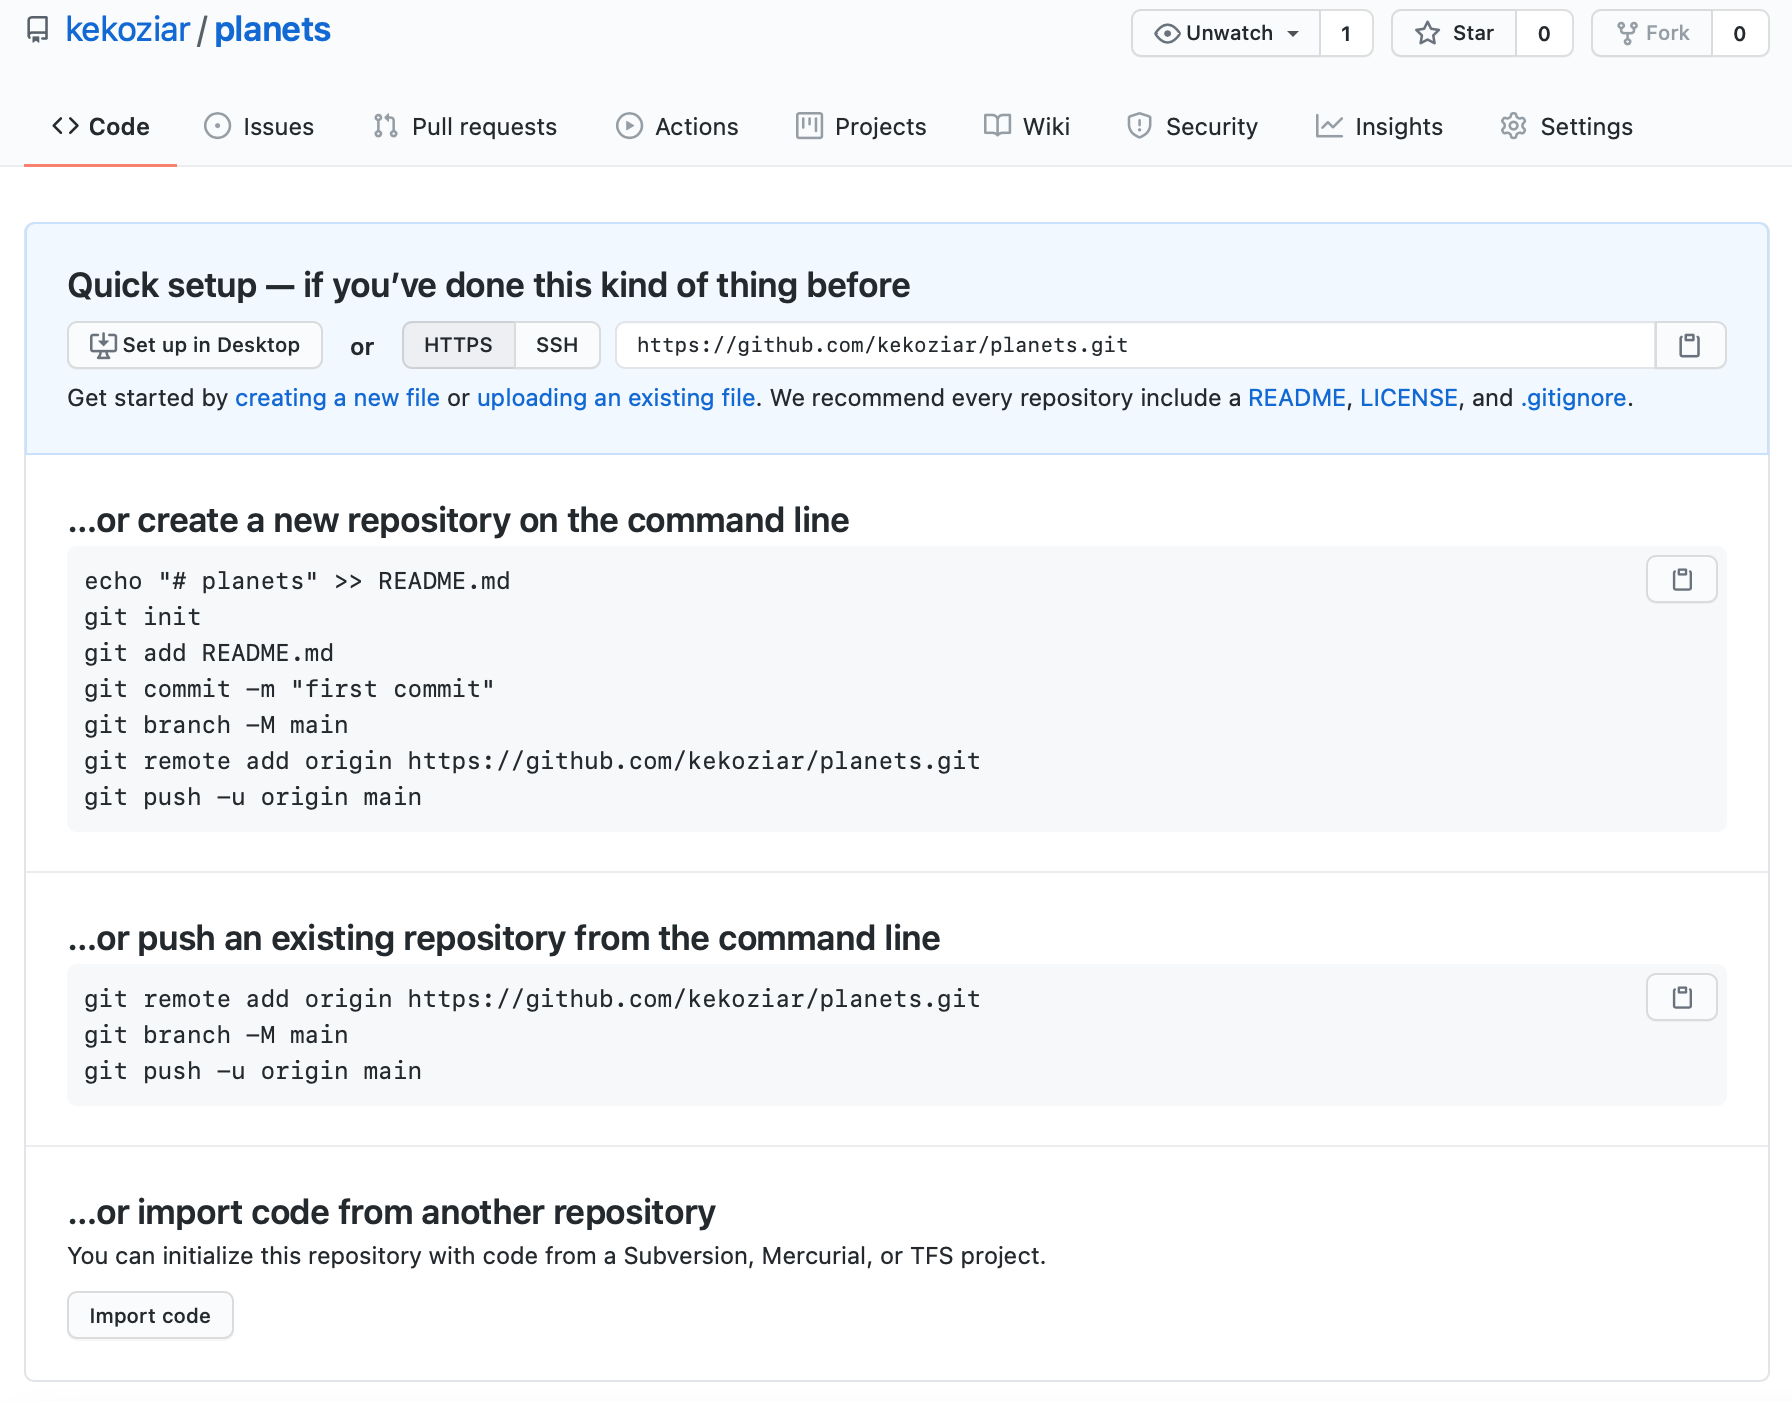
This effectively does the following on GitHub’s servers:
$ mkdir planets
$ cd planets
$ git init
If you remember back to the earlier episode where we added and
committed our earlier work on mars.txt, we had a diagram of the local repository
which looked like this:

Now that we have two repositories, we need a diagram like this:

Note that our local repository still contains our earlier work on mars.txt, but the
remote repository on GitHub appears empty as it doesn’t contain any files yet.
2. Connect local to remote repository
Now we connect the two repositories. We do this by making the GitHub repository a remote for the local repository. The home page of the repository on GitHub includes the URL string we need to identify it:

The most accepted way of adding remotes uses the SSH protocol. However, this requires you to create a SSH key to be authenticated by the remote server hosting the repository. This procedure is quite complicated and we will use the HTTPS protocol instead. Thus, click on the ‘HTTPS’ link to change the protocol from SSH to HTTPS.

Note: we left the figures with the SSH protocol, but you should use the HTTPS one. Code snippets have been changed to adopt the HTTPS, so you’re safe there.
Copy that URL from the browser, go into the local planets repository, and run
this command:
$ git remote add origin https://github.com/vlad/planets.git
Make sure to use the URL for your repository rather than Vlad’s: the only
difference should be your username instead of vlad.
origin is a local name used to refer to the remote repository. It could be called
anything, but origin is a convention that is often used by default in git
and GitHub, so it’s helpful to stick with this unless there’s a reason not to.
We can check that the command has worked by running git remote -v:
$ git remote -v
origin git@github.com:vlad/planets.git (fetch)
origin git@github.com:vlad/planets.git (push)
We’ll discuss remotes in more detail in the next episode, while talking about how they might be used for collaboration.
3. Personal access tokens (PAT)
Personal access tokens (PATs) is the recommended way for authentication to GitHub instead of passwords. Tokens are more flexible than passwords, meaning that a token can be authorized to perform certain operations, but not others. Tokens are also disposable, i.e. when they are not needed anymore they can be easily deleted. To create a token go to Settings -> <> Developer settings -> Personal access tokens -> Generate new token.
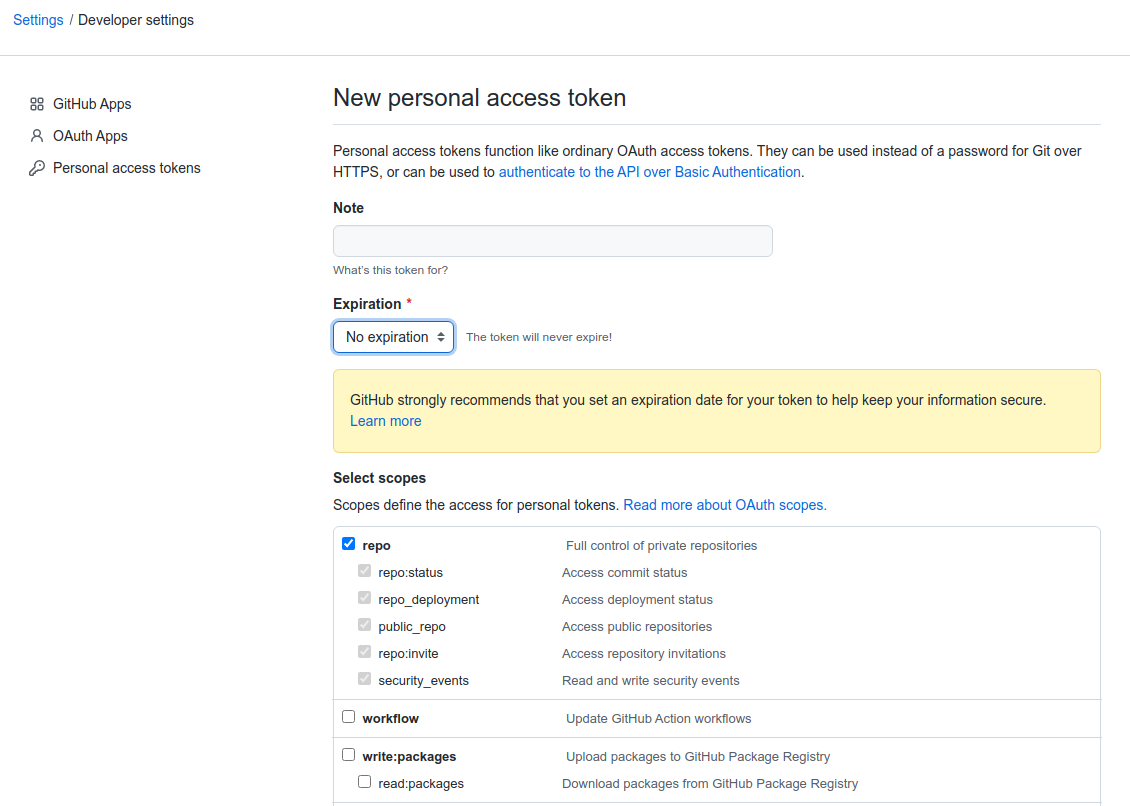
You have to specify an expiration date of your tokes. For most cases, an expiration date of 1 year is fine. As a security precaution, GitHub automatically removes personal access tokens that haven’t been used in a year.
You can assign scopes to tokens, which define what the token can have access to. A token with no assigned scopes can only access public information. To use your token to access repositories from the command line, select repo.
If you see something similar to the image below, than congratulations! You have created your first token.
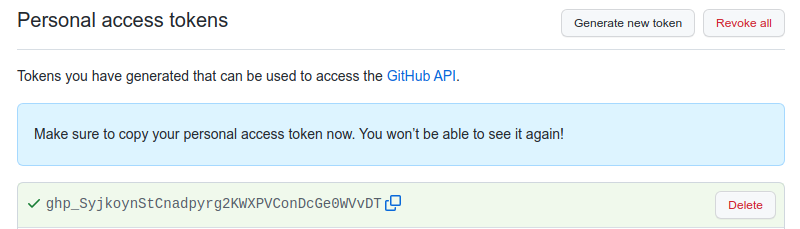
It is time to use the token. Copy it right away, because it will not be possible to see the token afterwards.
4. Push local changes to a remote
Now that the token is created, we can return to the remote. Before pushing to remote, it’s best to tell git to save the token:
git config credential.helper store
Next, it’s time to push the changes from our local repository to the repository on GitHub:
$ git push origin main
This will ask for a password; simply paste your token and press Enter. Because you tell git to save the token, next time you pull/push to remote, you won’t need to reinsert the token.
Enumerating objects: 16, done.
Counting objects: 100% (16/16), done.
Delta compression using up to 8 threads.
Compressing objects: 100% (11/11), done.
Writing objects: 100% (16/16), 1.45 KiB | 372.00 KiB/s, done.
Total 16 (delta 2), reused 0 (delta 0)
remote: Resolving deltas: 100% (2/2), done.
To https://github.com/vlad/planets.git
* [new branch] main -> main
The ‘-u’ Flag
You may see a
-uoption used withgit pushin some documentation. This option is synonymous with the--set-upstream-tooption for thegit branchcommand, and is used to associate the current branch with a remote branch so that thegit pullcommand can be used without any arguments. To do this, simply usegit push -u origin mainonce the remote has been set up.
We can pull changes from the remote repository to the local one as well:
$ git pull origin main
From https://github.com/vlad/planets
* branch main -> FETCH_HEAD
Already up-to-date.
Pulling has no effect in this case because the two repositories are already synchronized. If someone else had pushed some changes to the repository on GitHub, though, this command would download them to our local repository.
GitHub GUI
Browse to your
planetsrepository on GitHub. Under the Code tab, find and click on the text that says “XX commits” (where “XX” is some number). Hover over, and click on, the three buttons to the right of each commit. What information can you gather/explore from these buttons? How would you get that same information in the shell?Solution
The left-most button (with the picture of a clipboard) copies the full identifier of the commit to the clipboard. In the shell,
git logwill show you the full commit identifier for each commit.When you click on the middle button, you’ll see all of the changes that were made in that particular commit. Green shaded lines indicate additions and red ones removals. In the shell we can do the same thing with
git diff. In particular,git diff ID1..ID2where ID1 and ID2 are commit identifiers (e.g.git diff a3bf1e5..041e637) will show the differences between those two commits.The right-most button lets you view all of the files in the repository at the time of that commit. To do this in the shell, we’d need to checkout the repository at that particular time. We can do this with
git checkout IDwhere ID is the identifier of the commit we want to look at. If we do this, we need to remember to put the repository back to the right state afterwards!
Uploading files directly in GitHub browser
Github also allows you to skip the command line and upload files directly to your repository without having to leave the browser. There are two options. First you can click the “Upload files” button in the toolbar at the top of the file tree. Or, you can drag and drop files from your desktop onto the file tree. You can read more about this on this GitHub page
GitHub Timestamp
Create a remote repository on GitHub. Push the contents of your local repository to the remote. Make changes to your local repository and push these changes. Go to the repo you just created on GitHub and check the timestamps of the files. How does GitHub record times, and why?
Solution
GitHub displays timestamps in a human readable relative format (i.e. “22 hours ago” or “three weeks ago”). However, if you hover over the timestamp, you can see the exact time at which the last change to the file occurred.
Push vs. Commit
In this episode, we introduced the “git push” command. How is “git push” different from “git commit”?
Solution
When we push changes, we’re interacting with a remote repository to update it with the changes we’ve made locally (often this corresponds to sharing the changes we’ve made with others). Commit only updates your local repository.
GitHub License and README files
In this episode we learned about creating a remote repository on GitHub, but when you initialized your GitHub repo, you didn’t add a README.md or a license file. If you had, what do you think would have happened when you tried to link your local and remote repositories?
Solution
In this case, we’d see a merge conflict due to unrelated histories. When GitHub creates a README.md file, it performs a commit in the remote repository. When you try to pull the remote repository to your local repository, Git detects that they have histories that do not share a common origin and refuses to merge.
$ git pull origin mainwarning: no common commits remote: Enumerating objects: 3, done. remote: Counting objects: 100% (3/3), done. remote: Total 3 (delta 0), reused 0 (delta 0), pack-reused 0 Unpacking objects: 100% (3/3), done. From https://github.com/vlad/planets * branch main -> FETCH_HEAD * [new branch] main -> origin/main fatal: refusing to merge unrelated historiesYou can force git to merge the two repositories with the option
--allow-unrelated-histories. Be careful when you use this option and carefully examine the contents of local and remote repositories before merging.$ git pull --allow-unrelated-histories origin mainFrom https://github.com/vlad/planets * branch main -> FETCH_HEAD Merge made by the 'recursive' strategy. README.md | 1 + 1 file changed, 1 insertion(+) create mode 100644 README.md
Key Points
A local Git repository can be connected to one or more remote repositories.
Use the SSH protocol to connect to remote repositories.
git pushcopies changes from a local repository to a remote repository.
git pullcopies changes from a remote repository to a local repository.
Lunch Break
Overview
Teaching: min
Exercises: minQuestions
Objectives
Key Points
Collaborating
Overview
Teaching: 25 min
Exercises: 0 minQuestions
How can I use version control to collaborate with other people?
Objectives
Clone a remote repository.
Collaborate by pushing to a common repository.
Describe the basic collaborative workflow.
For the next step, get into pairs. One person will be the “Owner” and the other will be the “Collaborator”. The goal is that the Collaborator add changes into the Owner’s repository. We will switch roles at the end, so both persons will play Owner and Collaborator.
Practicing By Yourself
If you’re working through this lesson on your own, you can carry on by opening a second terminal window. This window will represent your partner, working on another computer. You won’t need to give anyone access on GitHub, because both ‘partners’ are you.
The Owner needs to give the Collaborator access. On GitHub, click the settings button on the right, select Manage access, click Invite a collaborator, and then enter your partner’s username.
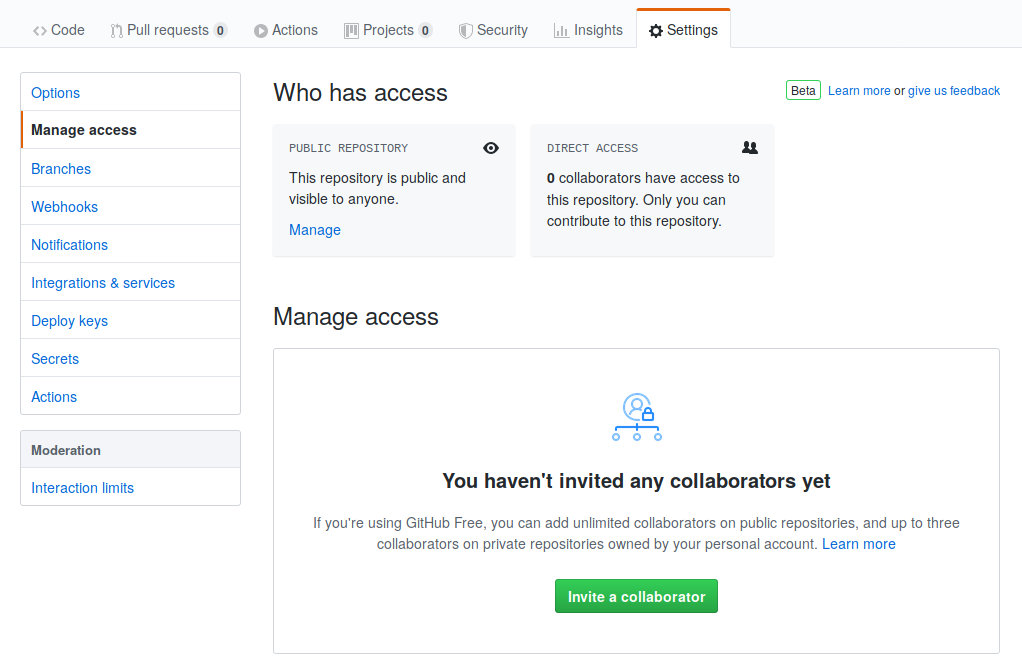
To accept access to the Owner’s repo, the Collaborator needs to go to https://github.com/notifications or check for email notification. Once there she can accept access to the Owner’s repo.
Next, the Collaborator needs to download a copy of the Owner’s repository to her machine. This is called “cloning a repo”.
The Collaborator doesn’t want to overwrite her own version of planets.git, so
needs to clone the Owner’s repository to a different location than her own
repository with the same name.
To clone the Owner’s repo into her Desktop folder, the Collaborator enters:
$ git clone git@github.com:vlad/planets.git ~/Desktop/vlad-planets
Replace ‘vlad’ with the Owner’s username.
If you choose to clone without the clone path
(~/Desktop/vlad-planets) specified at the end,
you will clone inside your own planets folder!
Make sure to navigate to the Desktop folder first.

The Collaborator can now make a change in her clone of the Owner’s repository, exactly the same way as we’ve been doing before:
$ cd ~/Desktop/vlad-planets
$ nano pluto.txt
$ cat pluto.txt
It is so a planet!
$ git add pluto.txt
$ git commit -m "Add notes about Pluto"
1 file changed, 1 insertion(+)
create mode 100644 pluto.txt
Then push the change to the Owner’s repository on GitHub:
$ git push origin main
Enumerating objects: 4, done.
Counting objects: 4, done.
Delta compression using up to 4 threads.
Compressing objects: 100% (2/2), done.
Writing objects: 100% (3/3), 306 bytes, done.
Total 3 (delta 0), reused 0 (delta 0)
To https://github.com/vlad/planets.git
9272da5..29aba7c main -> main
Note that we didn’t have to create a remote called origin: Git uses this
name by default when we clone a repository. (This is why origin was a
sensible choice earlier when we were setting up remotes by hand.)
Take a look at the Owner’s repository on GitHub again, and you should be able to see the new commit made by the Collaborator. You may need to refresh your browser to see the new commit.
Some more about remotes
In this episode and the previous one, our local repository has had a single “remote”, called
origin. A remote is a copy of the repository that is hosted somewhere else, that we can push to and pull from, and there’s no reason that you have to work with only one. For example, on some large projects you might have your own copy in your own GitHub account (you’d probably call thisorigin) and also the main “upstream” project repository (let’s call thisupstreamfor the sake of examples). You would pull fromupstreamfrom time to time to get the latest updates that other people have committed.Remember that the name you give to a remote only exists locally. It’s an alias that you choose - whether
origin, orupstream, orfred- and not something intrinstic to the remote repository.The
git remotefamily of commands is used to set up and alter the remotes associated with a repository. Here are some of the most useful ones:
git remote -vlists all the remotes that are configured (we already used this in the last episode)git remote add [name] [url]is used to add a new remotegit remote remove [name]removes a remote. Note that it doesn’t affect the remote repository at all - it just removes the link to it from the local repo.git remote set-url [name] [newurl]changes the URL that is associated with the remote. This is useful if it has moved, e.g. to a different GitHub account, or from GitHub to a different hosting service. Or, if we made a typo when adding it!git remote rename [oldname] [newname]changes the local alias by which a remote is known - its name. For example, one could use this to changeupstreamtofred.
To download the Collaborator’s changes from GitHub, the Owner now enters:
$ git pull origin main
remote: Enumerating objects: 4, done.
remote: Counting objects: 100% (4/4), done.
remote: Compressing objects: 100% (2/2), done.
remote: Total 3 (delta 0), reused 3 (delta 0), pack-reused 0
Unpacking objects: 100% (3/3), done.
From https://github.com/vlad/planets
* branch main -> FETCH_HEAD
9272da5..29aba7c main -> origin/main
Updating 9272da5..29aba7c
Fast-forward
pluto.txt | 1 +
1 file changed, 1 insertion(+)
create mode 100644 pluto.txt
Now the three repositories (Owner’s local, Collaborator’s local, and Owner’s on GitHub) are back in sync.
A Basic Collaborative Workflow
In practice, it is good to be sure that you have an updated version of the repository you are collaborating on, so you should
git pullbefore making our changes. The basic collaborative workflow would be:
- update your local repo with
git pull origin main,- make your changes and stage them with
git add,- commit your changes with
git commit -m, and- upload the changes to GitHub with
git push origin mainIt is better to make many commits with smaller changes rather than of one commit with massive changes: small commits are easier to read and review.
Switch Roles and Repeat
Switch roles and repeat the whole process.
Review Changes
The Owner pushed commits to the repository without giving any information to the Collaborator. How can the Collaborator find out what has changed with command line? And on GitHub?
Solution
On the command line, the Collaborator can use
git fetch origin mainto get the remote changes into the local repository, but without merging them. Then by runninggit diff main origin/mainthe Collaborator will see the changes output in the terminal.On GitHub, the Collaborator can go to the repository and click on “commits” to view the most recent commits pushed to the repository.
Comment Changes in GitHub
The Collaborator has some questions about one line change made by the Owner and has some suggestions to propose.
With GitHub, it is possible to comment the diff of a commit. Over the line of code to comment, a blue comment icon appears to open a comment window.
The Collaborator posts its comments and suggestions using GitHub interface.
Version History, Backup, and Version Control
Some backup software can keep a history of the versions of your files. They also allows you to recover specific versions. How is this functionality different from version control? What are some of the benefits of using version control, Git and GitHub?
Key Points
git clonecopies a remote repository to create a local repository with a remote calledoriginautomatically set up.
Conflicts
Overview
Teaching: 15 min
Exercises: 0 minQuestions
What do I do when my changes conflict with someone else’s?
Objectives
Explain what conflicts are and when they can occur.
Resolve conflicts resulting from a merge.
As soon as people can work in parallel, they’ll likely step on each other’s toes. This will even happen with a single person: if we are working on a piece of software on both our laptop and a server in the lab, we could make different changes to each copy. Version control helps us manage these conflicts by giving us tools to resolve overlapping changes.
To see how we can resolve conflicts, we must first create one. The file
mars.txt currently looks like this in both partners’ copies of our planets
repository:
$ cat mars.txt
Cold and dry, but everything is my favorite color
The two moons may be a problem for Wolfman
But the Mummy will appreciate the lack of humidity
Let’s add a line to the collaborator’s copy only:
$ nano mars.txt
$ cat mars.txt
Cold and dry, but everything is my favorite color
The two moons may be a problem for Wolfman
But the Mummy will appreciate the lack of humidity
This line added to Wolfman's copy
and then push the change to GitHub:
$ git add mars.txt
$ git commit -m "Add a line in our home copy"
[main 5ae9631] Add a line in our home copy
1 file changed, 1 insertion(+)
$ git push origin main
Enumerating objects: 5, done.
Counting objects: 100% (5/5), done.
Delta compression using up to 8 threads
Compressing objects: 100% (3/3), done.
Writing objects: 100% (3/3), 331 bytes | 331.00 KiB/s, done.
Total 3 (delta 2), reused 0 (delta 0)
remote: Resolving deltas: 100% (2/2), completed with 2 local objects.
To https://github.com/vlad/planets.git
29aba7c..dabb4c8 main -> main
Now let’s have the owner make a different change to their copy without updating from GitHub:
$ nano mars.txt
$ cat mars.txt
Cold and dry, but everything is my favorite color
The two moons may be a problem for Wolfman
But the Mummy will appreciate the lack of humidity
We added a different line in the other copy
We can commit the change locally:
$ git add mars.txt
$ git commit -m "Add a line in my copy"
[main 07ebc69] Add a line in my copy
 1 file changed, 1 insertion(+)
but Git won’t let us push it to GitHub:
$ git push origin main
To https://github.com/vlad/planets.git
 ! [rejected]        main -> main (fetch first)
error: failed to push some refs to 'https://github.com/vlad/planets.git'
hint: Updates were rejected because the remote contains work that you do
hint: not have locally. This is usually caused by another repository pushing
hint: to the same ref. You may want to first integrate the remote changes
hint: (e.g., 'git pull ...') before pushing again.
hint: See the 'Note about fast-forwards' in 'git push --help' for details.

Git rejects the push because it detects that the remote repository has new updates that have not been incorporated into the local branch. What we have to do is pull the changes from GitHub, merge them into the copy we’re currently working in, and then push that. Let’s start by pulling:
$ git pull origin main
remote: Enumerating objects: 5, done.
remote: Counting objects: 100% (5/5), done.
remote: Compressing objects: 100% (1/1), done.
remote: Total 3 (delta 2), reused 3 (delta 2), pack-reused 0
Unpacking objects: 100% (3/3), done.
From https://github.com/vlad/planets
 * branch            main     -> FETCH_HEAD
    29aba7c..dabb4c8  main     -> origin/main
Auto-merging mars.txt
CONFLICT (content): Merge conflict in mars.txt
Automatic merge failed; fix conflicts and then commit the result.
The git pull command updates the local repository to include those
changes already included in the remote repository.
After the changes from remote branch have been fetched, Git detects that changes made to the local copy
overlap with those made to the remote repository, and therefore refuses to merge the two versions to
stop us from trampling on our previous work. The conflict is marked in
in the affected file:
$ cat mars.txt
Cold and dry, but everything is my favorite color
The two moons may be a problem for Wolfman
But the Mummy will appreciate the lack of humidity
<<<<<<< HEAD
We added a different line in the other copy
=======
This line added to Wolfman's copy
>>>>>>> dabb4c8c450e8475aee9b14b4383acc99f42af1d
Our change is preceded by <<<<<<< HEAD.
Git has then inserted ======= as a separator between the conflicting changes
and marked the end of the content downloaded from GitHub with >>>>>>>.
(The string of letters and digits after that marker
identifies the commit we’ve just downloaded.)
It is now up to us to edit this file to remove these markers and reconcile the changes. We can do anything we want: keep the change made in the local repository, keep the change made in the remote repository, write something new to replace both, or get rid of the change entirely. Let’s replace both so that the file looks like this:
$ cat mars.txt
Cold and dry, but everything is my favorite color
The two moons may be a problem for Wolfman
But the Mummy will appreciate the lack of humidity
We removed the conflict on this line
To finish merging,
we add mars.txt to the changes being made by the merge
and then commit:
$ git add mars.txt
$ git status
On branch main
All conflicts fixed but you are still merging.
  (use "git commit" to conclude merge)

Changes to be committed:

	modified:   mars.txt
$ git commit -m "Merge changes from GitHub"
[main 2abf2b1] Merge changes from GitHub
Now we can push our changes to GitHub:
$ git push origin main
Enumerating objects: 10, done.
Counting objects: 100% (10/10), done.
Delta compression using up to 8 threads
Compressing objects: 100% (6/6), done.
Writing objects: 100% (6/6), 645 bytes | 645.00 KiB/s, done.
Total 6 (delta 4), reused 0 (delta 0)
remote: Resolving deltas: 100% (4/4), completed with 2 local objects.
To https://github.com/vlad/planets.git
   dabb4c8..2abf2b1  main -> main
Git keeps track of what we’ve merged with what, so we don’t have to fix things by hand again when the collaborator who made the first change pulls again:
$ git pull origin main
remote: Enumerating objects: 10, done.
remote: Counting objects: 100% (10/10), done.
remote: Compressing objects: 100% (2/2), done.
remote: Total 6 (delta 4), reused 6 (delta 4), pack-reused 0
Unpacking objects: 100% (6/6), done.
From https://github.com/vlad/planets
 * branch            main     -> FETCH_HEAD
    dabb4c8..2abf2b1  main     -> origin/main
Updating dabb4c8..2abf2b1
Fast-forward
 mars.txt | 2 +-
 1 file changed, 1 insertion(+), 1 deletion(-)
We get the merged file:
$ cat mars.txt
Cold and dry, but everything is my favorite color
The two moons may be a problem for Wolfman
But the Mummy will appreciate the lack of humidity
We removed the conflict on this line
We don’t need to merge again because Git knows someone has already done that.
Git’s ability to resolve conflicts is very useful, but conflict resolution costs time and effort, and can introduce errors if conflicts are not resolved correctly. If you find yourself resolving a lot of conflicts in a project, consider these technical approaches to reducing them:
- Pull from upstream more frequently, especially before starting new work
- Use topic branches to segregate work, merging to main when complete
- Make smaller more atomic commits
- Where logically appropriate, break large files into smaller ones so that it is less likely that two authors will alter the same file simultaneously
Conflicts can also be minimized with project management strategies:
- Clarify who is responsible for what areas with your collaborators
- Discuss what order tasks should be carried out in with your collaborators so that tasks expected to change the same lines won’t be worked on simultaneously
- If the conflicts are stylistic churn (e.g. tabs vs. spaces), establish a
project convention that is governing and use code style tools (e.g.
htmltidy,perltidy,rubocop, etc.) to enforce, if necessary
Solving Conflicts that You Create
Clone the repository created by your instructor. Add a new file to it, and modify an existing file (your instructor will tell you which one). When asked by your instructor, pull her changes from the repository to create a conflict, then resolve it.
Conflicts on Non-textual files
What does Git do when there is a conflict in an image or some other non-textual file that is stored in version control?
Solution
Let’s try it. Suppose Dracula takes a picture of Martian surface and calls it
mars.jpg.If you do not have an image file of Mars available, you can create a dummy binary file like this:
$ head -c 1024 /dev/urandom > mars.jpg
$ ls -lh mars.jpg
-rw-r--r-- 1 vlad 57095 1.0K Mar 8 20:24 mars.jpg
lsshows us that this created a 1-kilobyte file. It is full of random bytes read from the special file,/dev/urandom.Now, suppose Dracula adds
mars.jpgto his repository:$ git add mars.jpg $ git commit -m "Add picture of Martian surface"[main 8e4115c] Add picture of Martian surface 1 file changed, 0 insertions(+), 0 deletions(-) create mode 100644 mars.jpgSuppose that Wolfman has added a similar picture in the meantime. His is a picture of the Martian sky, but it is also called
mars.jpg. When Dracula tries to push, he gets a familiar message:$ git push origin mainTo https://github.com/vlad/planets.git ! [rejected] main -> main (fetch first) error: failed to push some refs to 'https://github.com/vlad/planets.git' hint: Updates were rejected because the remote contains work that you do hint: not have locally. This is usually caused by another repository pushing hint: to the same ref. You may want to first integrate the remote changes hint: (e.g., 'git pull ...') before pushing again. hint: See the 'Note about fast-forwards' in 'git push --help' for details.We’ve learned that we must pull first and resolve any conflicts:
$ git pull origin mainWhen there is a conflict on an image or other binary file, git prints a message like this:
$ git pull origin main
remote: Counting objects: 3, done.
remote: Compressing objects: 100% (3/3), done.
remote: Total 3 (delta 0), reused 0 (delta 0)
Unpacking objects: 100% (3/3), done.
From https://github.com/vlad/planets.git
 * branch            main     -> FETCH_HEAD
   6a67967..439dc8c  main     -> origin/main
warning: Cannot merge binary files: mars.jpg (HEAD vs. 439dc8c08869c342438f6dc4a2b615b05b93c76e)
Auto-merging mars.jpg
CONFLICT (add/add): Merge conflict in mars.jpg
Automatic merge failed; fix conflicts and then commit the result.
The conflict message here is mostly the same as it was for
mars.txt, but there is one key additional line:warning: Cannot merge binary files: mars.jpg (HEAD vs. 439dc8c08869c342438f6dc4a2b615b05b93c76e)Git cannot automatically insert conflict markers into an image as it does for text files. So, instead of editing the image file, we must check out the version we want to keep. Then we can add and commit this version.
On the key line above, Git has conveniently given us commit identifiers for the two versions of
mars.jpg. Our version isHEAD, and Wolfman’s version is439dc8c0.... If we want to use our version, we can usegit checkout:$ git checkout HEAD mars.jpg $ git add mars.jpg $ git commit -m "Use image of surface instead of sky"[main 21032c3] Use image of surface instead of skyIf instead we want to use Wolfman’s version, we can use
git checkoutwith Wolfman’s commit identifier,439dc8c0:$ git checkout 439dc8c0 mars.jpg $ git add mars.jpg $ git commit -m "Use image of sky instead of surface"[main da21b34] Use image of sky instead of surfaceWe can also keep both images. The catch is that we cannot keep them under the same name. But, we can check out each version in succession and rename it, then add the renamed versions. First, check out each image and rename it:
$ git checkout HEAD mars.jpg
$ git mv mars.jpg mars-surface.jpg
$ git checkout 439dc8c0 mars.jpg
$ mv mars.jpg mars-sky.jpg
Then, remove the old
mars.jpgand add the two new files:$ git rm mars.jpg $ git add mars-surface.jpg $ git add mars-sky.jpg $ git commit -m "Use two images: surface and sky"[main 94ae08c] Use two images: surface and sky 2 files changed, 0 insertions(+), 0 deletions(-) create mode 100644 mars-sky.jpg rename mars.jpg => mars-surface.jpg (100%)Now both images of Mars are checked into the repository, and
mars.jpgno longer exists.
A Typical Work Session
You sit down at your computer to work on a shared project that is tracked in a remote Git repository. During your work session, you take the following actions, but not in this order:
- Make changes by appending the number
100to a text filenumbers.txt- Update remote repository to match the local repository
- Celebrate your success with some fancy beverage(s)
- Update local repository to match the remote repository
- Stage changes to be committed
- Commit changes to the local repository
In what order should you perform these actions to minimize the chances of conflicts? Put the commands above in order in the action column of the table below. When you have the order right, see if you can write the corresponding commands in the command column. A few steps are populated to get you started.
order action . . . . . . . . . . command . . . . . . . . . . 1 2 echo 100 >> numbers.txt3 4 5 6 Celebrate! AFKSolution
order action . . . . . . command . . . . . . . . . . . . . . . . . . . 1 Update local git pull origin main2 Make changes echo 100 >> numbers.txt3 Stage changes git add numbers.txt4 Commit changes git commit -m "Add 100 to numbers.txt"5 Update remote git push origin main6 Celebrate! AFK
Key Points
Conflicts occur when two or more people change the same lines of the same file.
The version control system does not allow people to overwrite each other’s changes blindly, but highlights conflicts so that they can be resolved.
Open Science
Overview
Teaching: 5 min
Exercises: 5 minQuestions
How can version control help me make my work more open?
Objectives
Explain how a version control system can be leveraged as an electronic lab notebook for computational work.
The opposite of “open” isn’t “closed”. The opposite of “open” is “broken”.
— John Wilbanks
Free sharing of information might be the ideal in science, but the reality is often more complicated. Normal practice today looks something like this:
- A scientist collects some data and stores it on a machine that is occasionally backed up by her department.
- She then writes or modifies a few small programs (which also reside on her machine) to analyze that data.
- Once she has some results, she writes them up and submits her paper. She might include her data – a growing number of journals require this – but she probably doesn’t include her code.
- Time passes.
- The journal sends her reviews written anonymously by a handful of other people in her field. She revises her paper to satisfy them, during which time she might also modify the scripts she wrote earlier, and resubmits.
- More time passes.
- The paper is eventually published. It might include a link to an online copy of her data, but the paper itself will be behind a paywall: only people who have personal or institutional access will be able to read it.
For a growing number of scientists, though, the process looks like this:
- The data that the scientist collects is stored in an open access repository like figshare or Zenodo, possibly as soon as it’s collected, and given its own Digital Object Identifier (DOI). Or the data was already published and is stored in Dryad.
- The scientist creates a new repository on GitHub to hold her work.
- As she does her analysis, she pushes changes to her scripts (and possibly some output files) to that repository. She also uses the repository for her paper; that repository is then the hub for collaboration with her colleagues.
- When she’s happy with the state of her paper, she posts a version to arXiv or some other preprint server to invite feedback from peers.
- Based on that feedback, she may post several revisions before finally submitting her paper to a journal.
- The published paper includes links to her preprint and to her code and data repositories, which makes it much easier for other scientists to use her work as starting point for their own research.
This open model accelerates discovery: the more open work is, the more widely it is cited and re-used. However, people who want to work this way need to make some decisions about what exactly “open” means and how to do it. You can find more on the different aspects of Open Science in this book.
This is one of the (many) reasons we teach version control. When used diligently, it answers the “how” question by acting as a shareable electronic lab notebook for computational work:
- The conceptual stages of your work are documented, including who did what and when. Every step is stamped with an identifier (the commit ID) that is for most intents and purposes unique.
- You can tie documentation of rationale, ideas, and other intellectual work directly to the changes that spring from them.
- You can refer to what you used in your research to obtain your computational results in a way that is unique and recoverable.
- With a version control system such as Git, the entire history of the repository is easy to archive for perpetuity.
Making Code Citable
Anything that is hosted in a version control repository (data, code, papers, etc.) can be turned into a citable object. You’ll learn how to do this in the later episode on Citation.
How Reproducible Is My Work?
Ask one of your labmates to reproduce a result you recently obtained using only what they can find in your papers or on the web. Try to do the same for one of their results, then try to do it for a result from a lab you work with.
How to Find an Appropriate Data Repository?
Surf the internet for a couple of minutes and check out the data repositories mentioned above: Figshare, Zenodo, Dryad. Depending on your field of research, you might find community-recognized repositories that are well-known in your field. You might also find useful these data repositories recommended by Nature. Discuss with your neighbor which data repository you might want to approach for your current project and explain why.
How to Track Large Data or Image Files using Git?
Large data or image files such as
.md5or.psdfile types can be tracked within a github repository using the Git Large File Storage open source extension tool. This tool automatically uploads large file contents to a remote server and replaces the file with a text pointer within the github repository.Try downloading and installing the Git Large File Storage extension tool, then add tracking of a large file to your github repository. Ask a colleague to clone your repository and describe what they see when they access that large file.
Key Points
Open scientific work is more useful and more highly cited than closed.
Citation
Overview
Teaching: 5 min
Exercises: 0 minQuestions
How can I make my work easier to cite?
Objectives
Make your work easy to cite
You may want to include a file called CITATION or CITATION.txt
that describes how to reference your project;
the one for Software
Carpentry
states:
To reference Software Carpentry in publications, please cite both of the following:

Greg Wilson: "Software Carpentry: Getting Scientists to Write Better
Code by Making Them More Productive".  Computing in Science &
Engineering, Nov-Dec 2006.

Greg Wilson: "Software Carpentry: Lessons Learned". arXiv:1307.5448,
July 2013.

@article{wilson-software-carpentry-2006,
    author =  {Greg Wilson},
    title =   {Software Carpentry: Getting Scientists to Write Better Code by Making Them More Productive},
    journal = {Computing in Science \& Engineering},
    month =   {November--December},
    year =    {2006},
}

@online{wilson-software-carpentry-2013,
  author      = {Greg Wilson},
  title       = {Software Carpentry: Lessons Learned},
  version     = {1},
  date        = {2013-07-20},
  eprinttype  = {arxiv},
  eprint      = {1307.5448}
}
More detailed advice, and other ways to make your code citable can be found at the Software Sustainability Institute blog and in:
Smith AM, Katz DS, Niemeyer KE, FORCE11 Software Citation Working Group. (2016) Software citation
principles. [PeerJ Computer Science 2:e86](https://peerj.com/articles/cs-86/)
https://doi.org/10.7717/peerj-cs.8
There is also an @software{...
BibTeX entry type in case
no “umbrella” citation like a paper or book exists for the project you want to
make citable.
Key Points
Add a CITATION file to a repository to explain how you want your work cited.
Hosting
Overview
Teaching: 10 min
Exercises: 0 minQuestions
Where should I host my version control repositories?
Objectives
Explain different options for hosting scientific work.
The second big question for groups that want to open up their work is where to host their code and data. One option is for the lab, the department, or the university to provide a server, manage accounts and backups, and so on. The main benefit of this is that it clarifies who owns what, which is particularly important if any of the material is sensitive (i.e., relates to experiments involving human subjects or may be used in a patent application). The main drawbacks are the cost of providing the service and its longevity: a scientist who has spent ten years collecting data would like to be sure that data will still be available ten years from now, but that’s well beyond the lifespan of most of the grants that fund academic infrastructure.
Another option is to purchase a domain and pay an Internet service provider (ISP) to host it. This gives the individual or group more control, and sidesteps problems that can arise when moving from one institution to another, but requires more time and effort to set up than either the option above or the option below.
The third option is to use a public hosting service like GitHub, GitLab,or BitBucket. Each of these services provides a web interface that enables people to create, view, and edit their code repositories. These services also provide communication and project management tools including issue tracking, wiki pages, email notifications, and code reviews. These services benefit from economies of scale and network effects: it’s easier to run one large service well than to run many smaller services to the same standard. It’s also easier for people to collaborate. Using a popular service can help connect your project with communities already using the same service.
As an example, Software Carpentry is on GitHub where you can find the source for this page. Anyone with a GitHub account can suggest changes to this text.
GitHub repositories can also be assigned DOIs, by connecting its releases to
Zenodo. For example,
10.5281/zenodo.57467 is the DOI that has
been “minted” for this introduction to Git.
Using large, well-established services can also help you quickly take advantage of powerful tools. One such tool, continuous integration (CI), can automatically run software builds and tests whenever code is committed or pull requests are submitted. Direct integration of CI with an online hosting service means this information is present in any pull request, and helps maintain code integrity and quality standards. While CI is still available in self-hosted situations, there is much less setup and maintenance involved with using an online service. Furthermore, such tools are often provided free of charge to open source projects, and are also available for private repositories for a fee.
Institutional Barriers
Sharing is the ideal for science, but many institutions place restrictions on sharing, for example to protect potentially patentable intellectual property. If you encounter such restrictions, it can be productive to inquire about the underlying motivations and either to request an exception for a specific project or domain, or to push more broadly for institutional reform to support more open science.
Can My Work Be Public?
Find out whether you are allowed to host your work openly on a public forge. Can you do this unilaterally, or do you need permission from someone in your institution? If so, who?
Where Can I Share My Work?
Does your institution have a repository or repositories that you can use to share your papers, data and software? How do institutional repositories differ from services like arXiV, figshare, GitHub or GitLab?
Key Points
Projects can be hosted on university servers, on personal domains, or on public forges.
Rules regarding intellectual property and storage of sensitive information apply no matter where code and data are hosted.
Coffee Break
Overview
Teaching: min
Exercises: minQuestions
Objectives
Key Points
Using Git from RStudio
Overview
Teaching: 10 min
Exercises: 0 minQuestions
How can I use Git with RStudio?
Objectives
Understand how to use Git from RStudio.
Version control can be very useful when developing data analysis scripts. For that reason, the popular development environment RStudio for the R programming language has built-in integration with Git. While some advanced Git features still require the command-line, RStudio has a nice interface for many common Git operations.
RStudio allows us to create a project associated with a given directory to keep track of various related files. To be able to track the development of the project over time, to be able to revert to previous versions, and to collaborate with others, we version control the Rstudio project with Git. To get started using Git in RStudio, we create a new project:
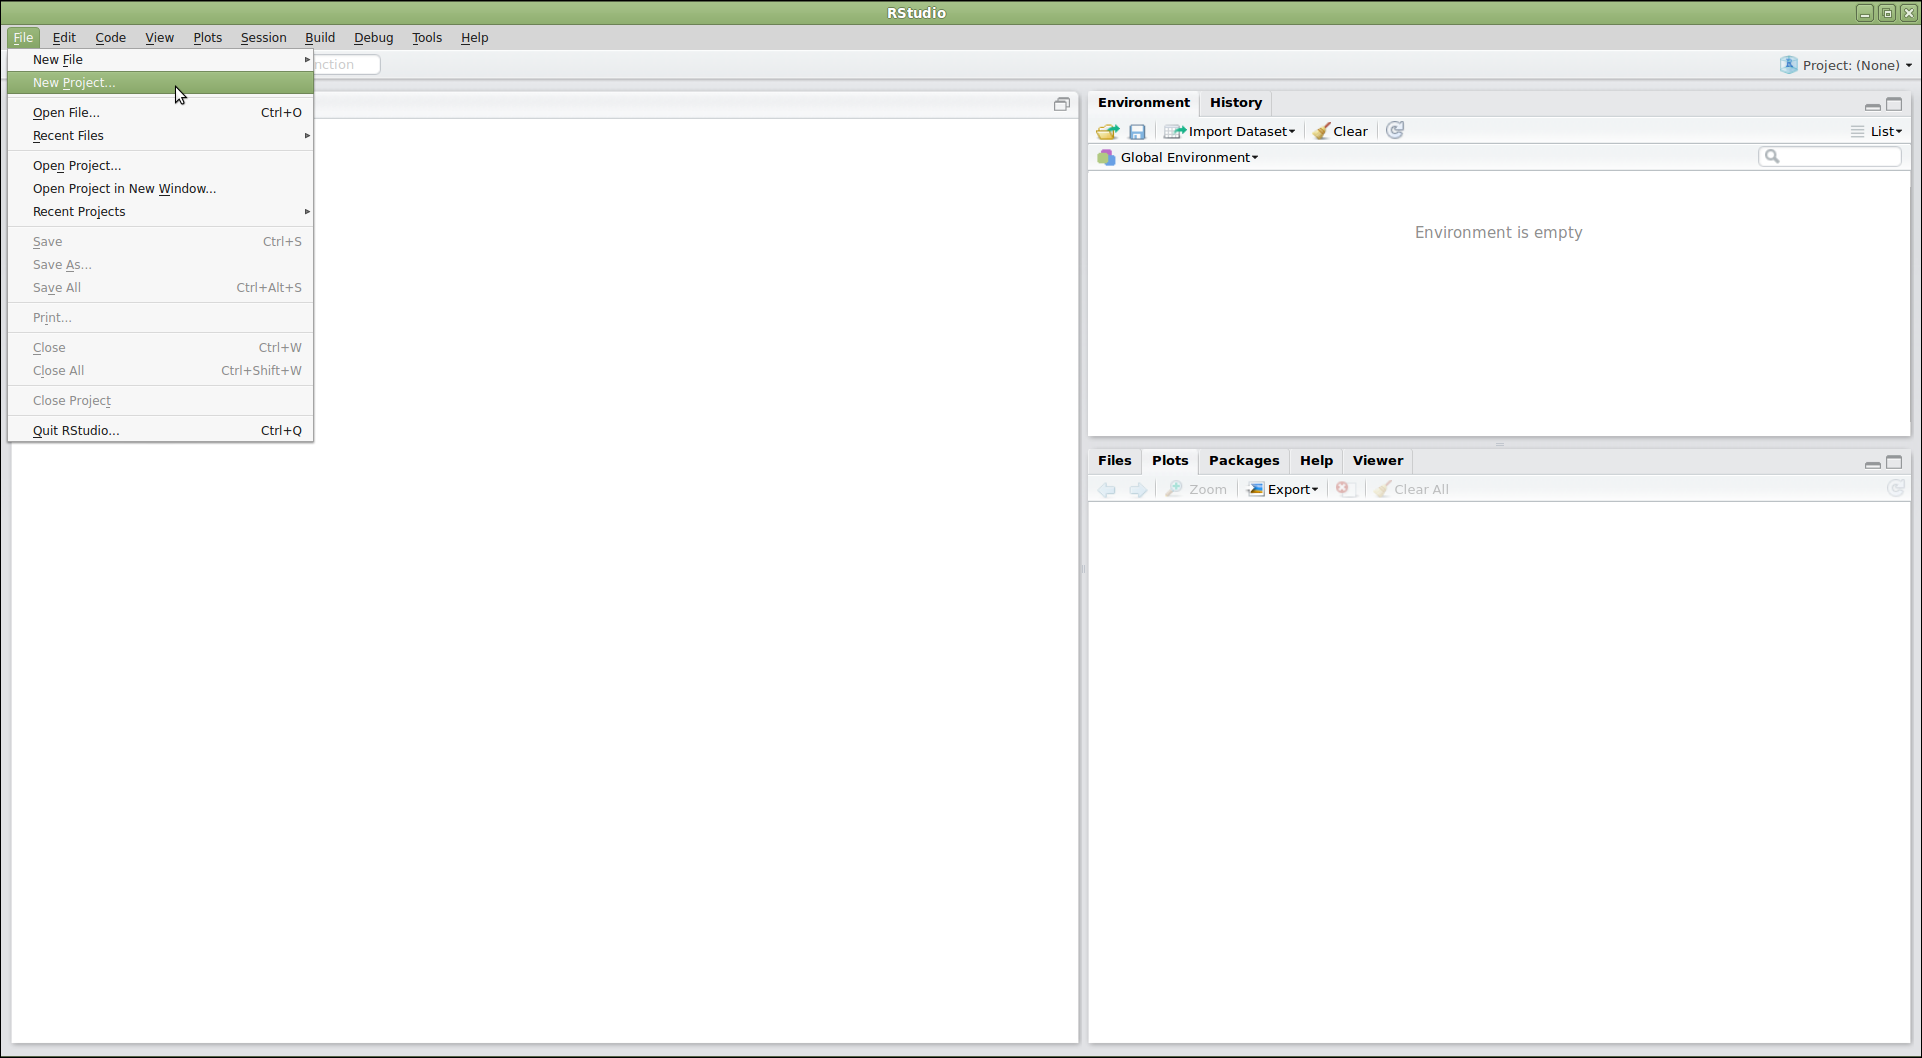
This will open a dialog asking us how we want to create the project. We have some options here. Let’s say that we want to use RStudio with the planets repository that we already made. Since that repository lives in a directory on our computer, we choose the option “Existing Directory”:
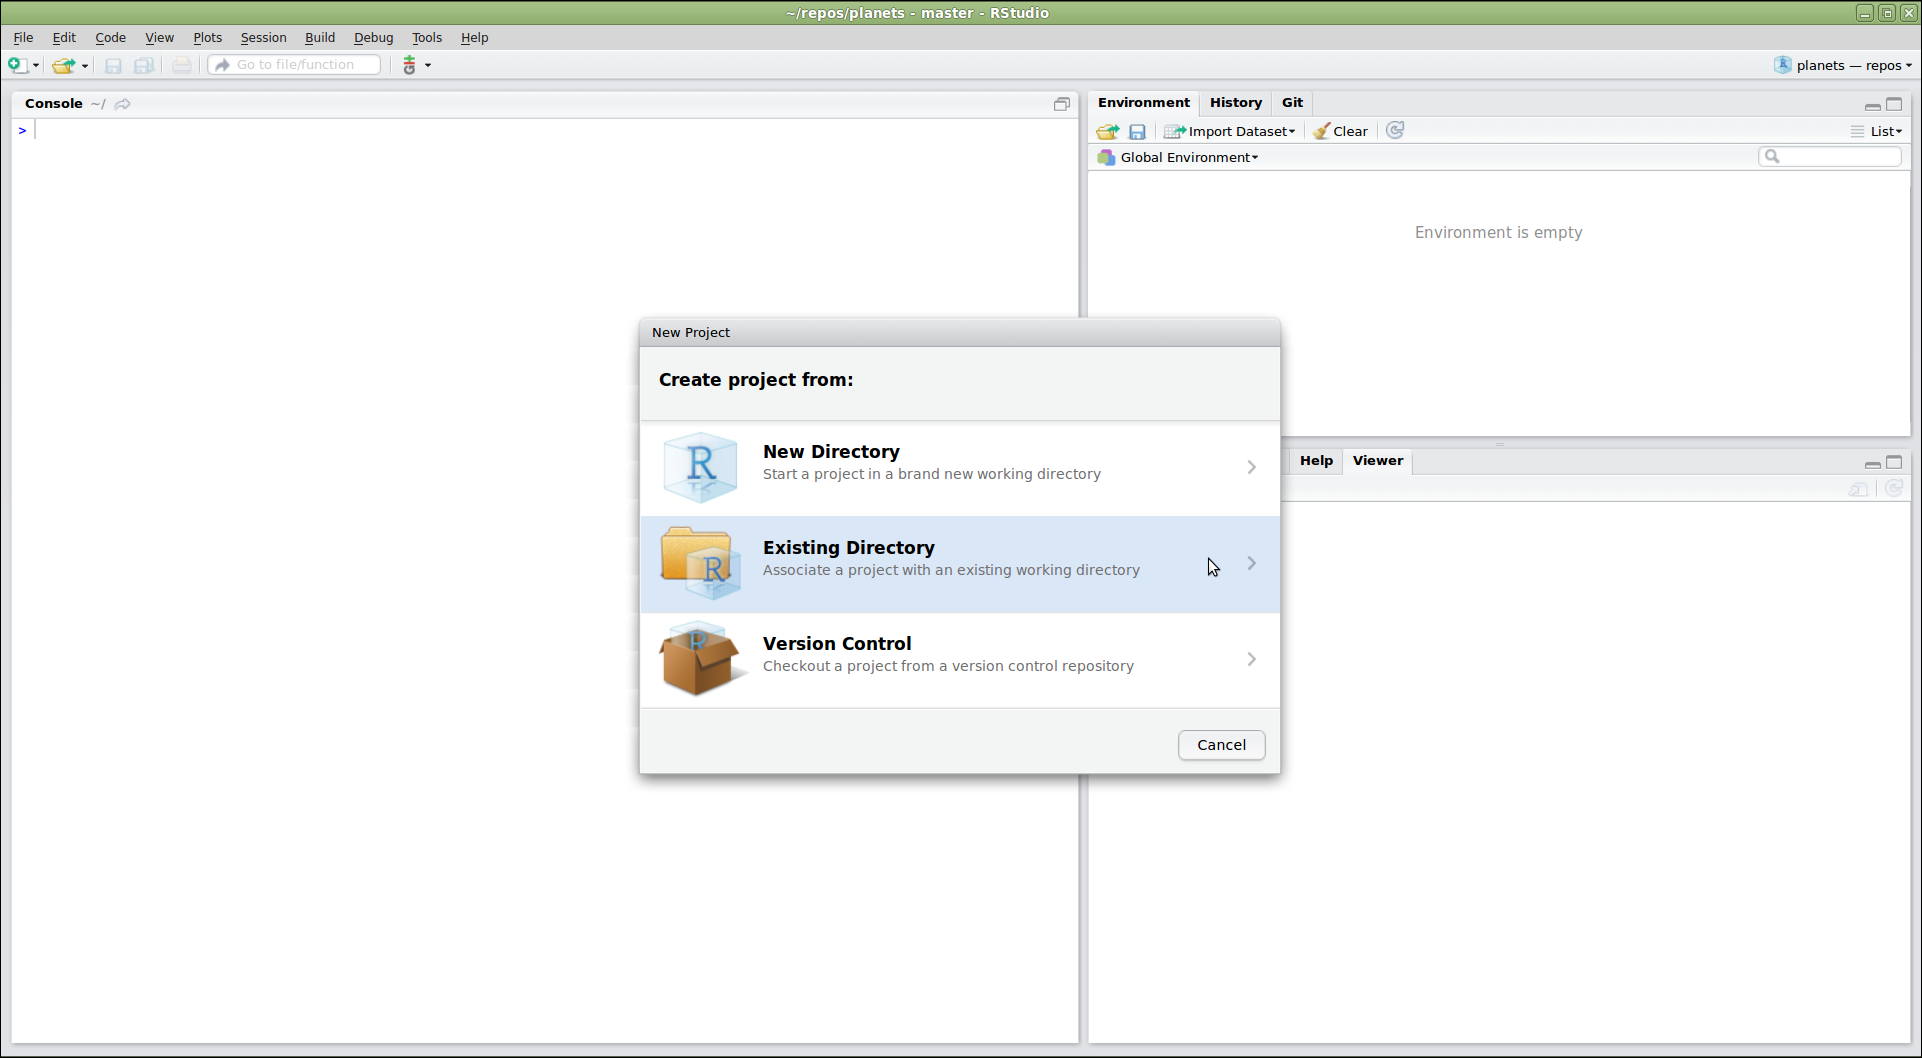
Do You See a “Version Control” Option?
Although we’re not going to use it here, there should be a “version control” option on this menu. That is what you would click on if you wanted to create a project on your computer by cloning a repository from GitHub. If that option is not present, it probably means that RStudio doesn’t know where your Git executable is, and you won’t be able to progress further in this lesson until you tell RStudio where it is.
Find your Git Executiable
First let’s make sure that Git is installed on your computer. Open your shell on Mac or Linux, or on Windows open the command prompt and then type:
which git(Mac, Linux)where git(Windows)If there is no version of Git on your computer, please follow the Git installation instructions in the setup of this lesson to install Git now. Next open your shell or command prompt and type
which git(Mac, Linux), orwhere git(Windows). Copy the path to the git executable.e.g. On one Windows computer which had GitHub Desktop installed on it, the path was:
C:/Users/UserName/AppData/Local/GitHubDesktop/app-1.1.1/resources/app/git/cmd/git.exeNOTE: The path on your computer will be somewhat different.
Tell RStudio where to find GitHub
In RStudio, go to the
Toolsmenu >Global Options>Git/SVNand then browse to the git executable you found in the command prompt or shell. Now restart RStudio. Note: Even if you have Git installed, you may need to accept the XCode license if you are using macOS.
Next, RStudio will ask which existing directory we want to use. Click “Browse…” and navigate to the correct directory, then click “Create Project”:
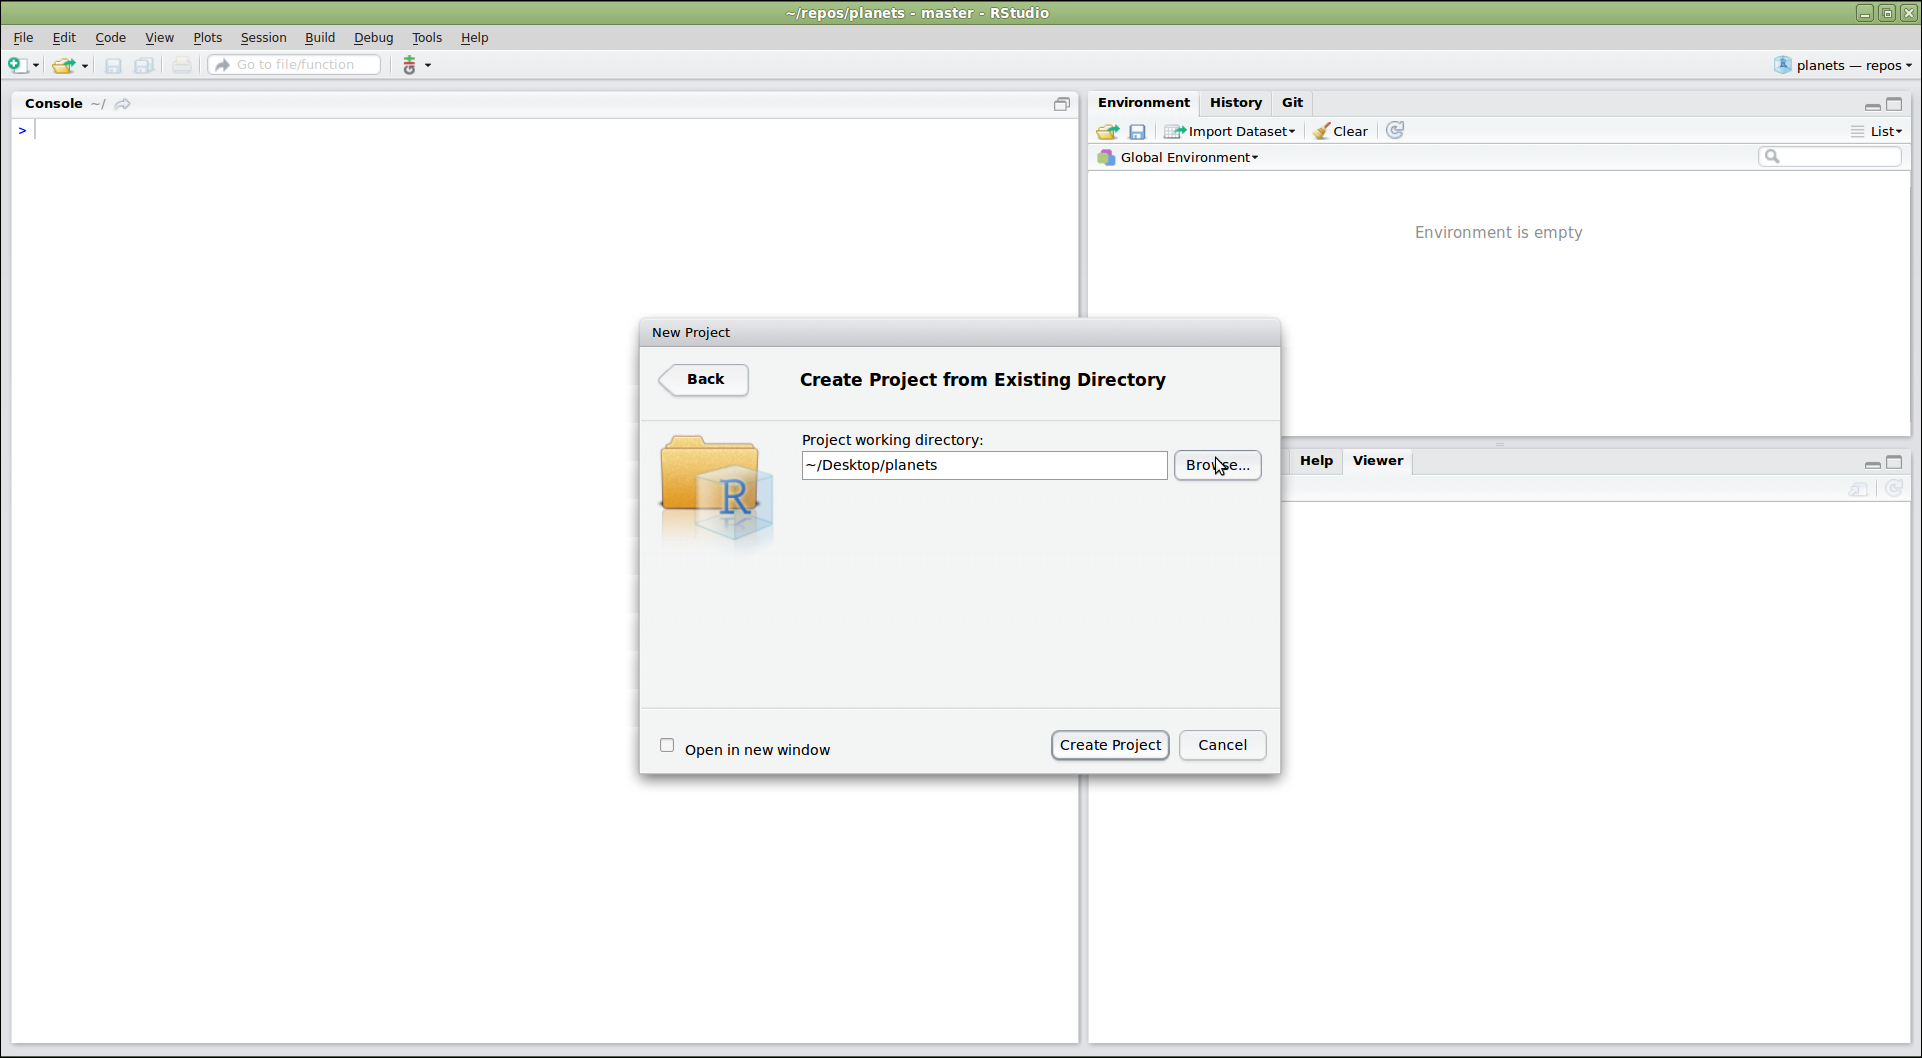
Ta-da! We have created a new project in RStudio within the existing planets repository. Notice the vertical “Git” menu in the menu bar. RStudio has recognized that the current directory is a Git repository, and gives us a number of tools to use Git:
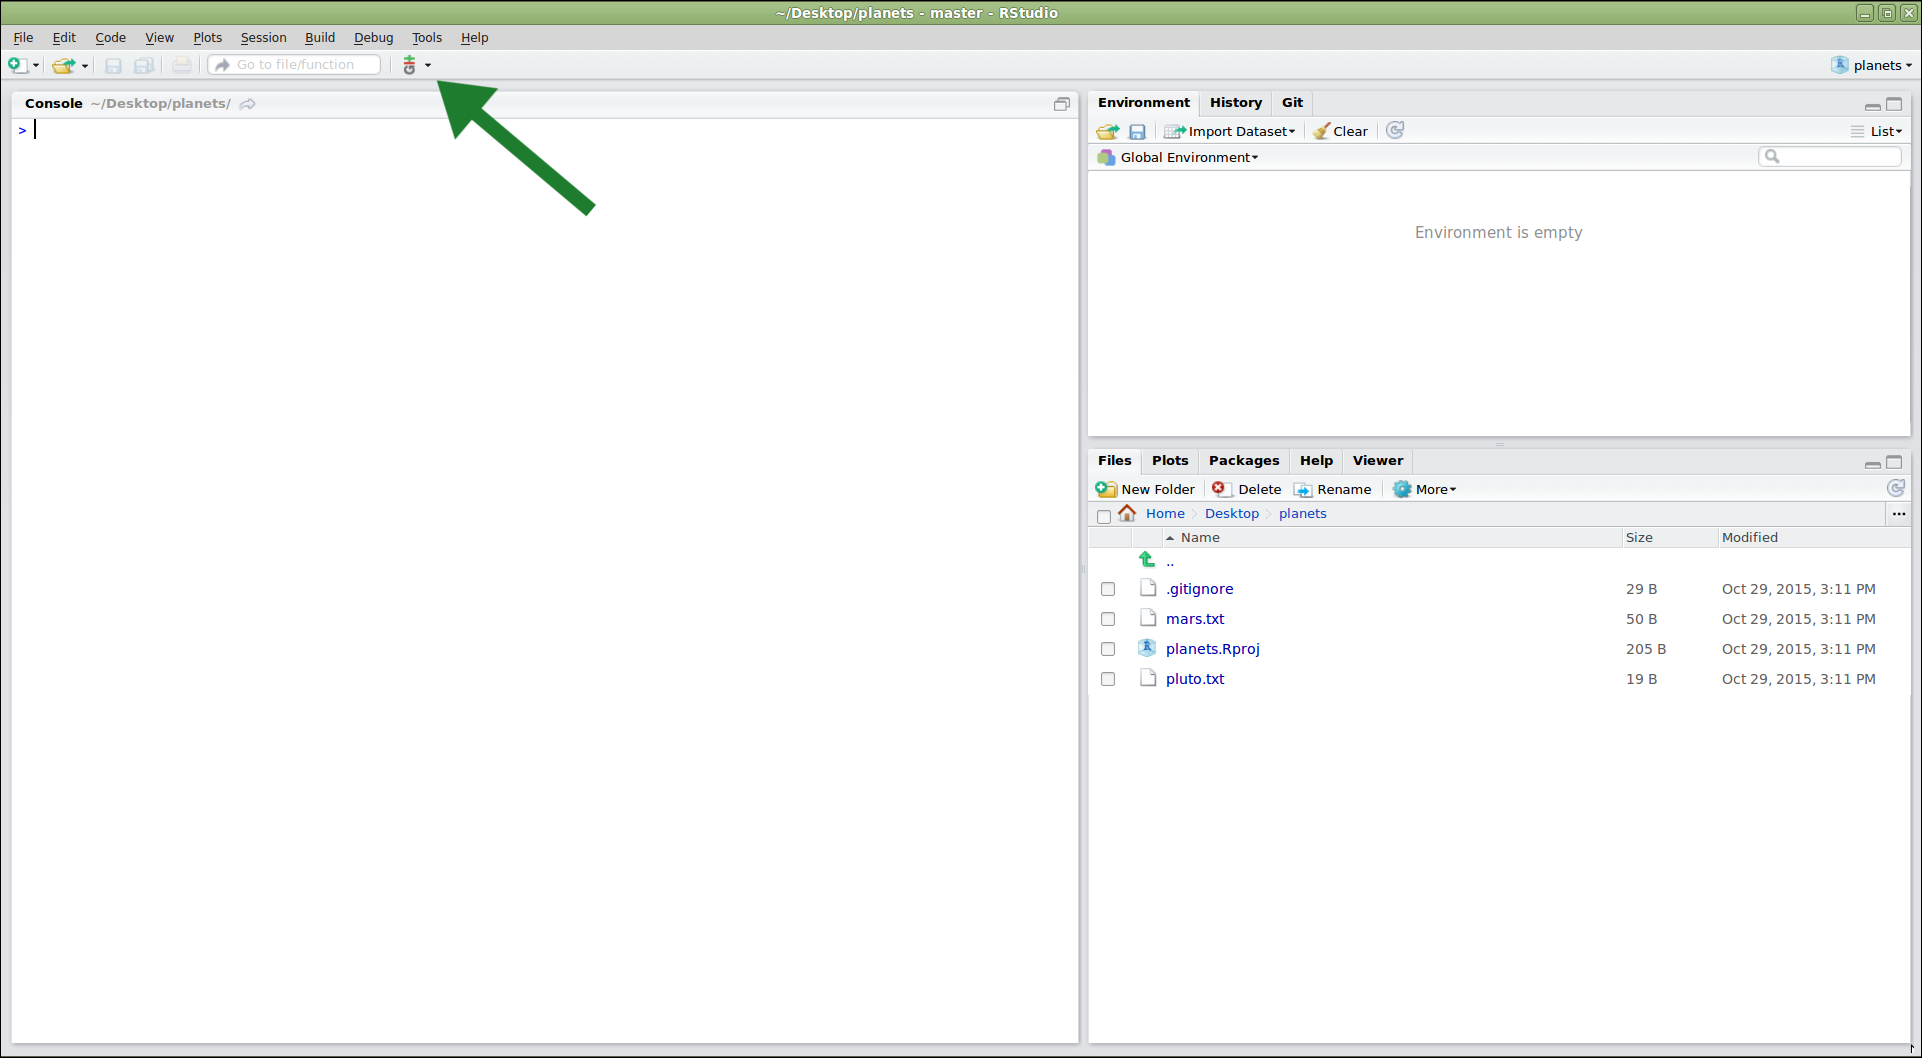
To edit the existing files in the repository, we can click on them in the “Files” panel on the lower right. Now let’s add some additional information about Pluto:
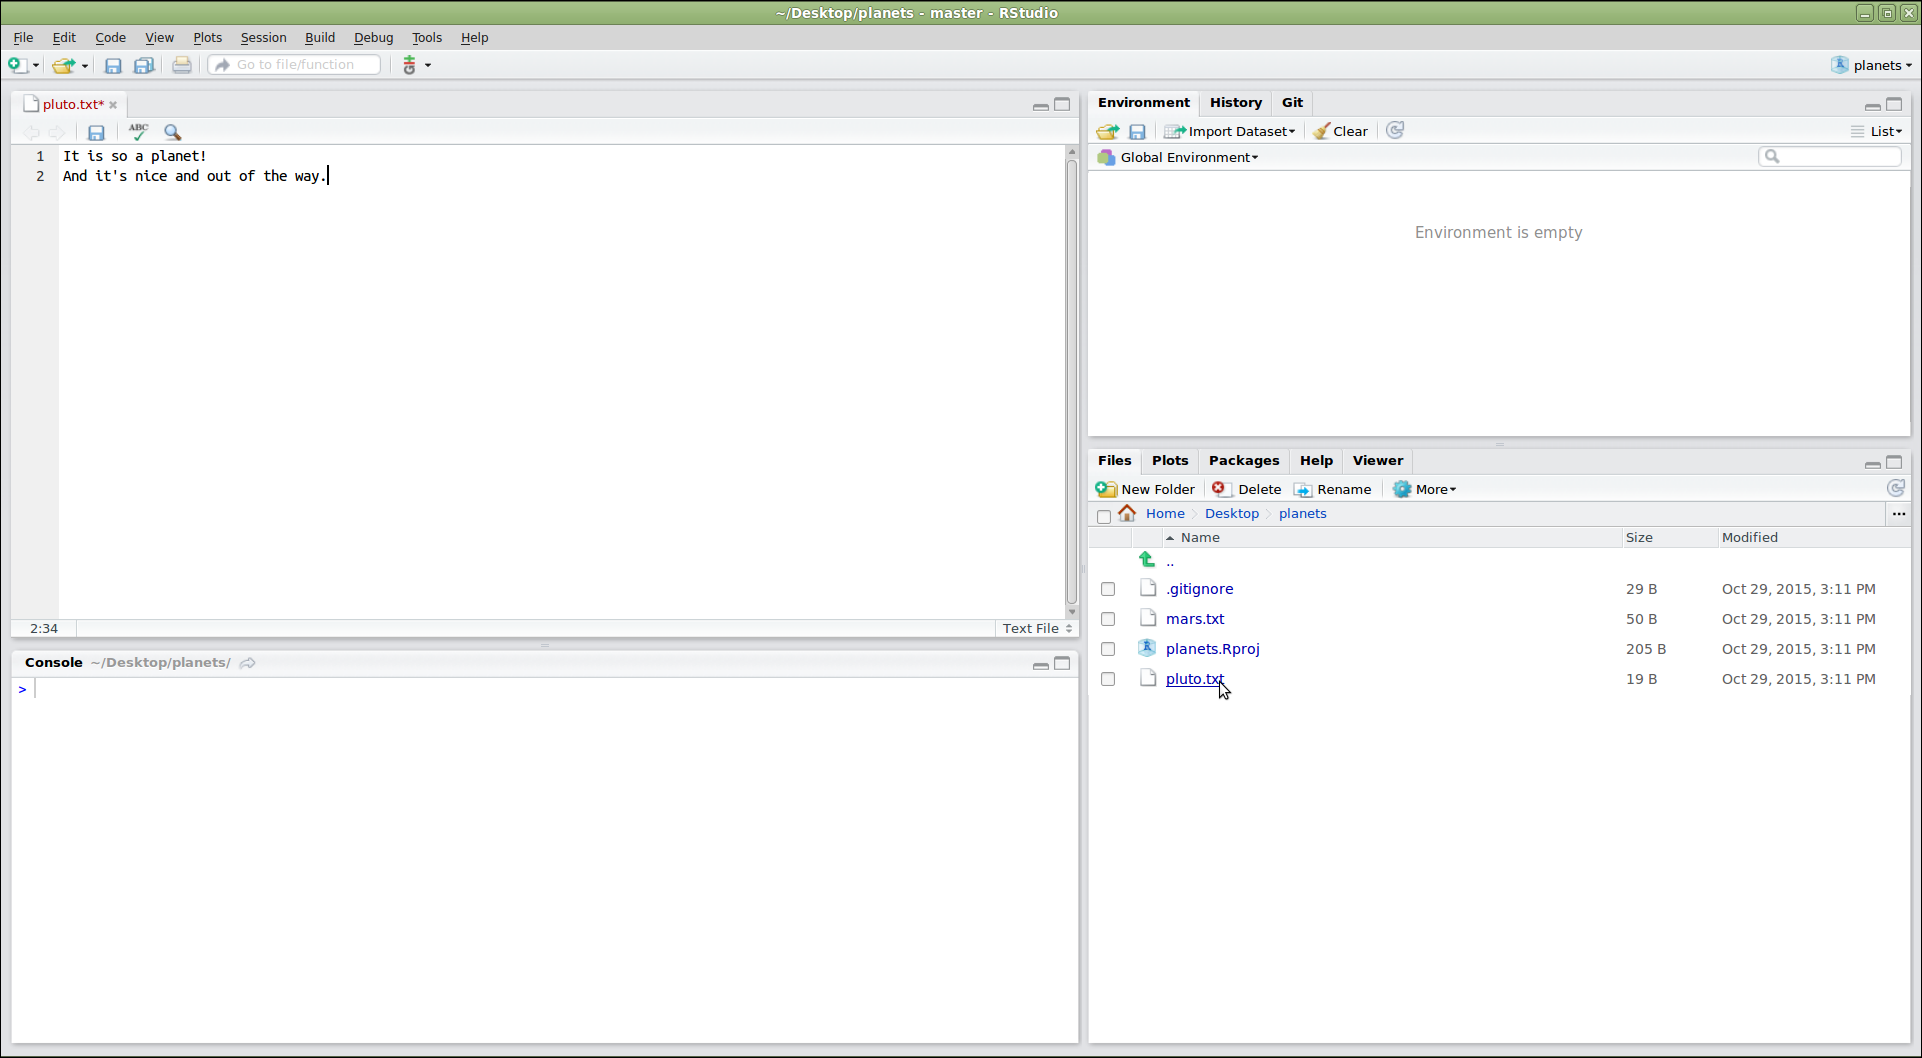
Once we have saved our edited files, we can use RStudio to commit the changes by clicking on “Commit…” in the Git menu:
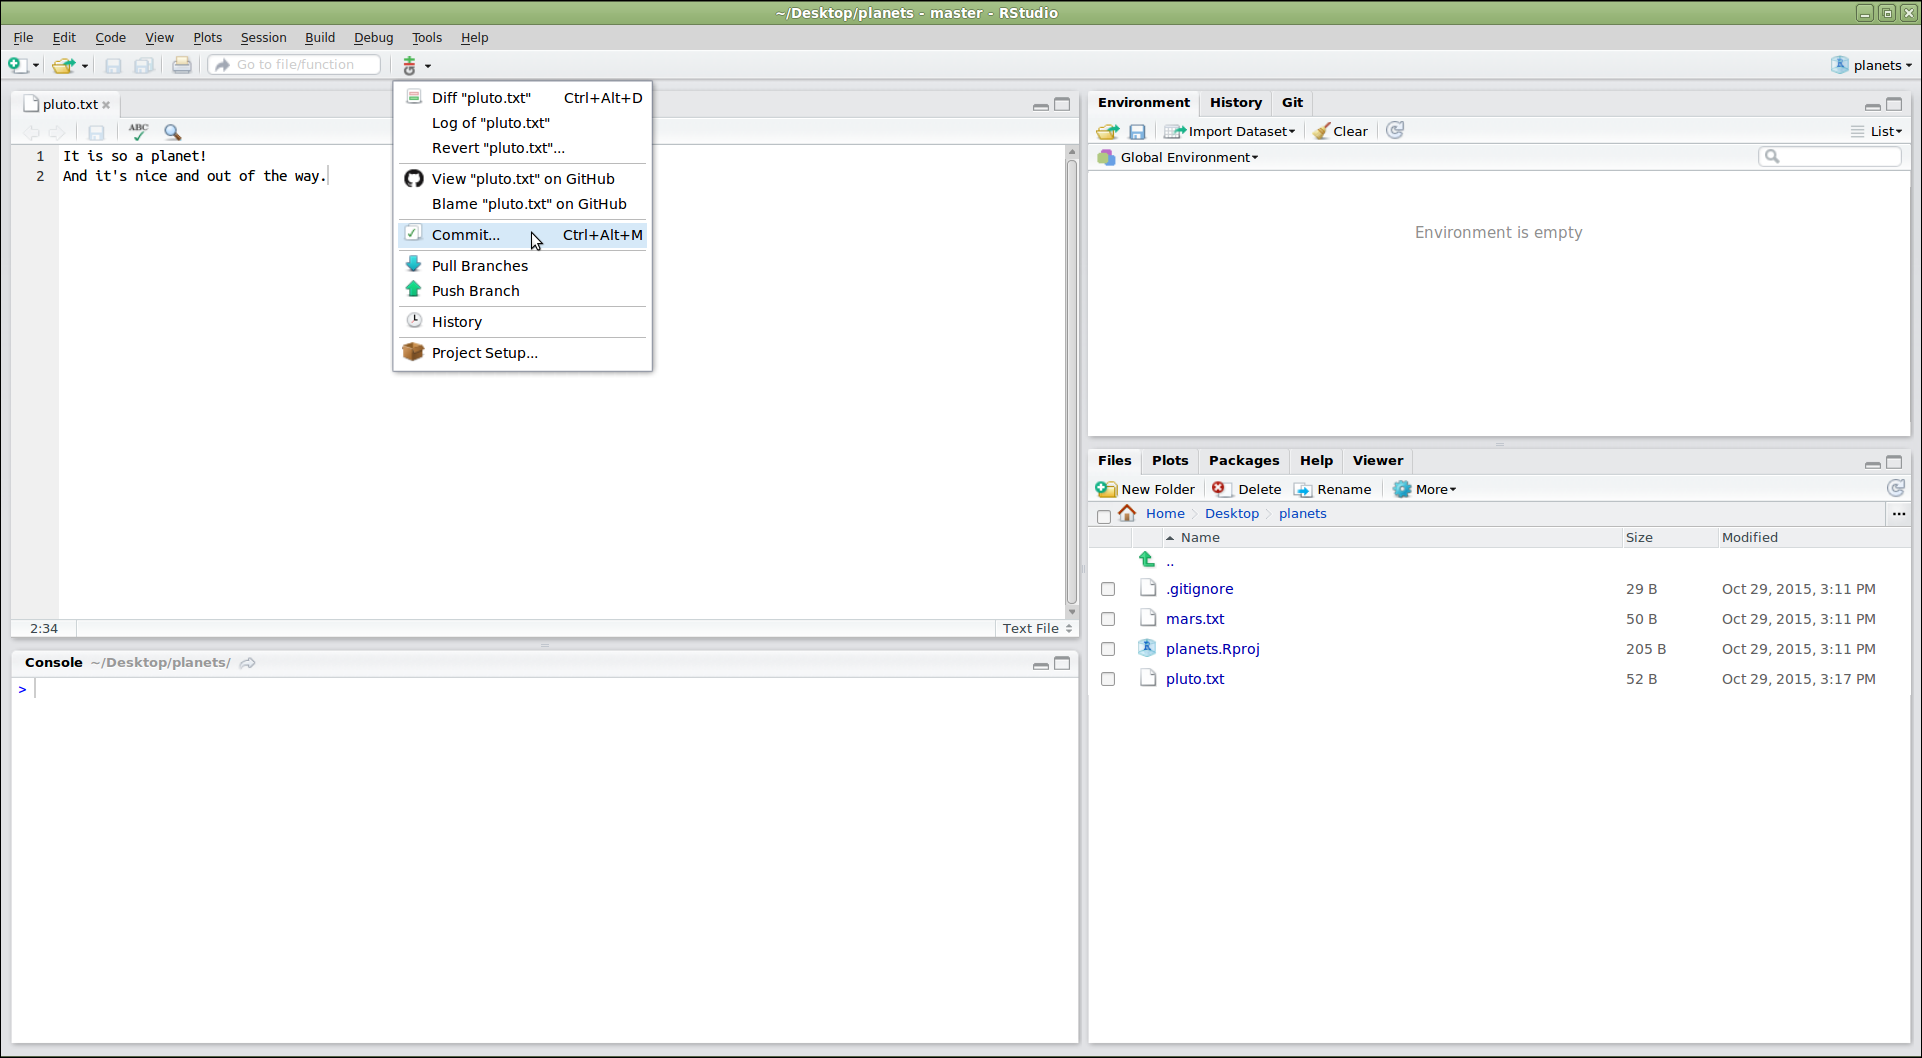
This will open a dialogue where we can select which files to commit (by
checking the appropriate boxes in the “Staged” column), and enter a commit
message (in the upper right panel). The icons in the “Status” column indicate
the current status of each file. Clicking on a file shows information about
changes in the lower panel (using output of git diff). Once everything is the
way we want it, we click “Commit”:
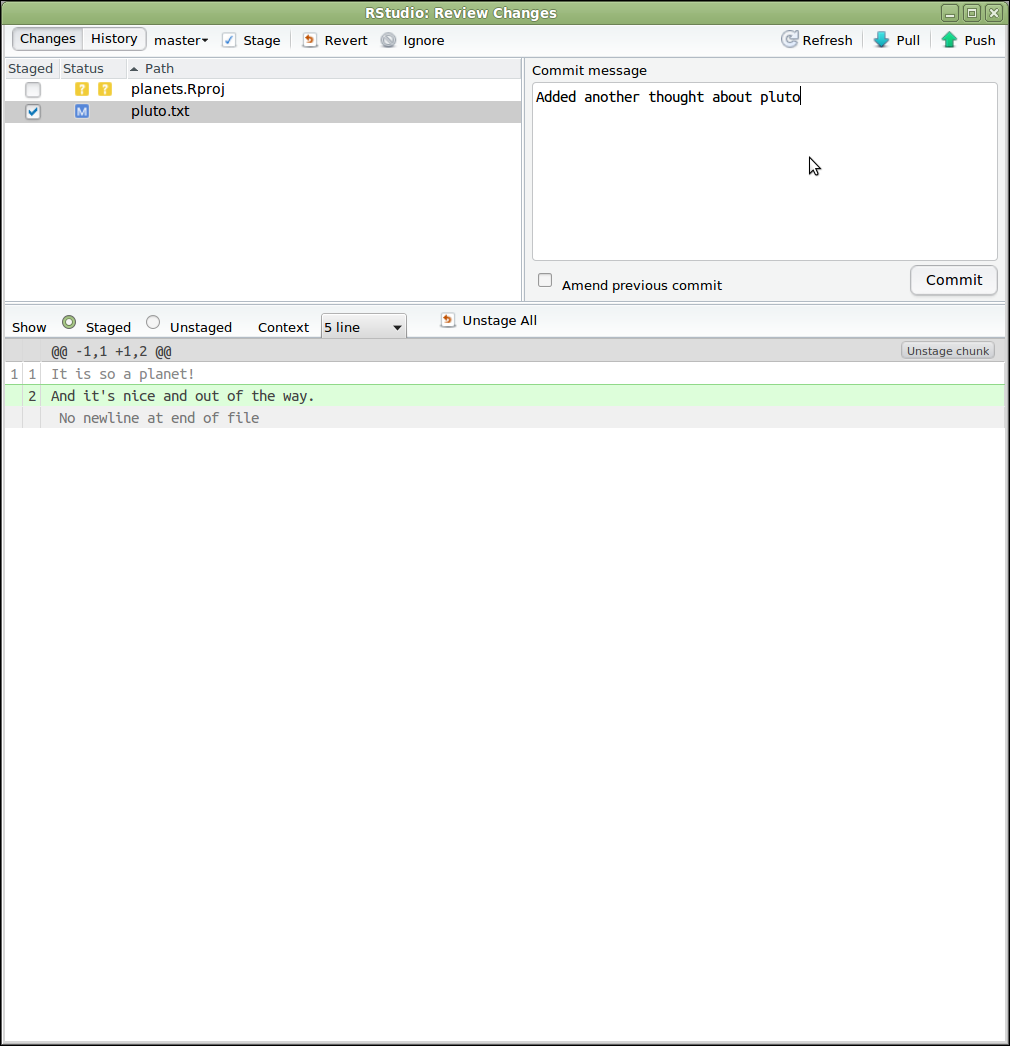
The changes can be pushed by selecting “Push Branch” from the Git menu. There are also options to pull from the remote repository, and to view the commit history:
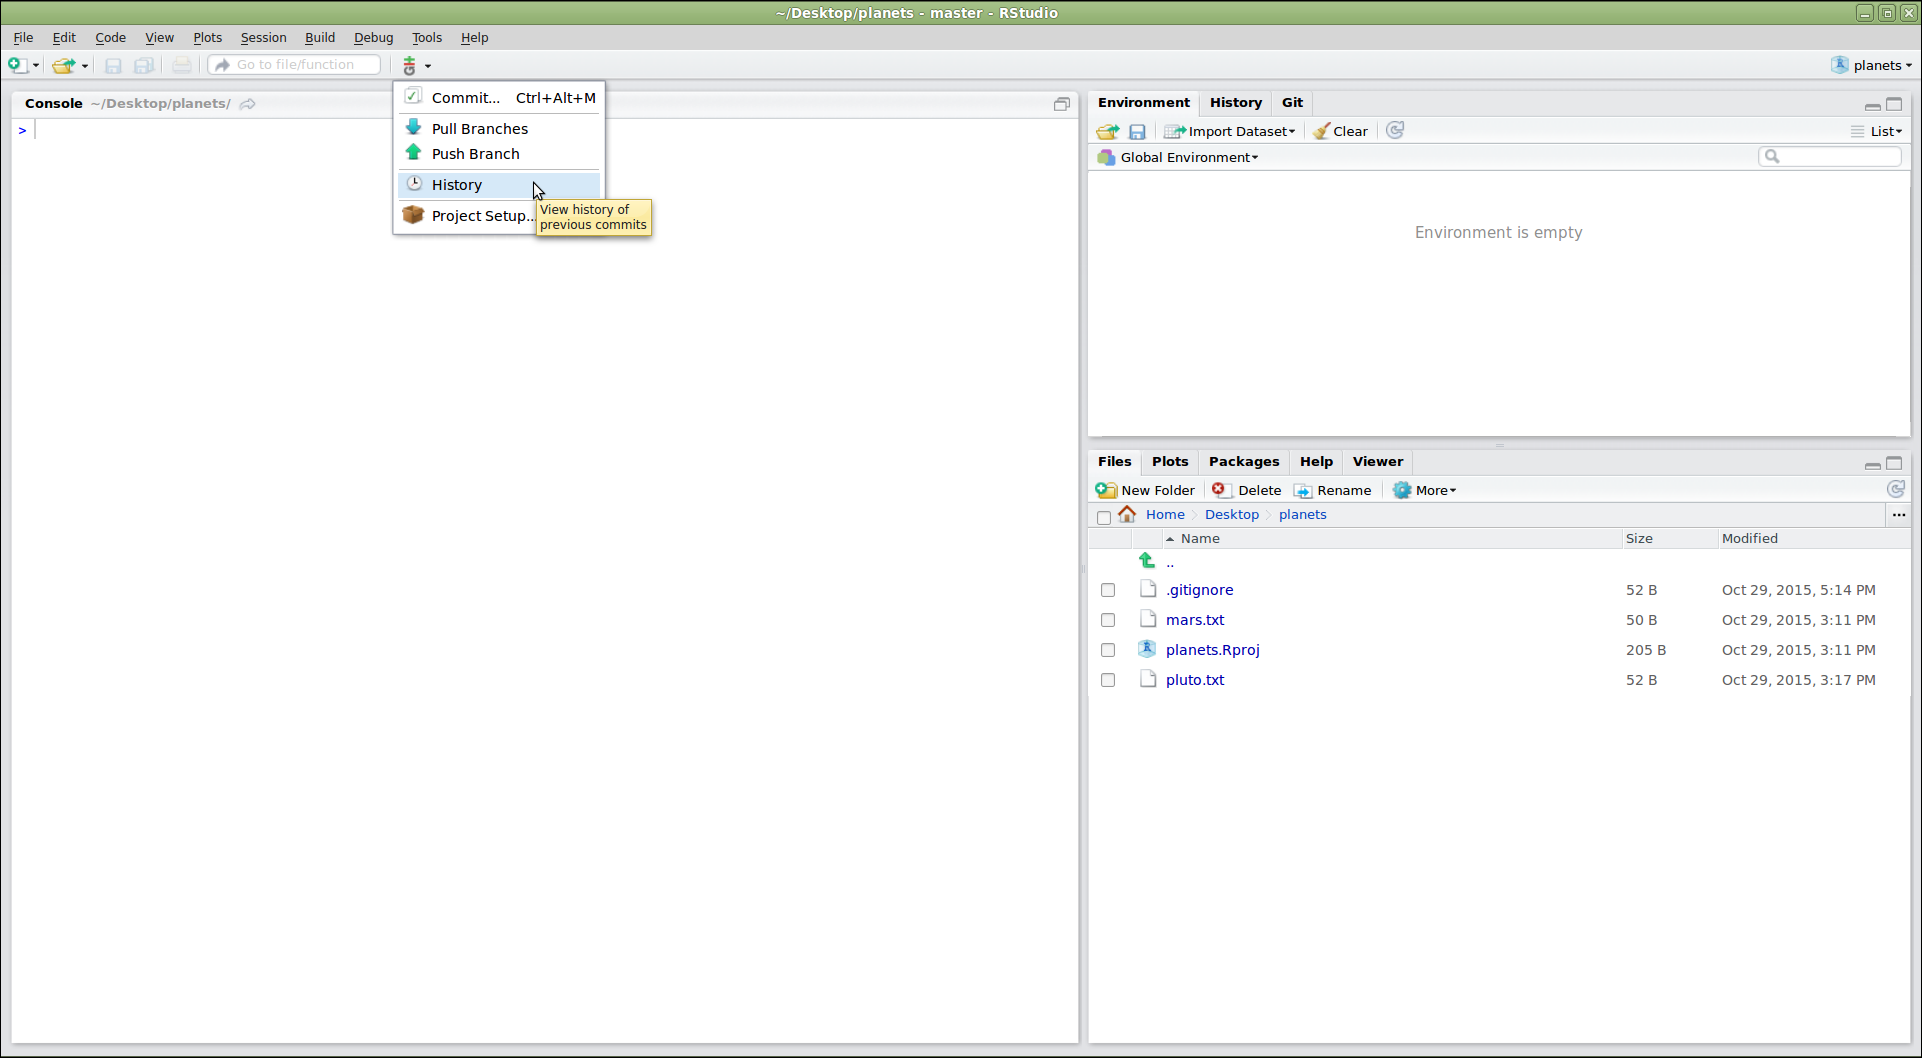
Are the Push/Pull Commands Grayed Out?
Grayed out Push/Pull commands generally mean that RStudio doesn’t know the location of your remote repository (e.g. on GitHub). To fix this, open a terminal to the repository and enter the command:
git push -u origin
main
. Then restart RStudio.
If we click on “History”, we can see a graphical version of what git log
would tell us:

RStudio creates a number of files that it uses to keep track of a project. We
often don’t want to track these, in which case we add them to our .gitignore
file:
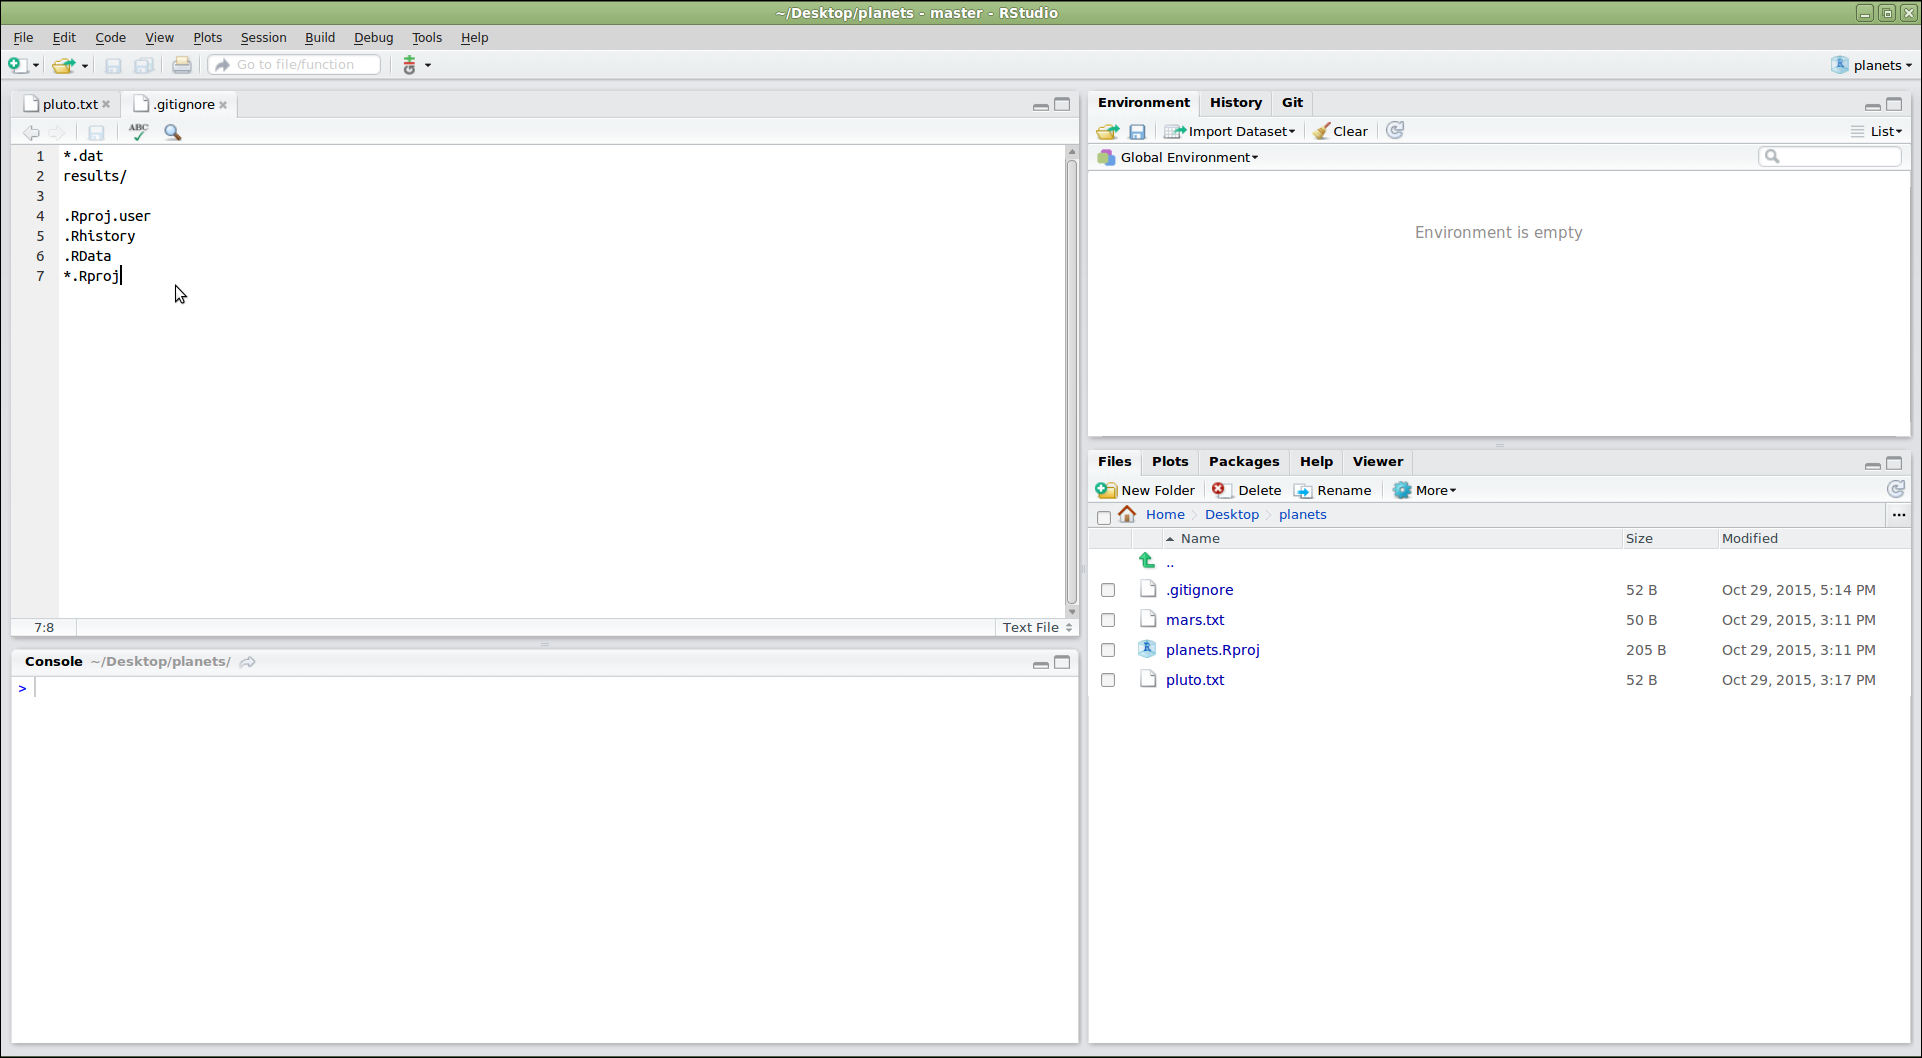
Tip: versioning disposable output
Generally you do not want to version control disposable output (or read-only data). You should modify the
.gitignorefile to tell Git to ignore these files and directories.
Challenge
- Create a new directory within your project called
graphs.- Modify the
.gitignoreso that thegraphsdirectory is not version controlled.Solution to Challenge
This can be done in Rstudio:
dir.create("./graphs")Then open up the
.gitignorefile from the right-hand panel of Rstudio and addgraphs/to the list of files to ignore.
There are many more features in the RStudio Git menu, but these should be enough to get you started!
Key Points
Using RStudio’s Git integration allows you to version control a project over time.
Using Git with EVE
Overview
Teaching: 15 min
Exercises: 0 minQuestions
How can I use Git with a High-Performance Computer (EVE)?
Objectives
Understand how to synchronize your git project on EVE.
Working on EVE is not very different than working on your machine, except that you will have to collaborate … with yourself! Basically, once connected to EVE, you need to clone the remote git repository and keep working as you would do on your machine. However, remember that the git repository on EVE and the one on your laptop are not directly connected, but can communicate only through remote. In other words, if you change something on both the EVE repository and your laptop, when you try to push and pull you will have conflicts. To avoid this, push the changes made on EVE and pull them on your local laptop before start working on your laptop again.
Once connected to EVE, clone the remote repository:
$ git clone https://github.com/emilio-berti/idiv-git-introduction.git
Cloning into 'idiv-git-introduction'...
remote: Enumerating objects: 10049, done.
remote: Counting objects: 100% (1492/1492), done.
remote: Compressing objects: 100% (715/715), done.
remote: Total 10049 (delta 926), reused 1246 (delta 775), pack-reused 8557
Receiving objects: 100% (10049/10049), 22.61 MiB | 10.21 MiB/s, done.
Resolving deltas: 100% (6211/6211), done.
Move into the new cloned directory, and check the branch you’re in:
cd idiv-git-introduction/
git status
On branch gh-pages
Your branch is up to date with 'origin/gh-pages'.

nothing to commit, working tree clean
An alternative to avoid conflicts is to create another branch specific for EVE. As scripts to submit jobs and paths within files are specific to the HPC, it may also be better to switch to a new branch instead of working on the main branch. Switch to a new branch called HPC:
git checkout -b HPC
And check again which branch you’re in:
On branch HPC
nothing to commit, working tree clean
Key Points
Using
git clonefrom a project you have on GitHub to synchronize on EVE.Push/pull before making changes to both the EVE and local git directories to avoid conflicts
Alterntively, create a new branch to work on EVE
Coffee Break
Overview
Teaching: min
Exercises: minQuestions
Objectives
Key Points
Connecting GitHub with Zenodo
Overview
Teaching: 20 min
Exercises: 0 minQuestions
How can I get a DOI and a permanent archive from code I have on GitHub?
Objectives
Be able to create a permanent archive using Zenodo from a project on GitHub.
For research purposes, you often need to include the code and data of a project into a paper. Because your learnt how to use git and GitHub throughout this course, we suppose your project is on GitHub. However, giving the link of your GitHub project is not enough. Why? Because we never know what will happen to this private company that could disappear someday. Citing only the URL of your project is also not very specific: which version are you referring to?
That’s where Zenodo comes in handy. It’s a repository that let you upload any kind of data online and assign them Digital Object Identifiers (DOI). DOIs are much easy to cite, more specific, and should be up for longer than URLs.
Why use Zenodo? (according to its website)
- Safe — your research is stored safely for the future in CERN’s Data Centre for as long as CERN exists.
- Trusted — built and operated by CERN and OpenAIRE to ensure that everyone can join in Open Science.
- Citeable — every upload is assigned a Digital Object Identifier (DOI), to make them citable and trackable.
- No waiting time — Uploads are made available online as soon as you hit publish, and your DOI is registered within seconds.
- Open or closed — Share e.g. anonymized clinical trial data with only medical professionals via our restricted access mode.
- Versioning — Easily update your dataset with our versioning feature.
- GitHub integration — Easily preserve your GitHub repository in Zenodo.
- Usage statistics — All uploads display standards compliant usage statistics
One of the advantage if you’re using GitHub is that there is already a simplified way to archive your GitHub repository on Zenodo.
1. Access your GitHub project
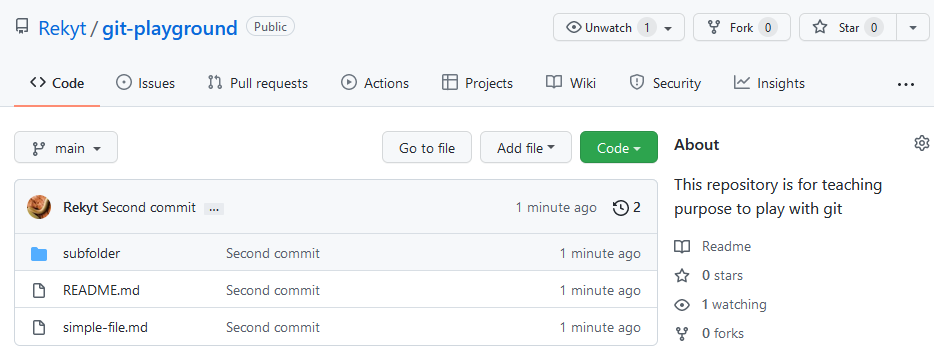
Login in GitHub and navigate to your project page.
2. Login with GitHub on Zenodo
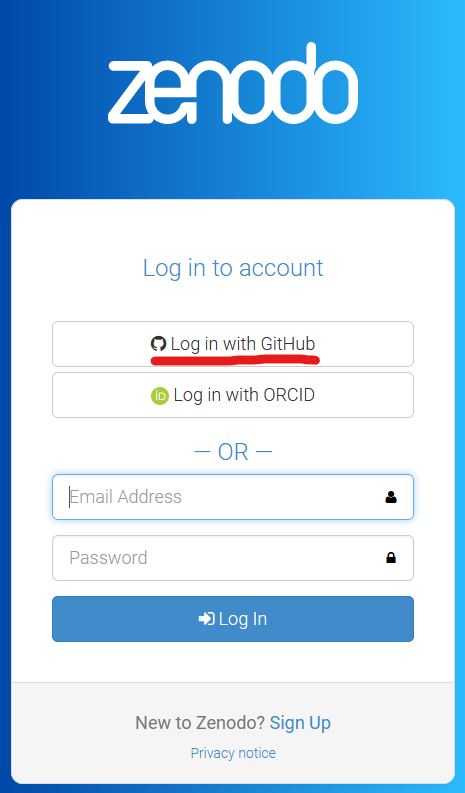
3. Go in the GitHub menu on Zenodo
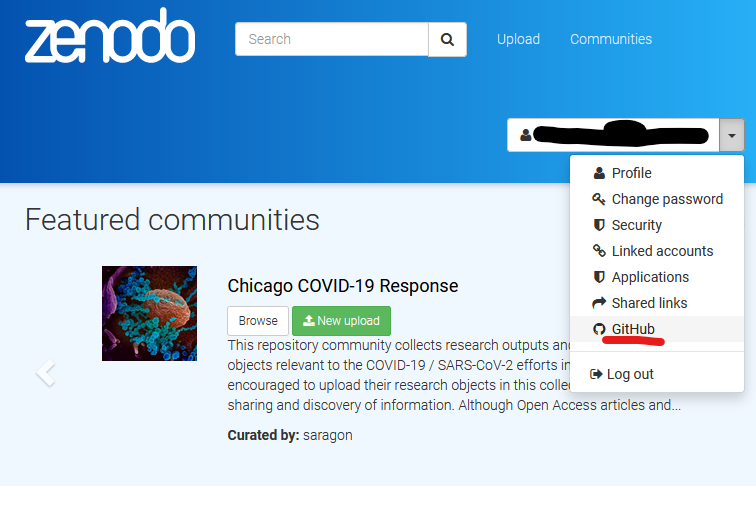
4. Navigate your project list and toggle Zenodo
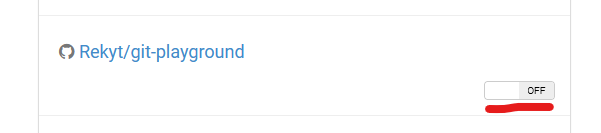
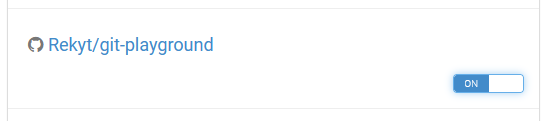
5. Go back on GitHub and create a release
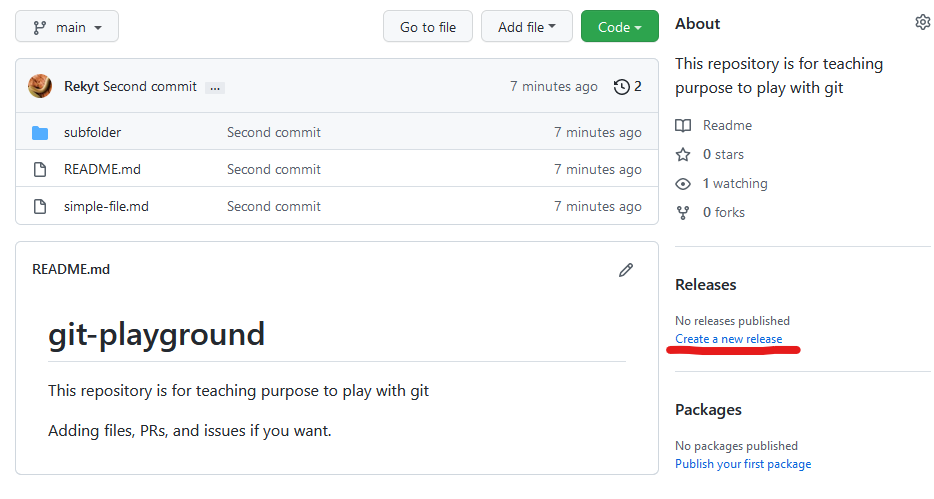
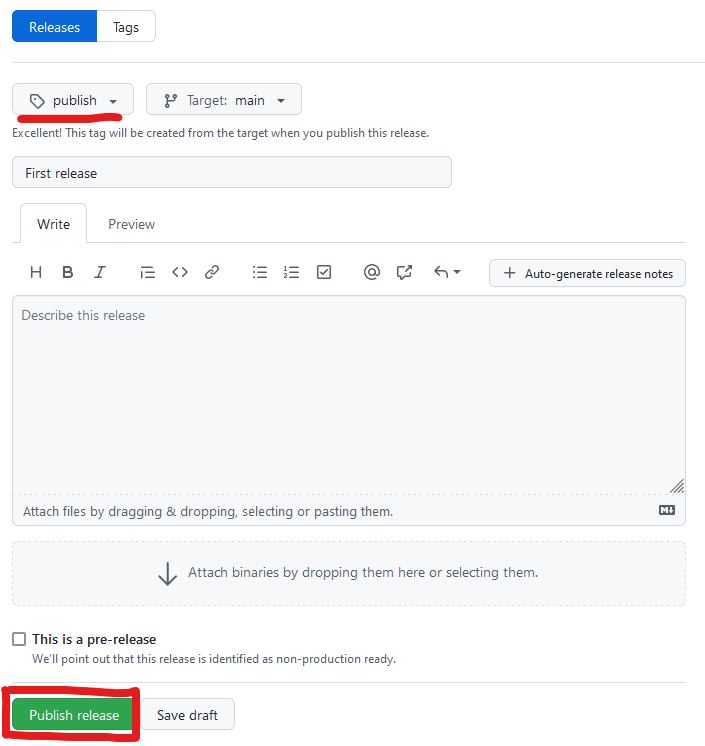

6. Go back on Zenodo to get the corresponding DOI and project page
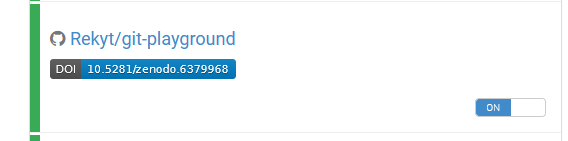

Key Points
By connecting on Zenodo with your GitHub credentials, you can toggle automatic archival based on GitHub releases.
Navigating and Searching code on GitHub
Overview
Teaching: 25 min
Exercises: 0 minQuestions
How can I use GitHub to navigate my code?
Objectives
Understand key features of GitHub to navigate into the code
You can access your last commit on GitHub in a very similar fashion
to git show. Find the commit in the top right corner of the repository.
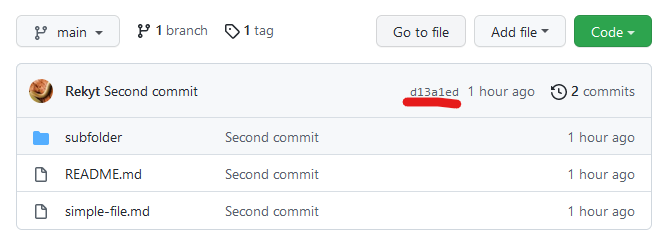
Then you can click on it to get the detail of the commit.

Similar to git log you can see the history of your commits in the project.
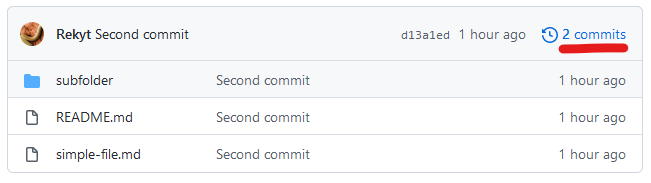
If you click on it you see the list of commits of your project.
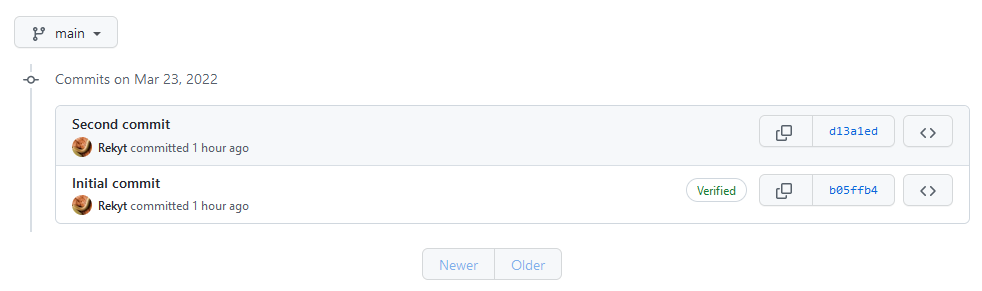
Through the GitHub interface you can also look at individual files. For this hover your mouse on a file name and click on it.
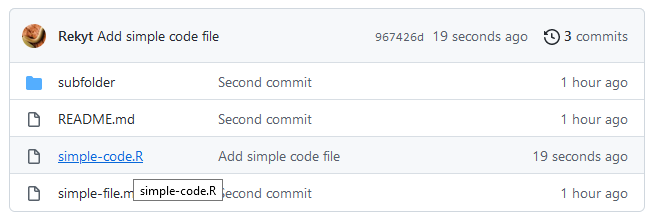
Then you can access the file interface of GitHub.
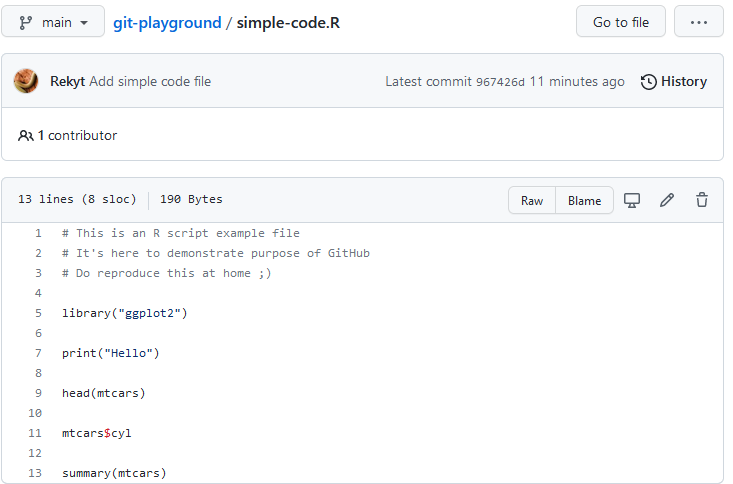
The window is split between the line numbers, the file name, the actual content of the file and many other features.
One of the most useful one is that you can always access the raw version of the file which makes it very simple to download. For that click on the “Raw” button on the top right corner of the file.
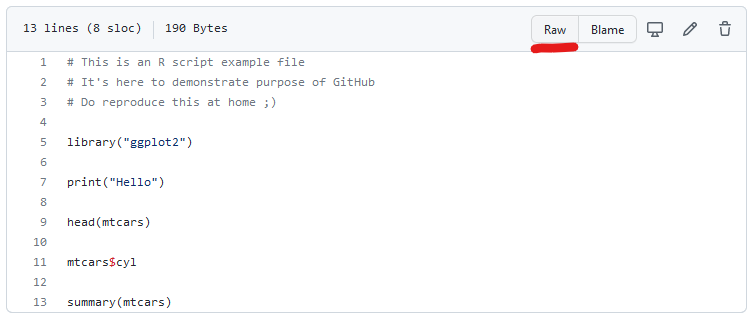
You can also access the commit history of a file by clicking on the history button in the top right, it will display a list of commits affecting that file.

Through the GitHub interface it is also possible to add collaborators to your project, so that they can also commit on the repository. To do that you have first to access the “Settings” tab of your project.

Then from there you have to click on “Collaborators” in the menu on the left. GitHub will ask you to confirm your password for security reasons.
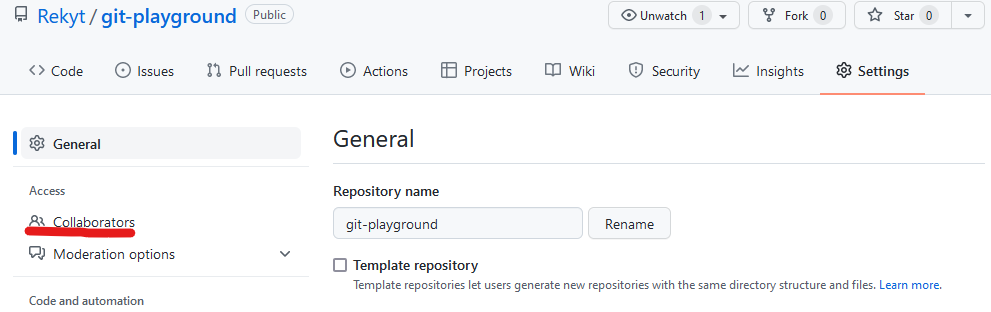
Then click on “add people” to search for people by their GitHub username to add them to the project.
One additional interesting feature are “GitHub issues”. There messages that can form discussions, and you can track independent bugs and ideas with them. There are quite commonly used to track the progress (what has been done and needs to be done) of a project.
Key Points
Using GitHub commit history allows you to get access directly to your code.
You can look at specific files, have them as raw version, or acces their history
It is possible to select a specific line of code to link to it or cite it
Through the settings tab of a project you can collaborators
GitHub issues are a good way to keep track of progress, bugs, and ideas on a project
Coffee Break
Overview
Teaching: min
Exercises: minQuestions
Objectives
Key Points
Extra time
Overview
Teaching: 45 min
Exercises: 0 minQuestions
Objectives
Key Points